How to Use This Manual
Legend
- Highlighted text — a button, field, tab, or menu you interact with in the UI.
- System — what the system does automatically after your action.
- Role Switch — log out and continue as a different persona.
- Screenshot — dashed frame marking where a capture is inserted.
- Automated — backend process, no user action required.
Login Quick Reference
| Persona | Portal | Initial Credentials |
|---|---|---|
| COMPANY_ADMIN | Admin ERP | Set during system setup |
| WAREHOUSE_MANAGER (Central WH) | Admin ERP | Set during Entity provisioning (1.1) |
| DEALER (Branch) | Admin ERP | Set during Entity provisioning (1.1) |
| WAREHOUSE_STAFF / Employee | /employee-portal | Issued by administrator |
| VENDOR | /vendor-portal | Set during vendor onboarding (1.2) |
| CUSTOMER | /customer-portal | Initial password = registered phone number |
Chapter 1 — Master Data & Network Setup
1.1 — Onboarding Entities
Log in as COMPANY_ADMIN on the Admin ERP.
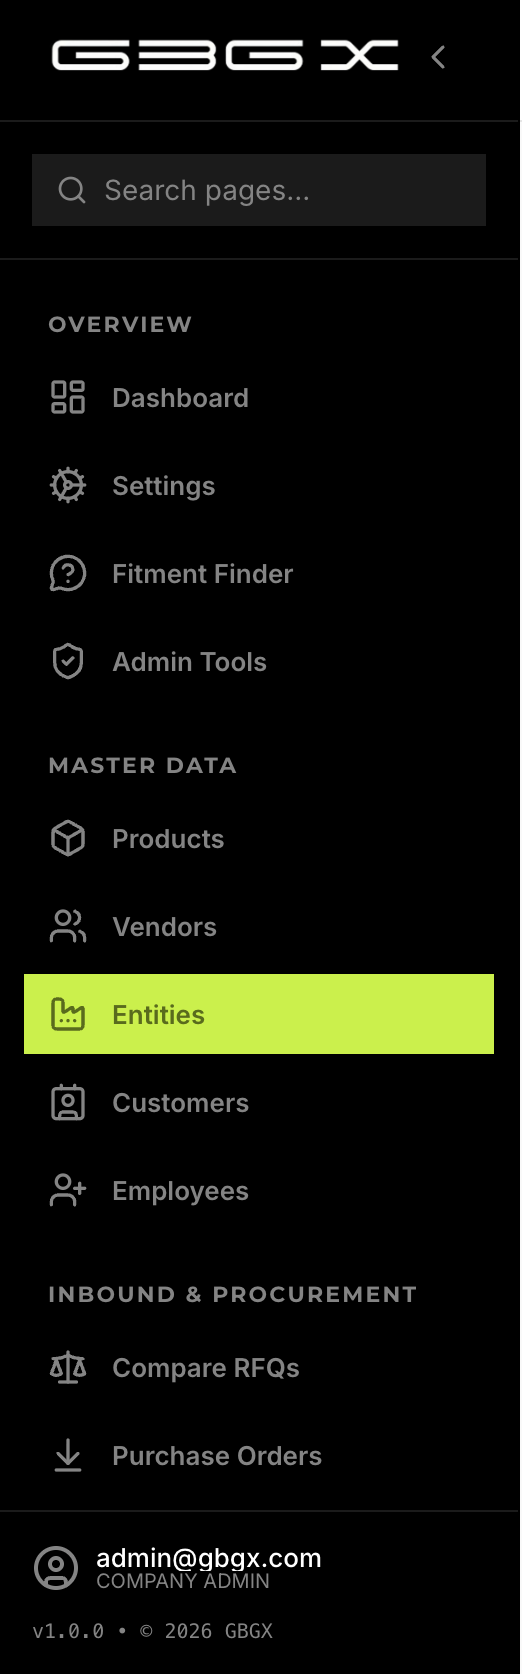
Navigate to Entities in the sidebar.
Click Provision Entity (top right).
Select Entity Type — e.g., WAREHOUSE or DEALER.
Enter the Entity Name (e.g., "Mumbai Warehouse").
Enter the Admin Email and Initial Password for the branch manager.
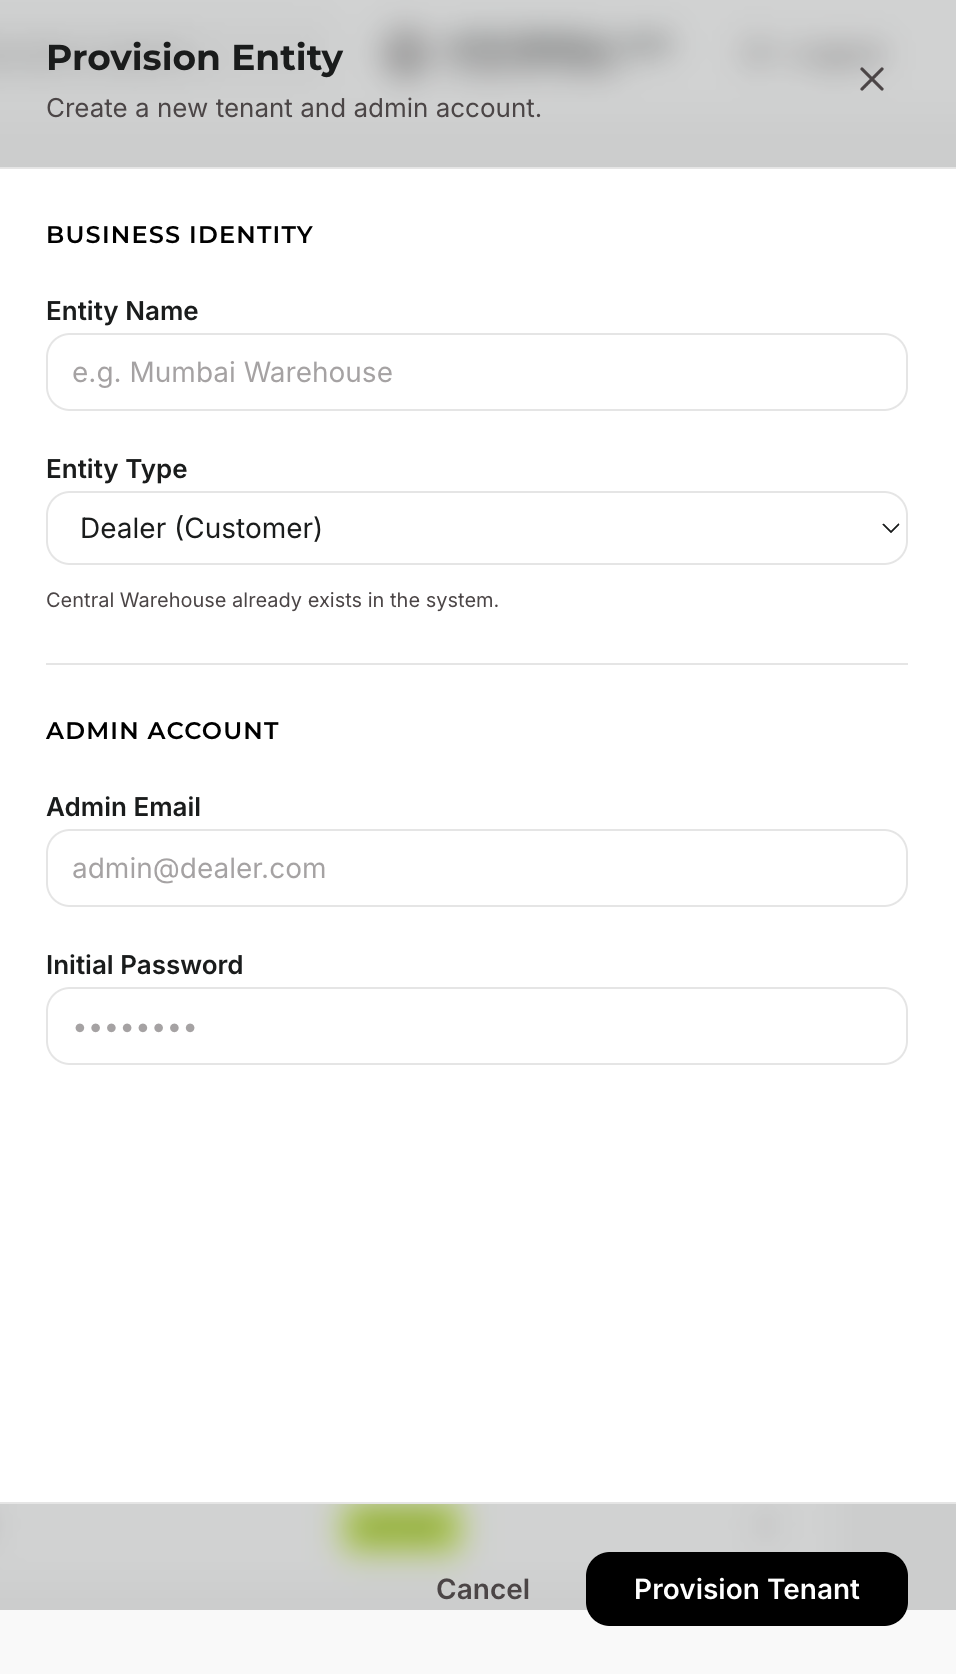
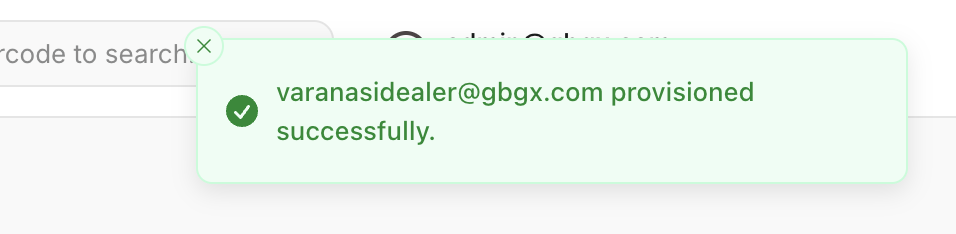
Click Save.
1.2 — Onboarding Vendors
Navigate to Vendors in the sidebar.
Click Onboard Vendor.
Enter Legal Name, Tax ID (GSTIN), Contact Email, and Phone.
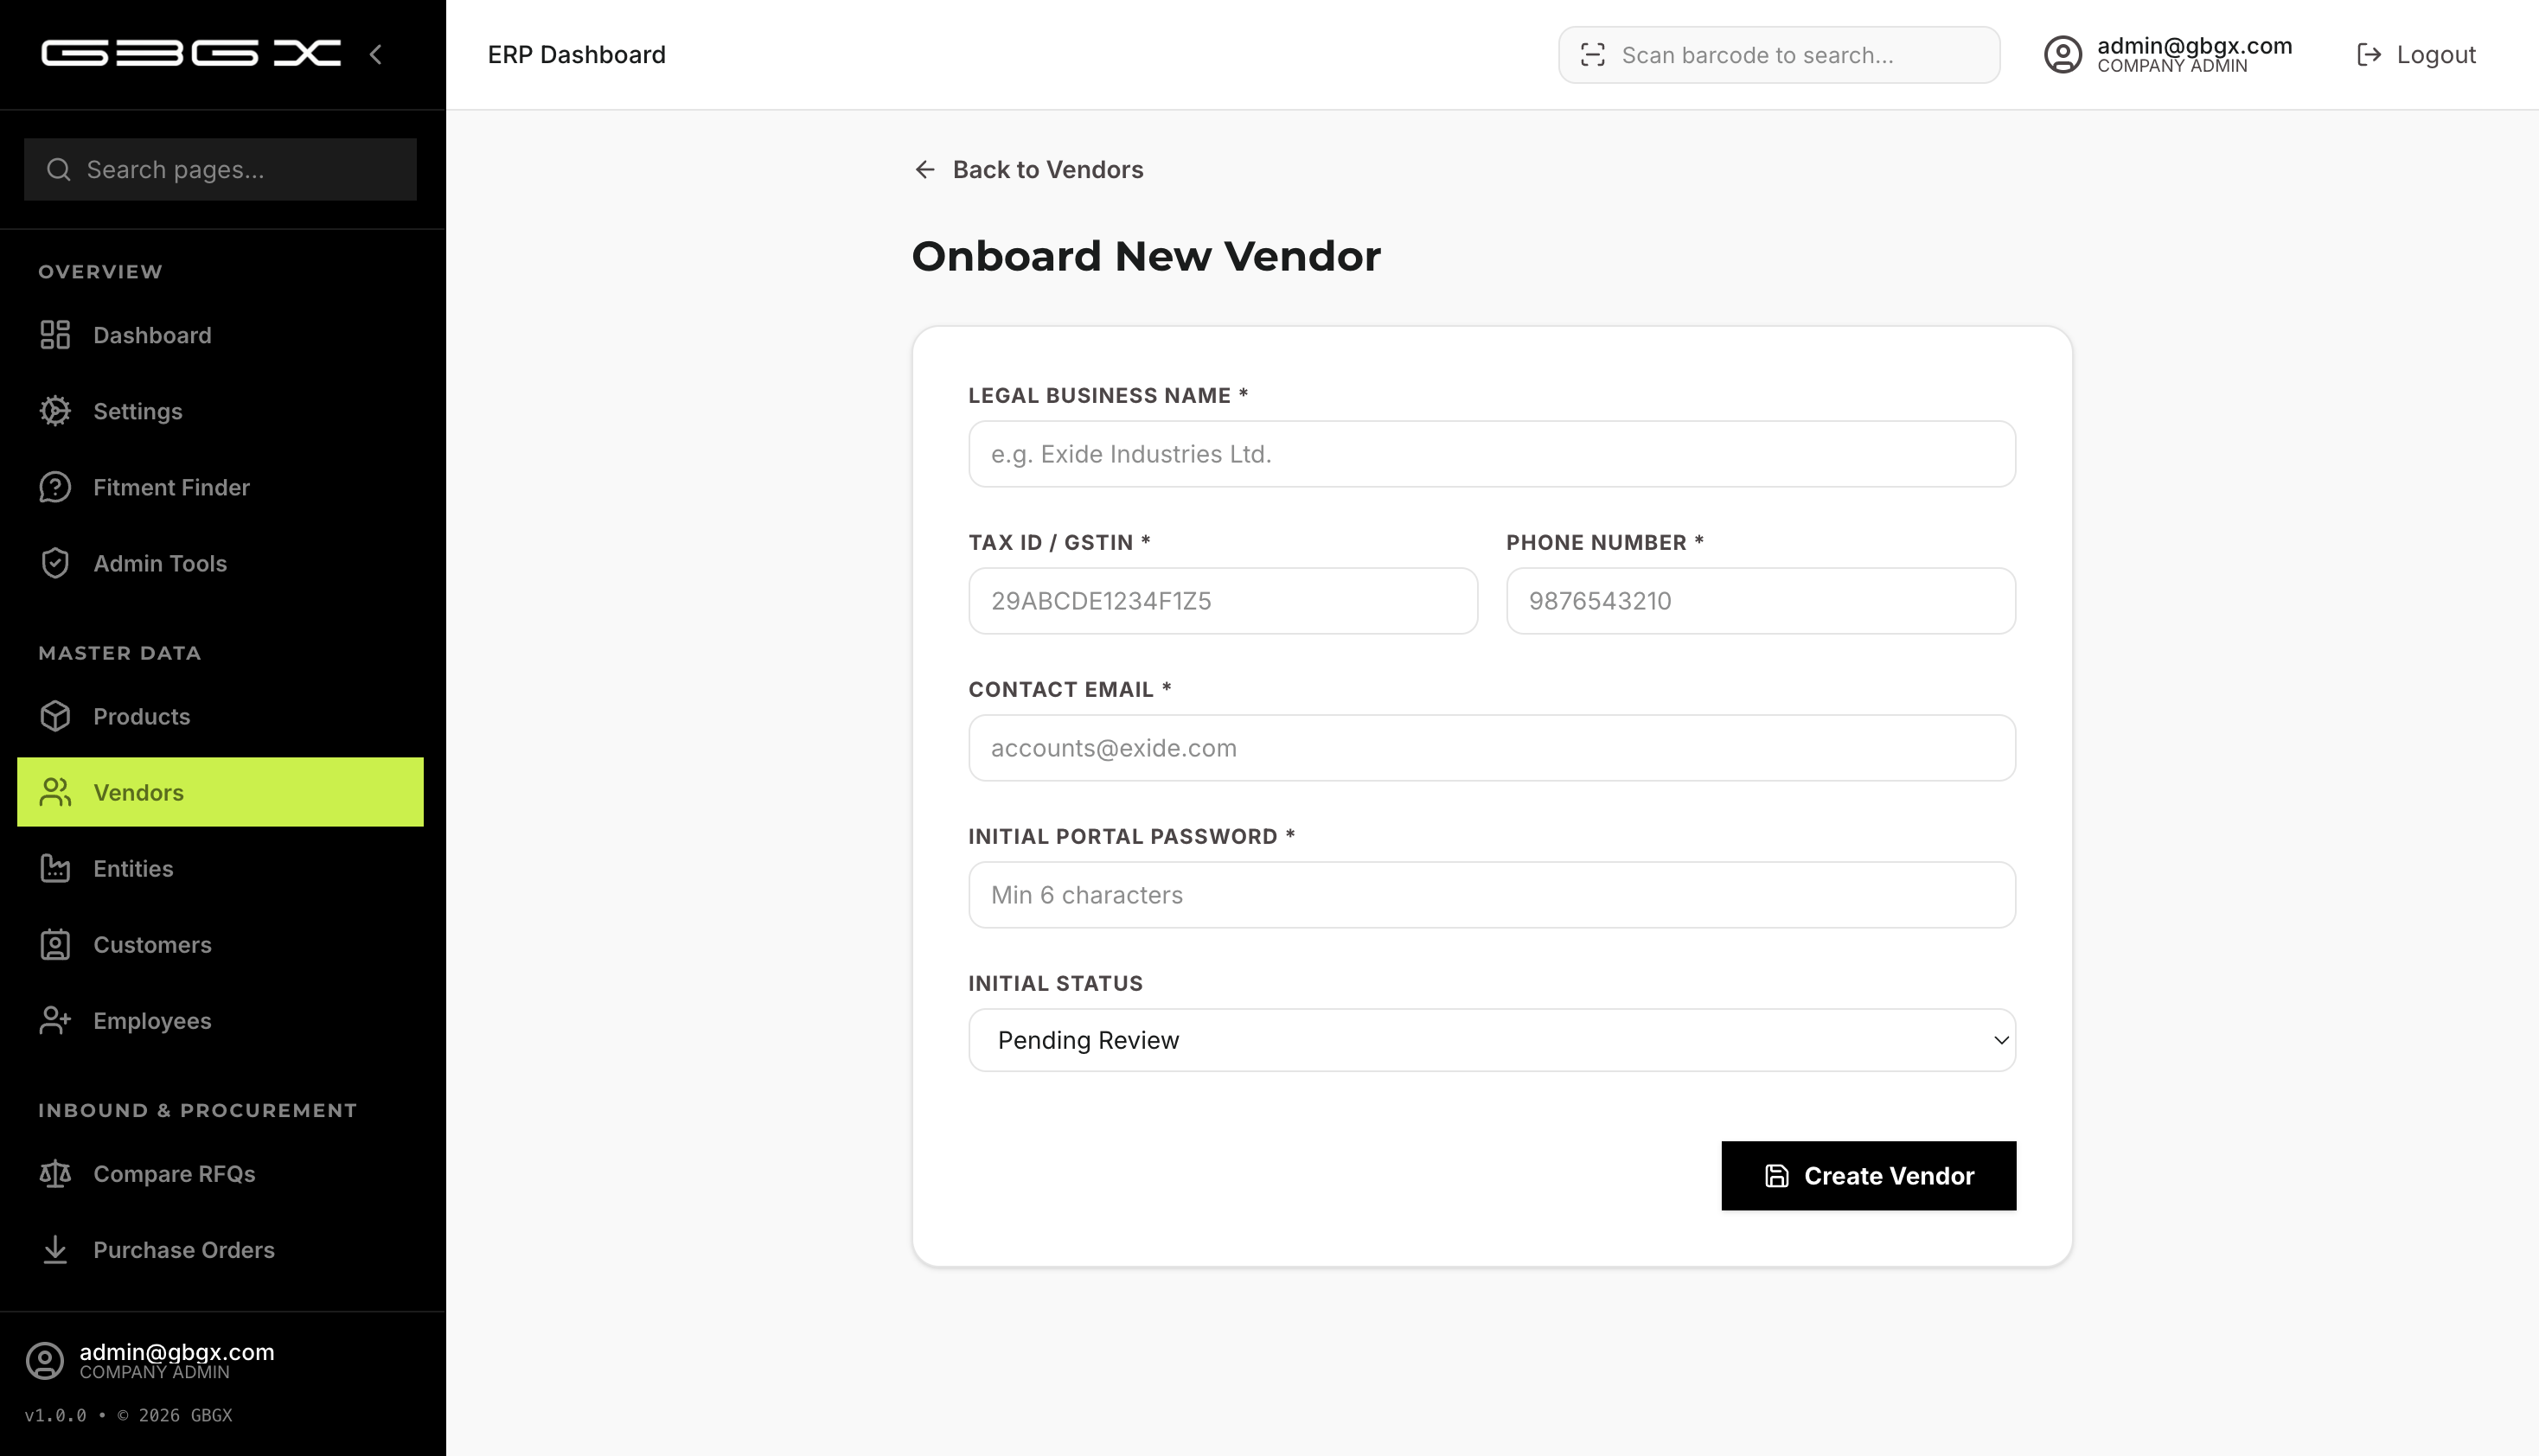
Set the Initial Portal Password.
Set Status to APPROVED (if they can supply immediately).
Click Save.

1.3 — Creating a Product (Quantity vs. Serialized)
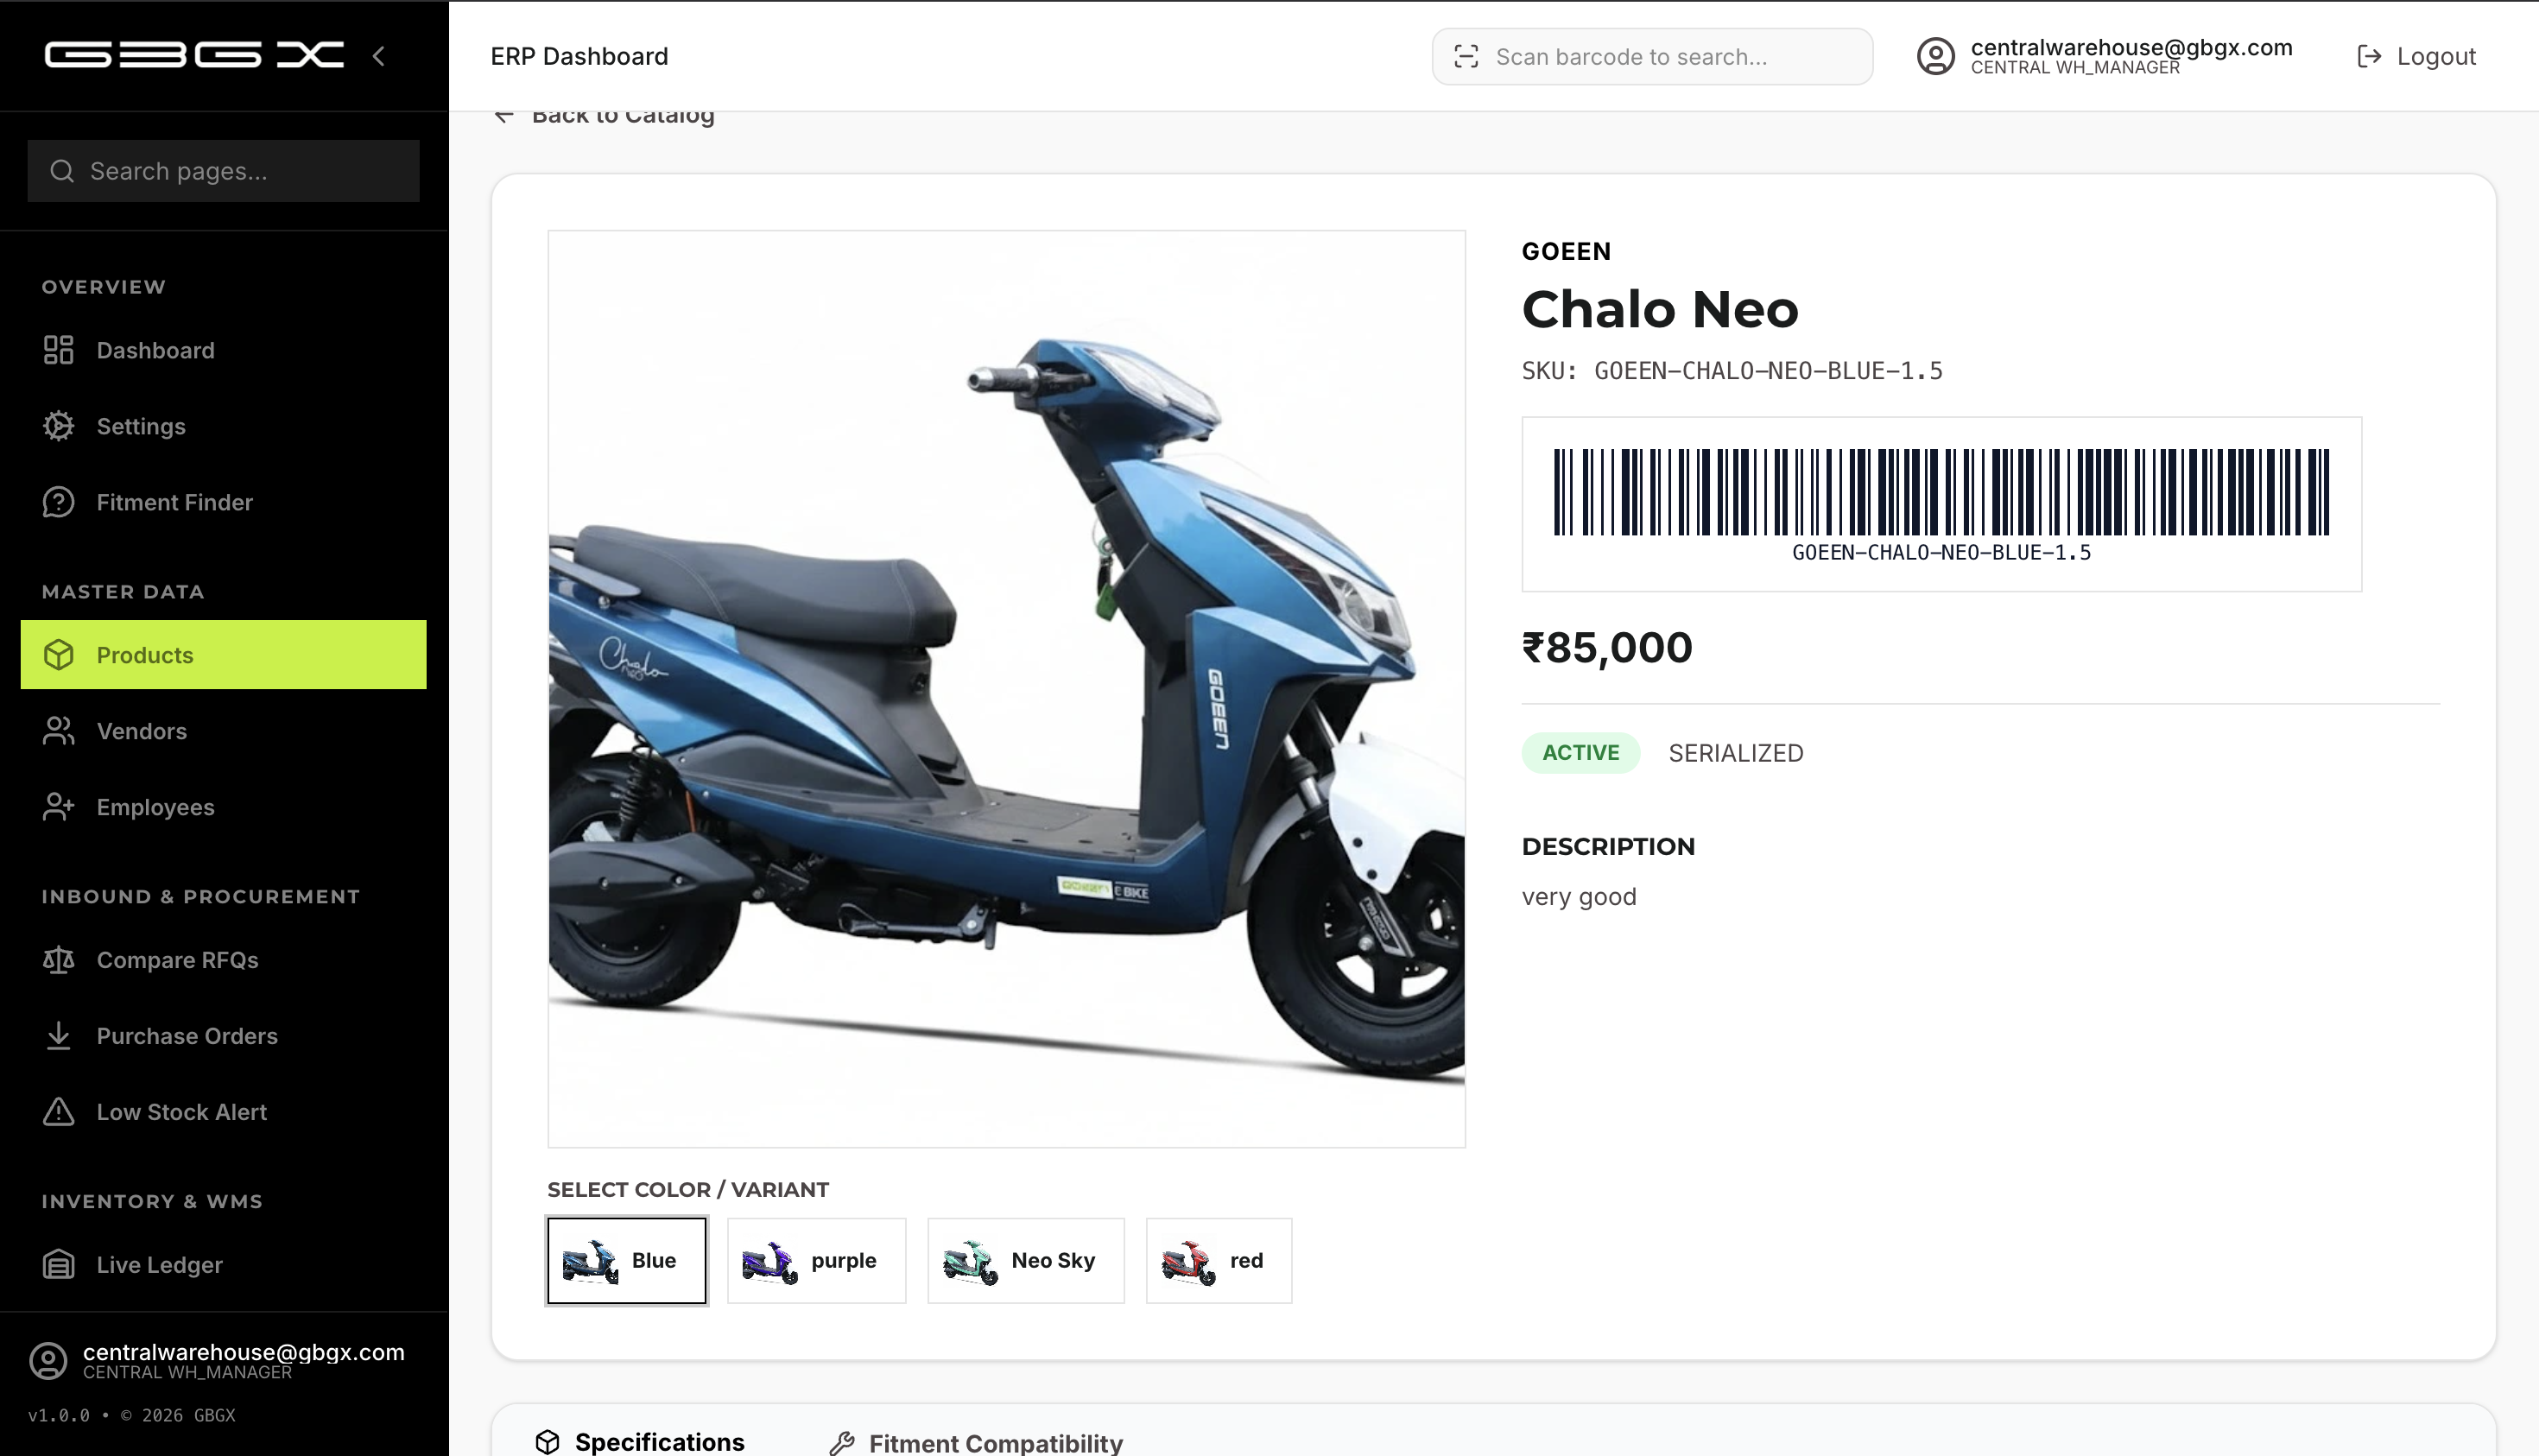
Navigate to Products → New Catalog Item.
Enter Brand and Product Name.
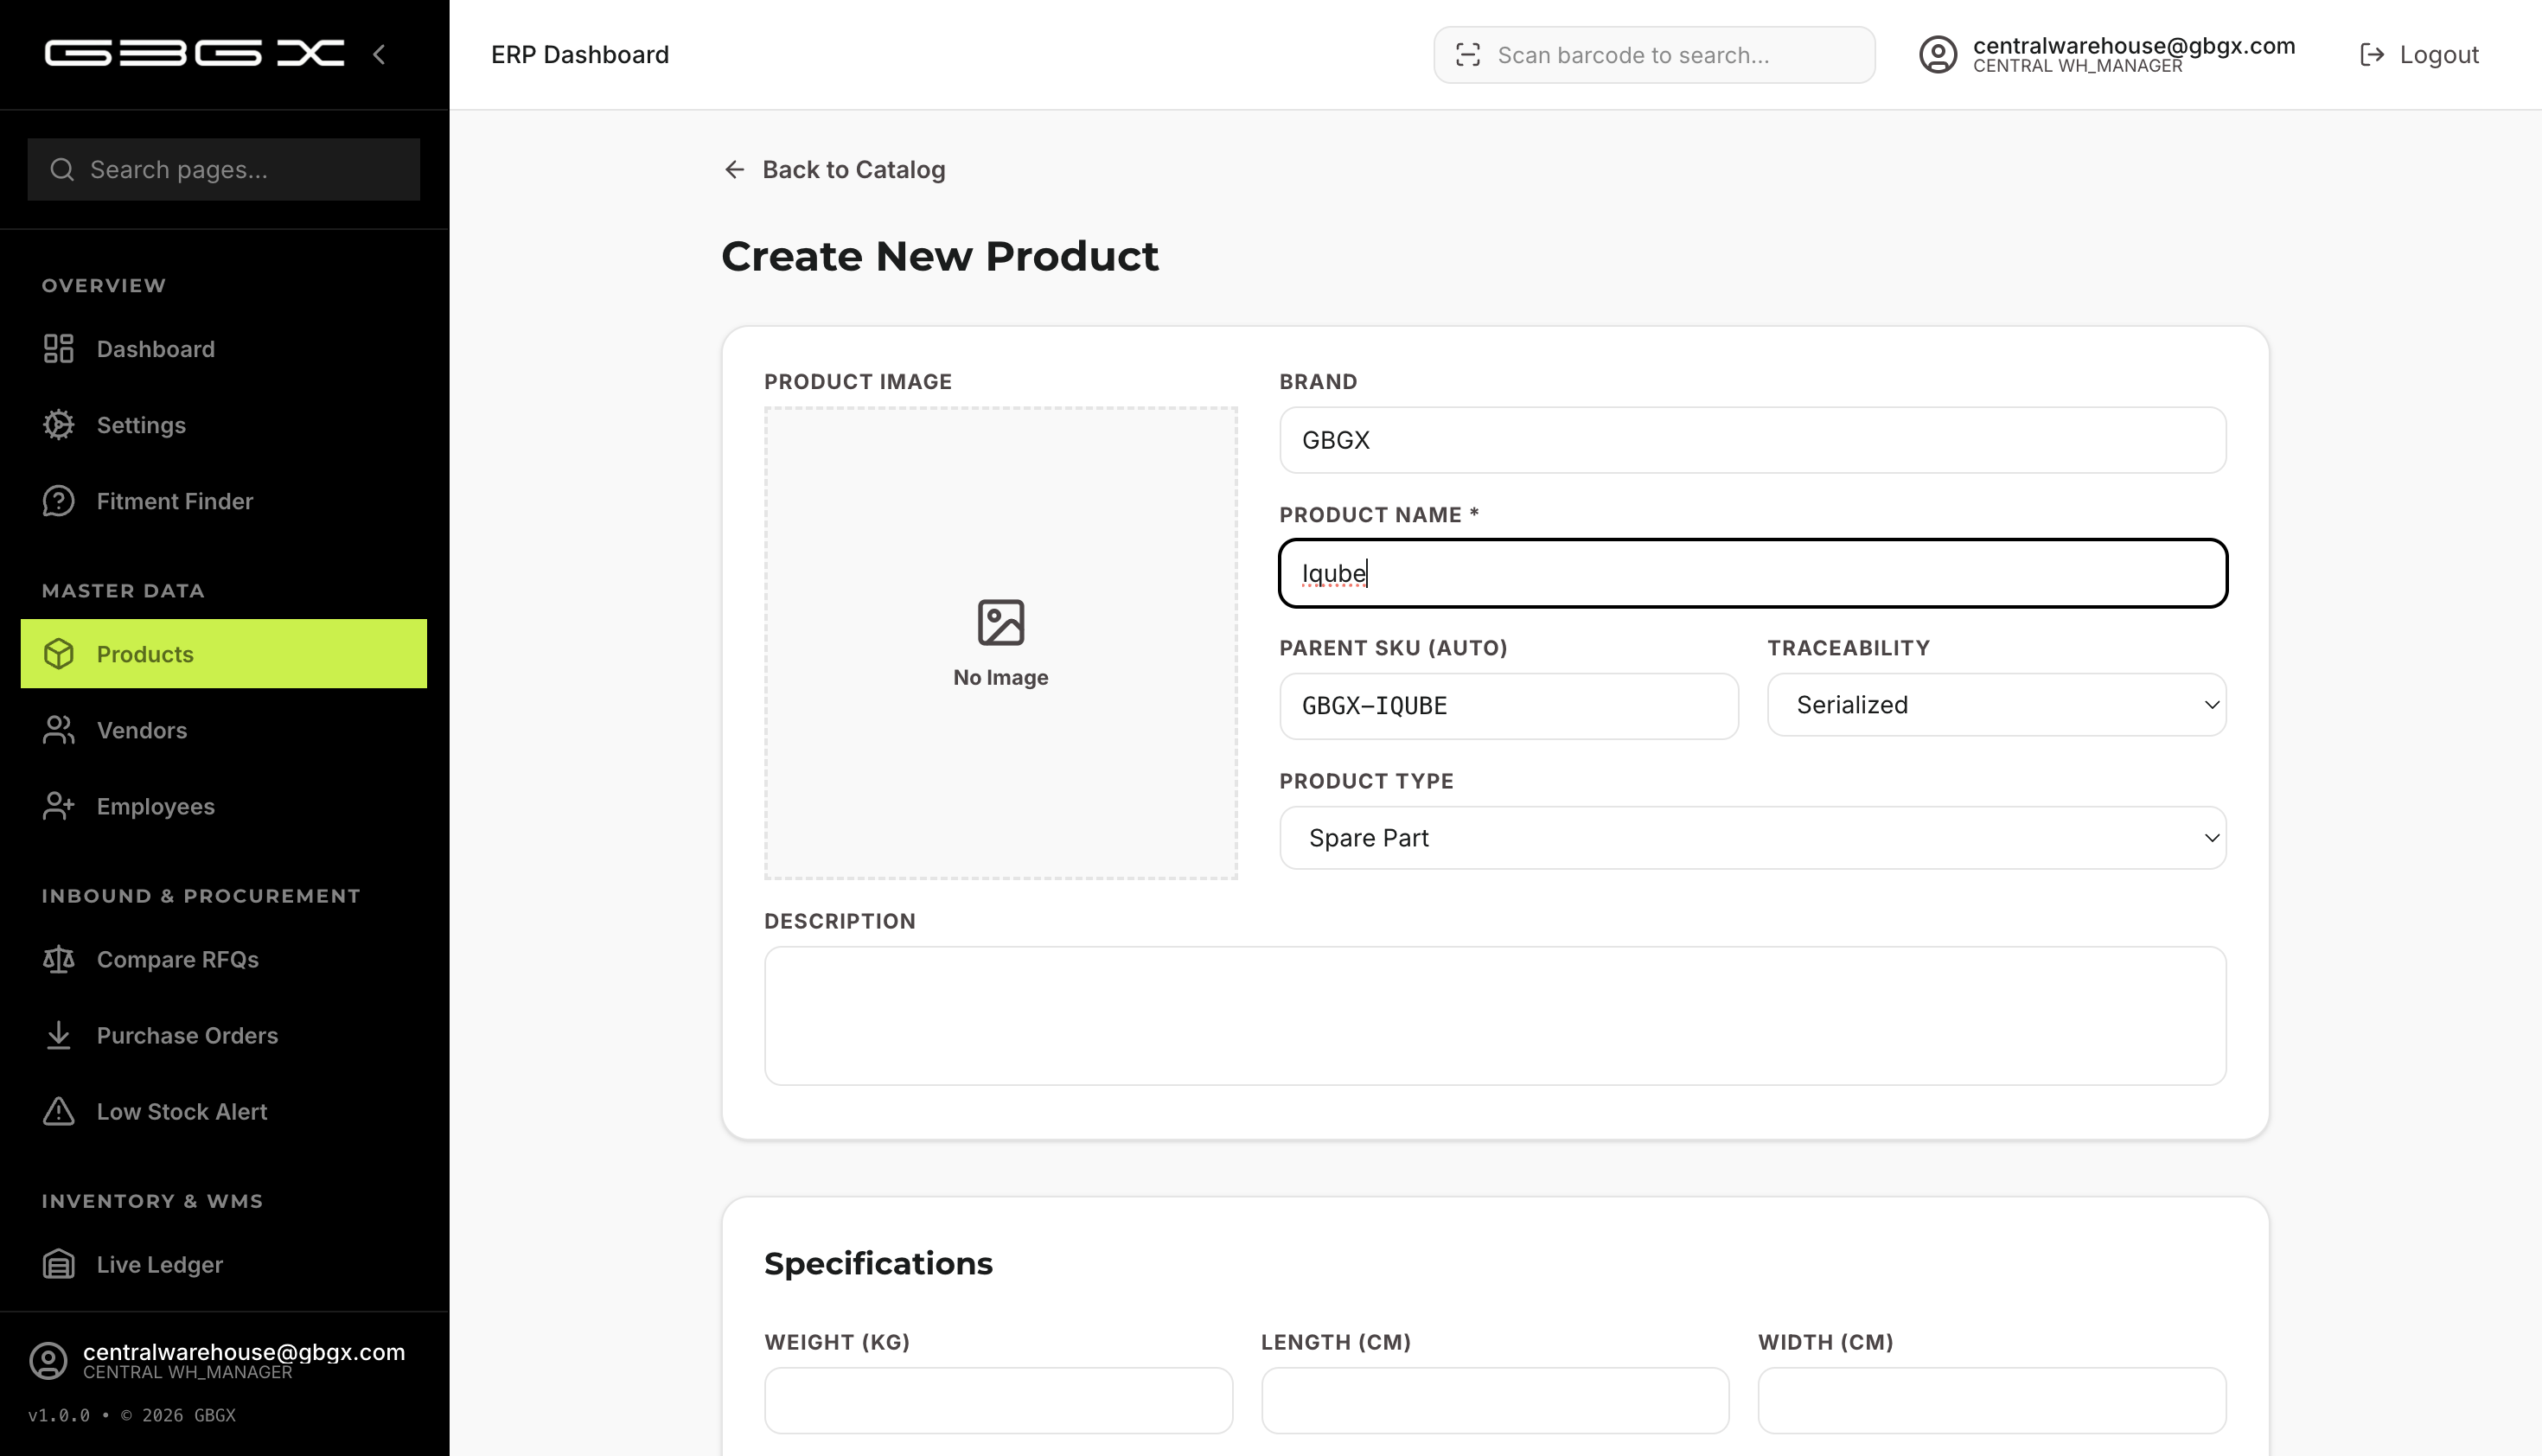
Select Traceability:
- Quantity Based — bulk items (e.g., screws, oil).
- Serialized — high-value items (e.g., Batteries, Motors). Forces serial number entry during sales/receiving.
- Batch Tracked — items with expiry dates (FEFO).
If Serialized: enable Has Warranty and enter Warranty Months.

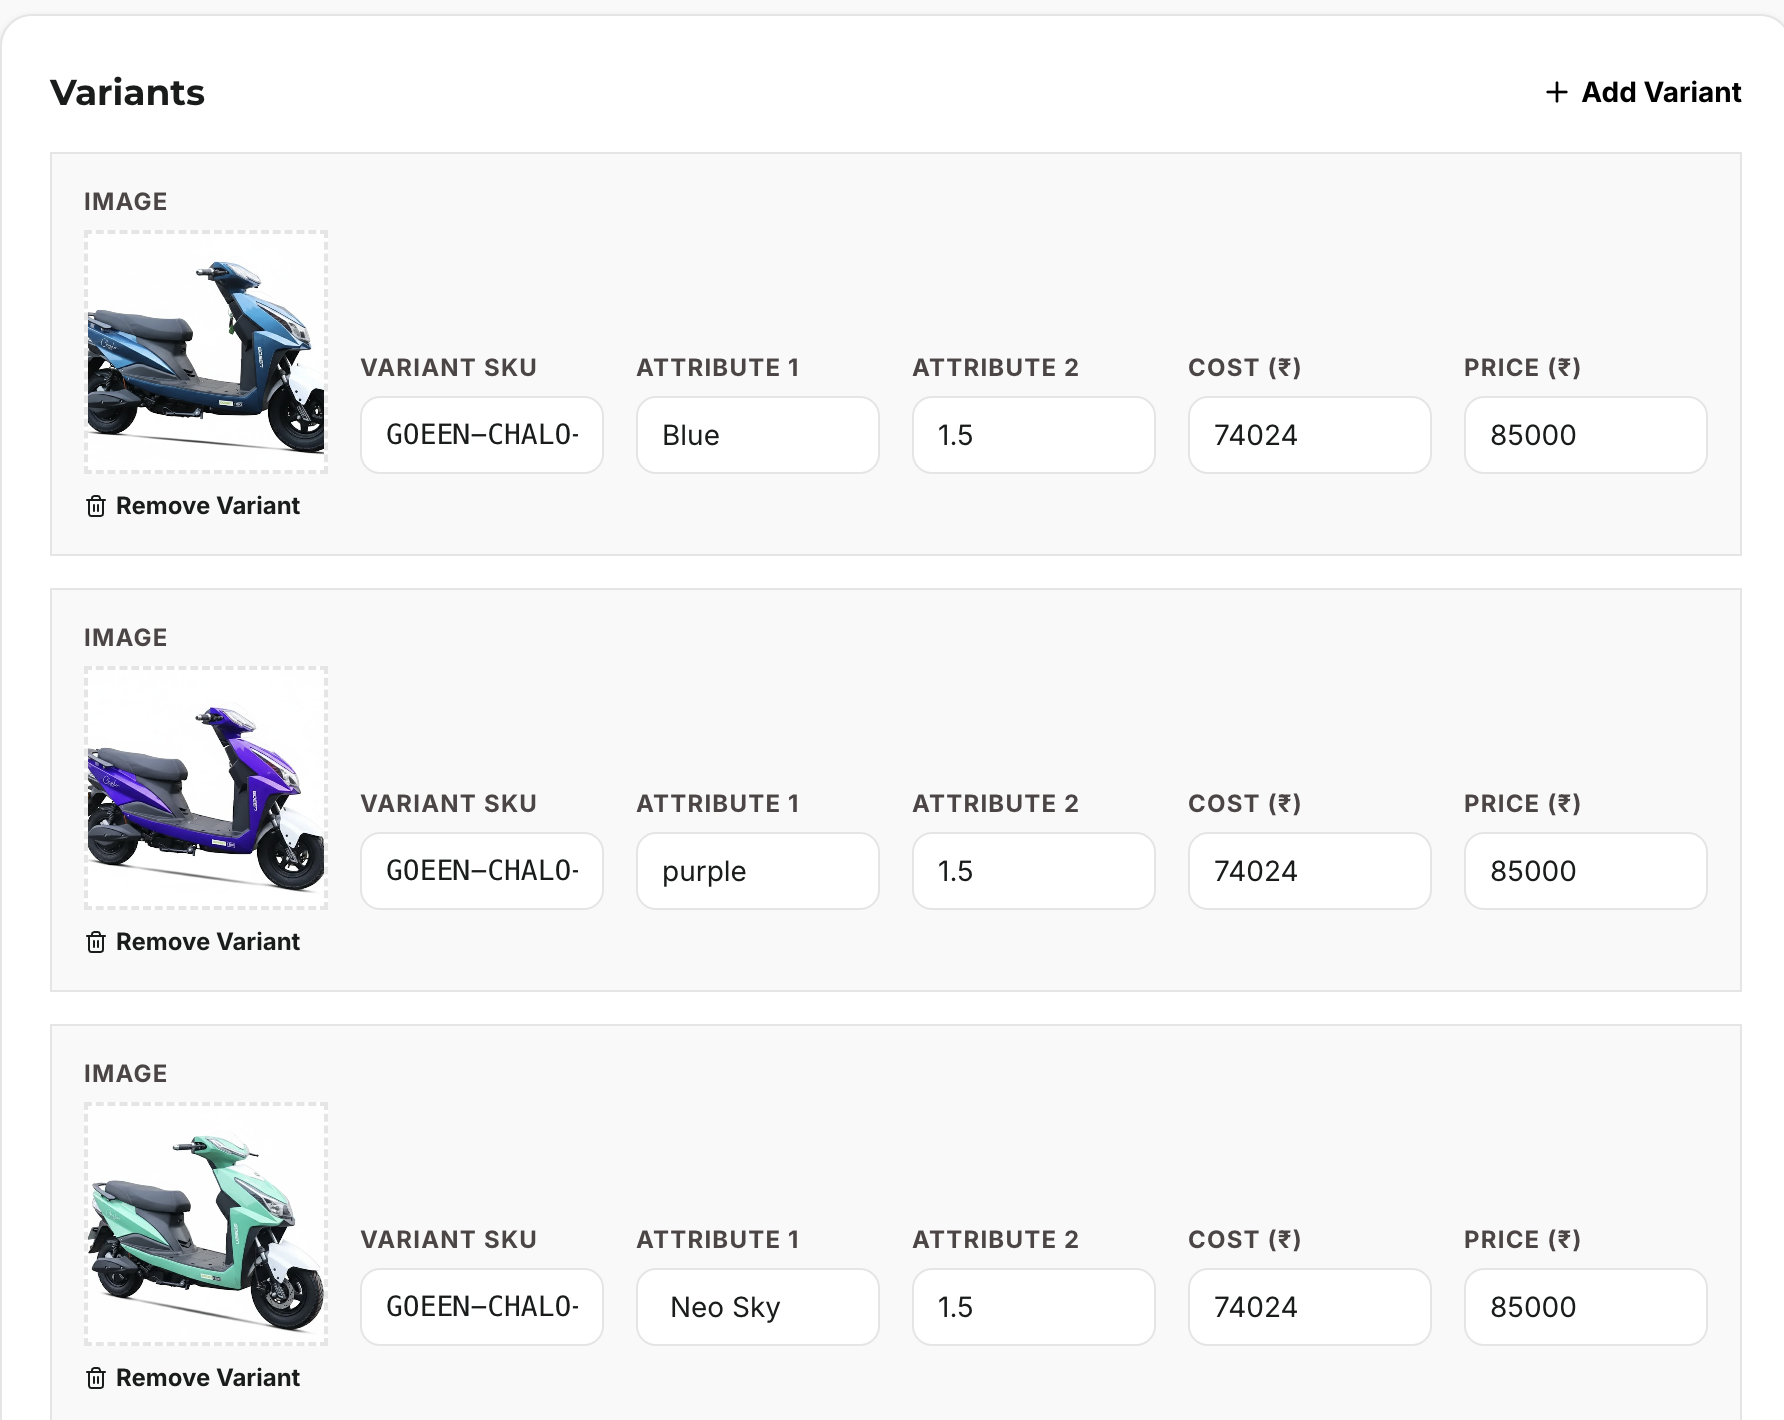
Scroll down to Variants and add attributes (e.g., Color, Capacity). Enter Cost and Selling Prices.
Fitment Engine: link the part to specific EV Master Vehicles (Make/Model/Year) to ensure dealers only sell compatible parts.
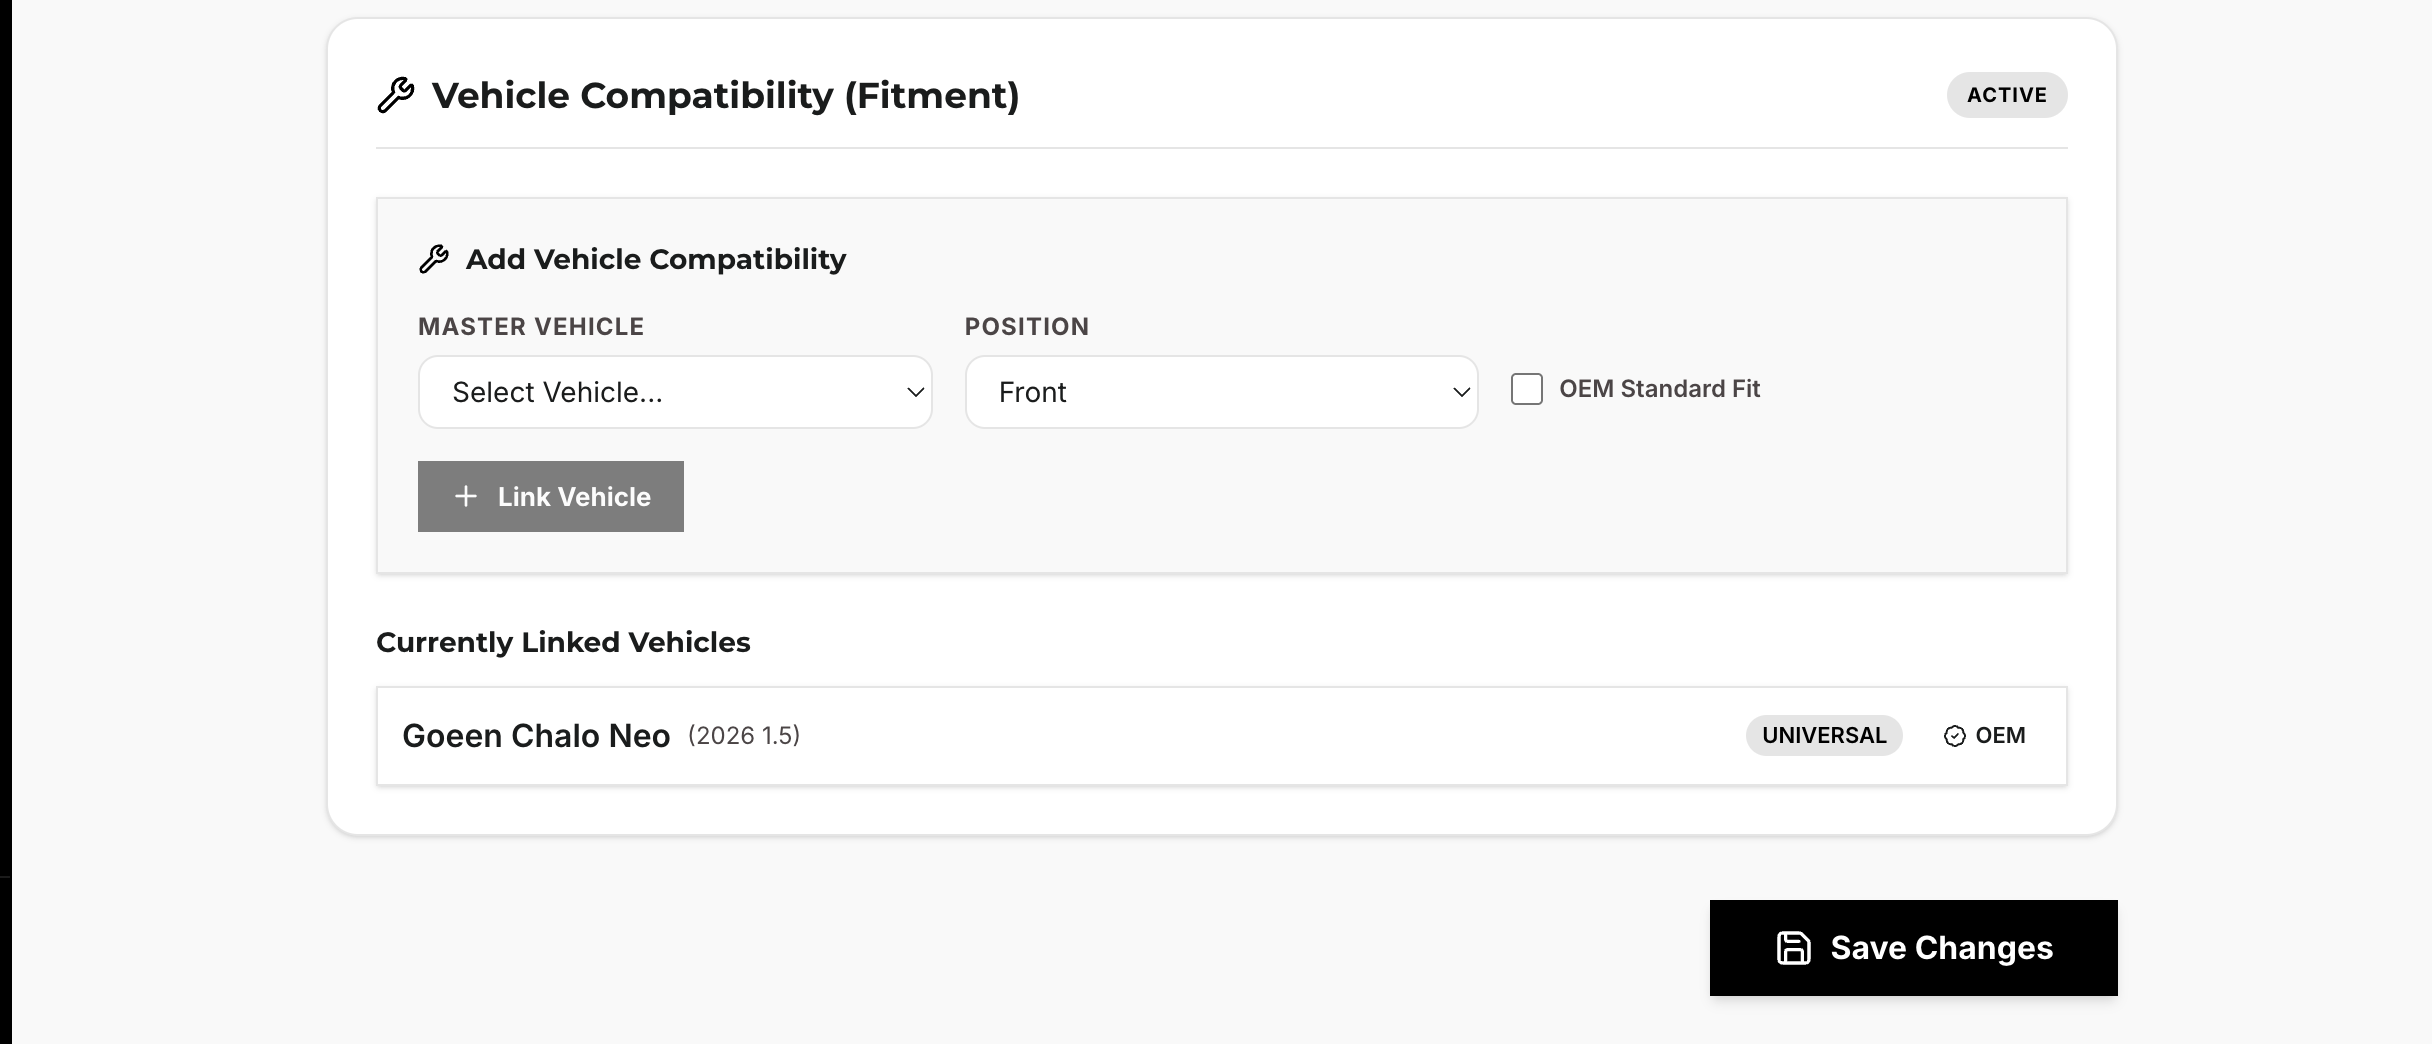
Click Save Product.
Chapter 2 — Procurement & Vendor Portal
2.1 — Creating an RFQ & Approving PO
Navigate to Procurement → Compare RFQs → New RFQ.
Select Variant SKU and Quantity.
Select target vendors from the dropdown (filtered by who supplies this SKU).
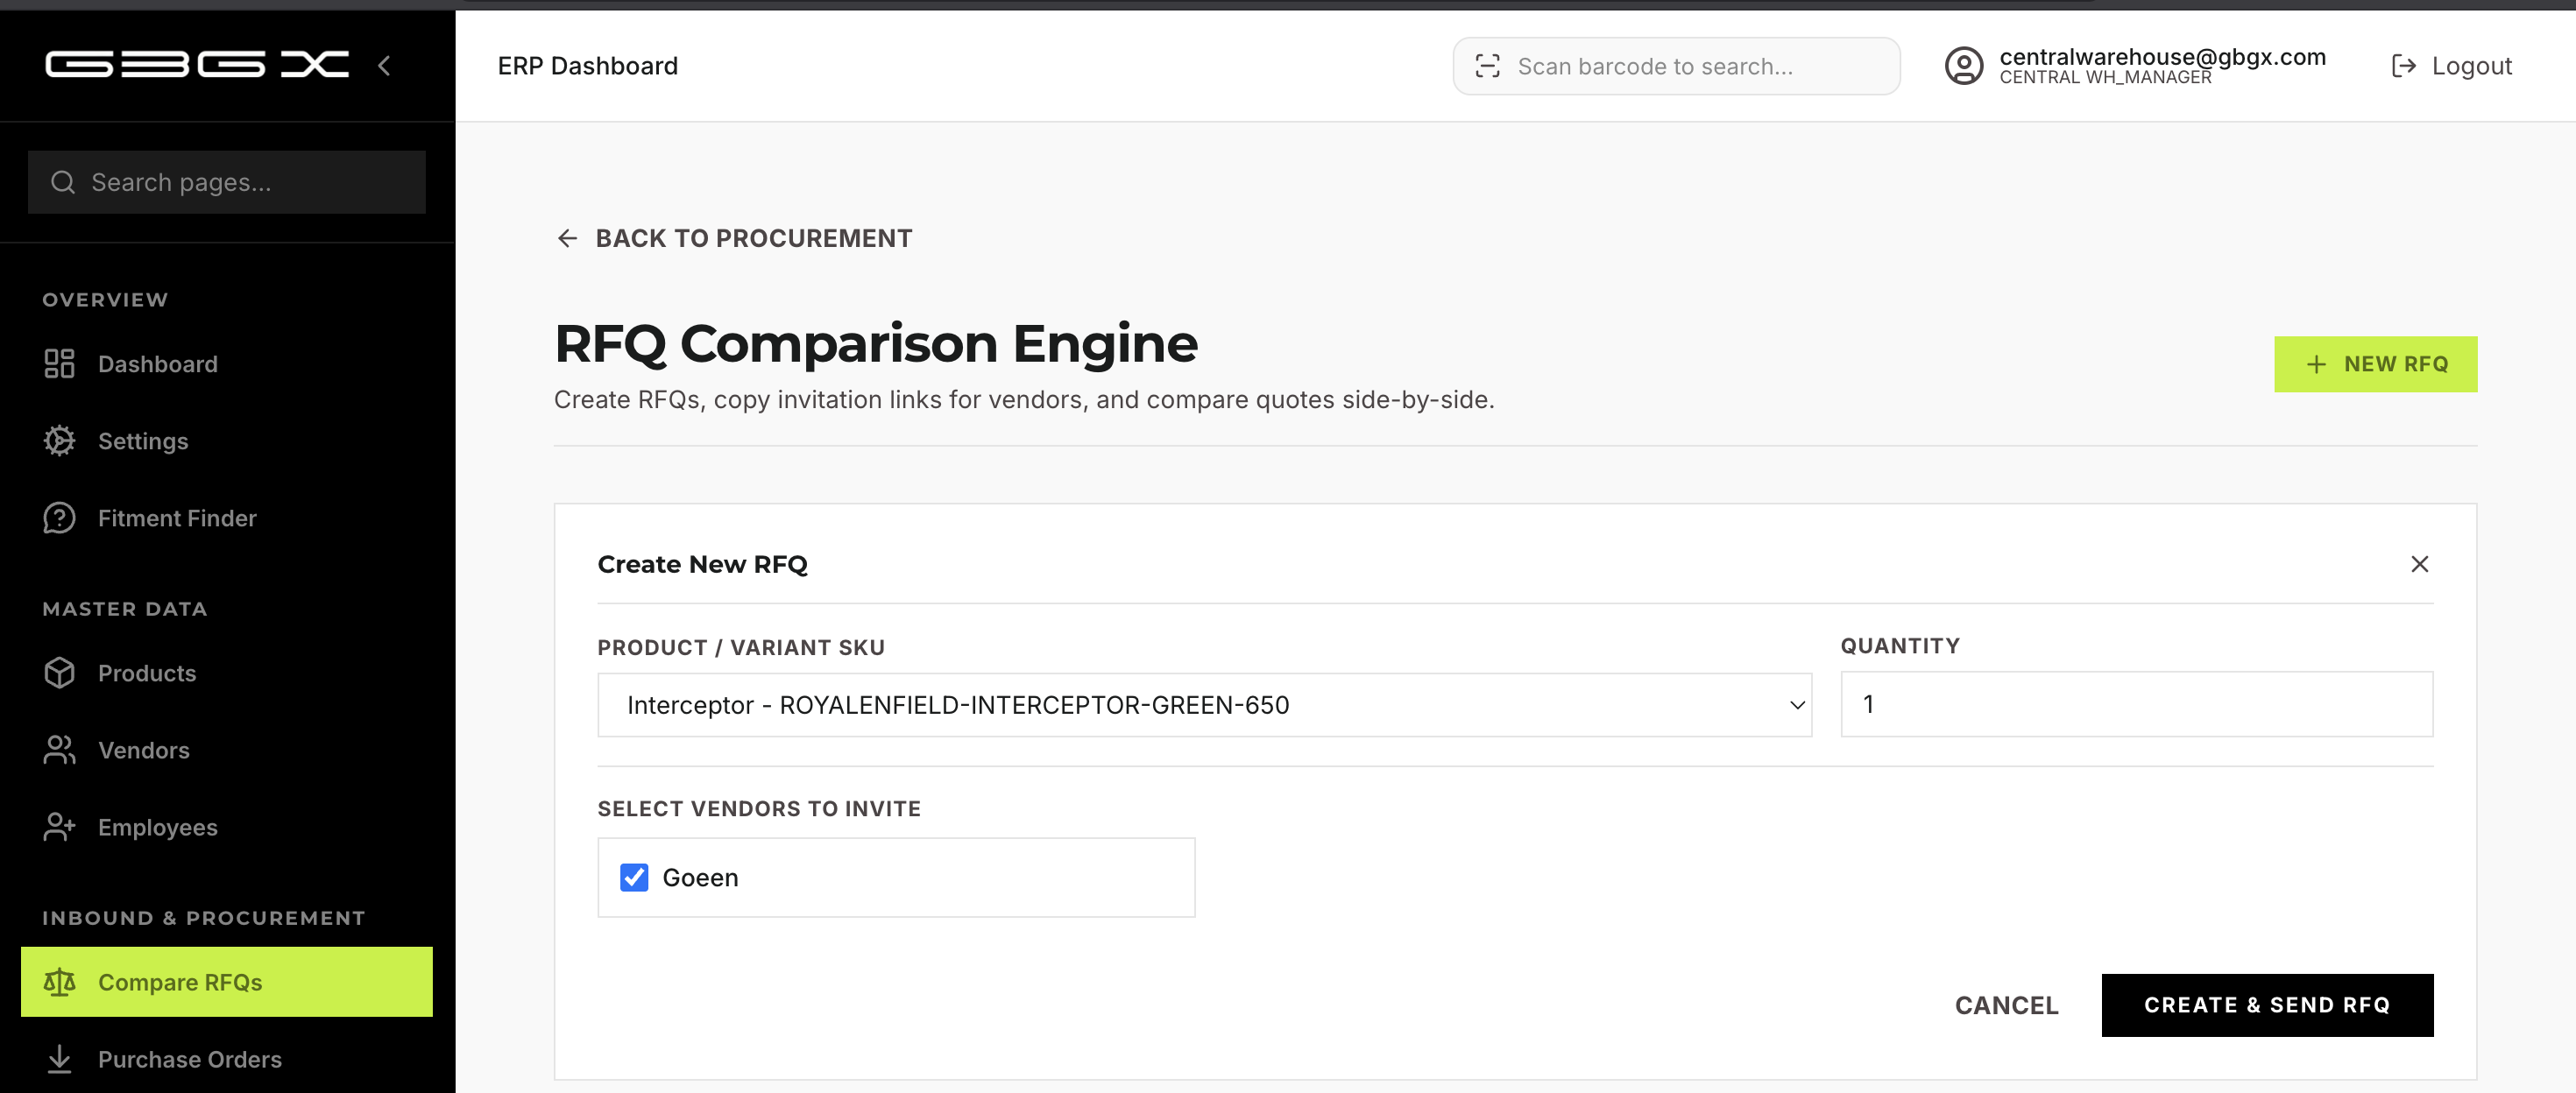
Click Create & Send RFQ.
Vendor submits quote via Vendor Portal (see 2.2).
Admin returns to Compare RFQs and views the side-by-side quotes.
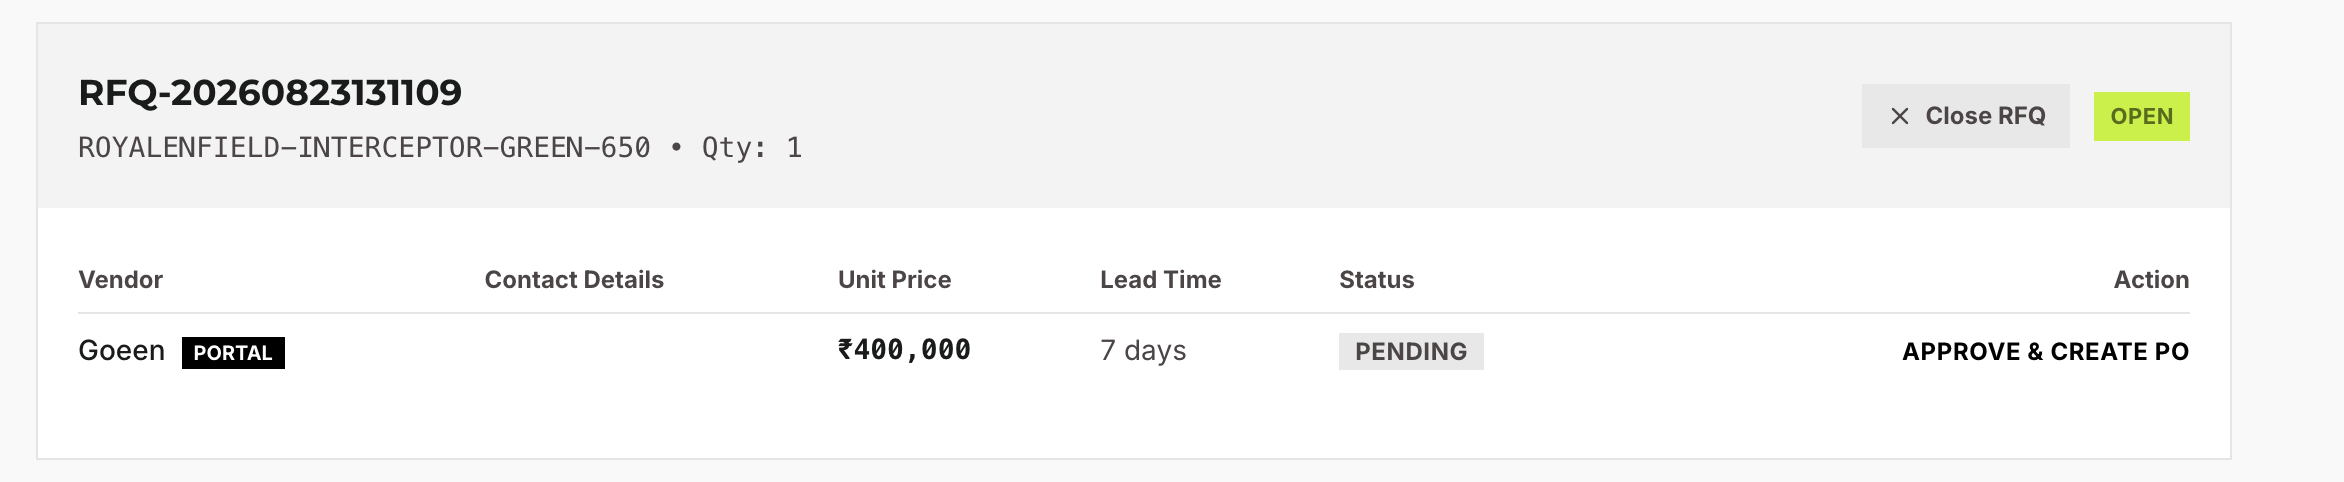
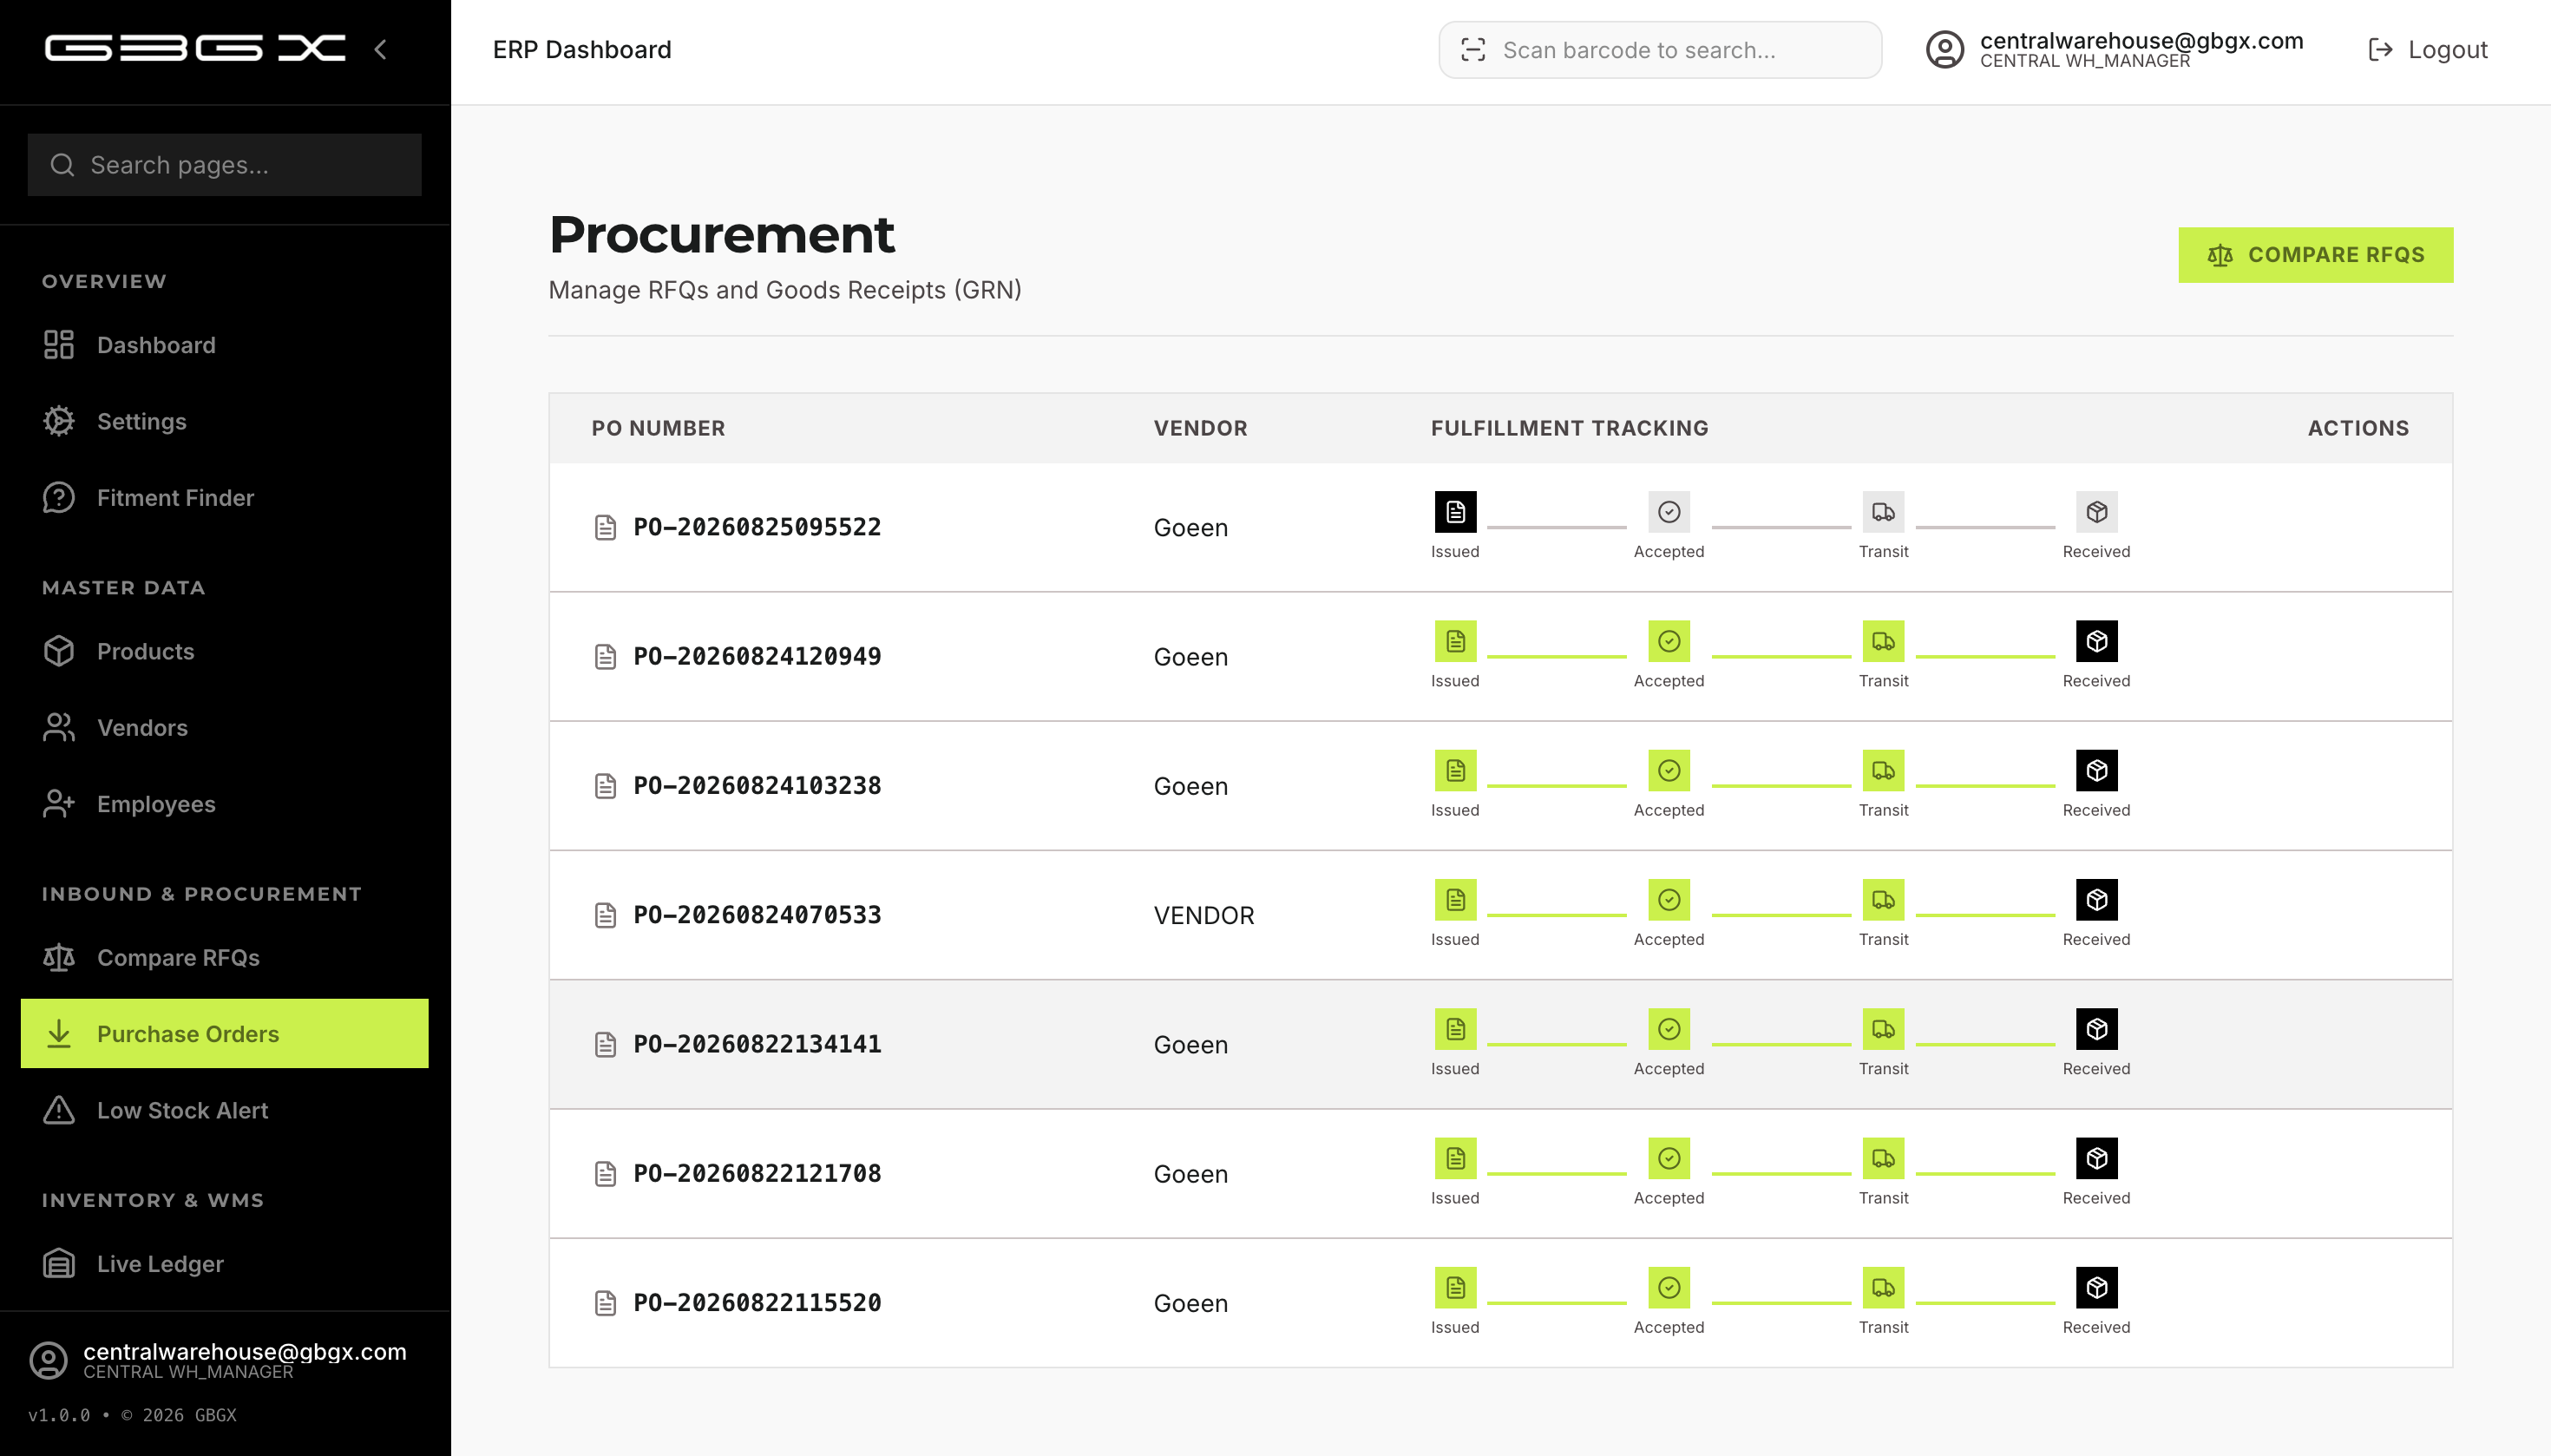
Click Approve & Create PO on the best quote.
2.2 — Vendor Portal Overview & GRN Submission
Vendor logs into the Vendor Portal.
Navigates to My Purchase Orders and clicks Submit GRN on the issued PO.
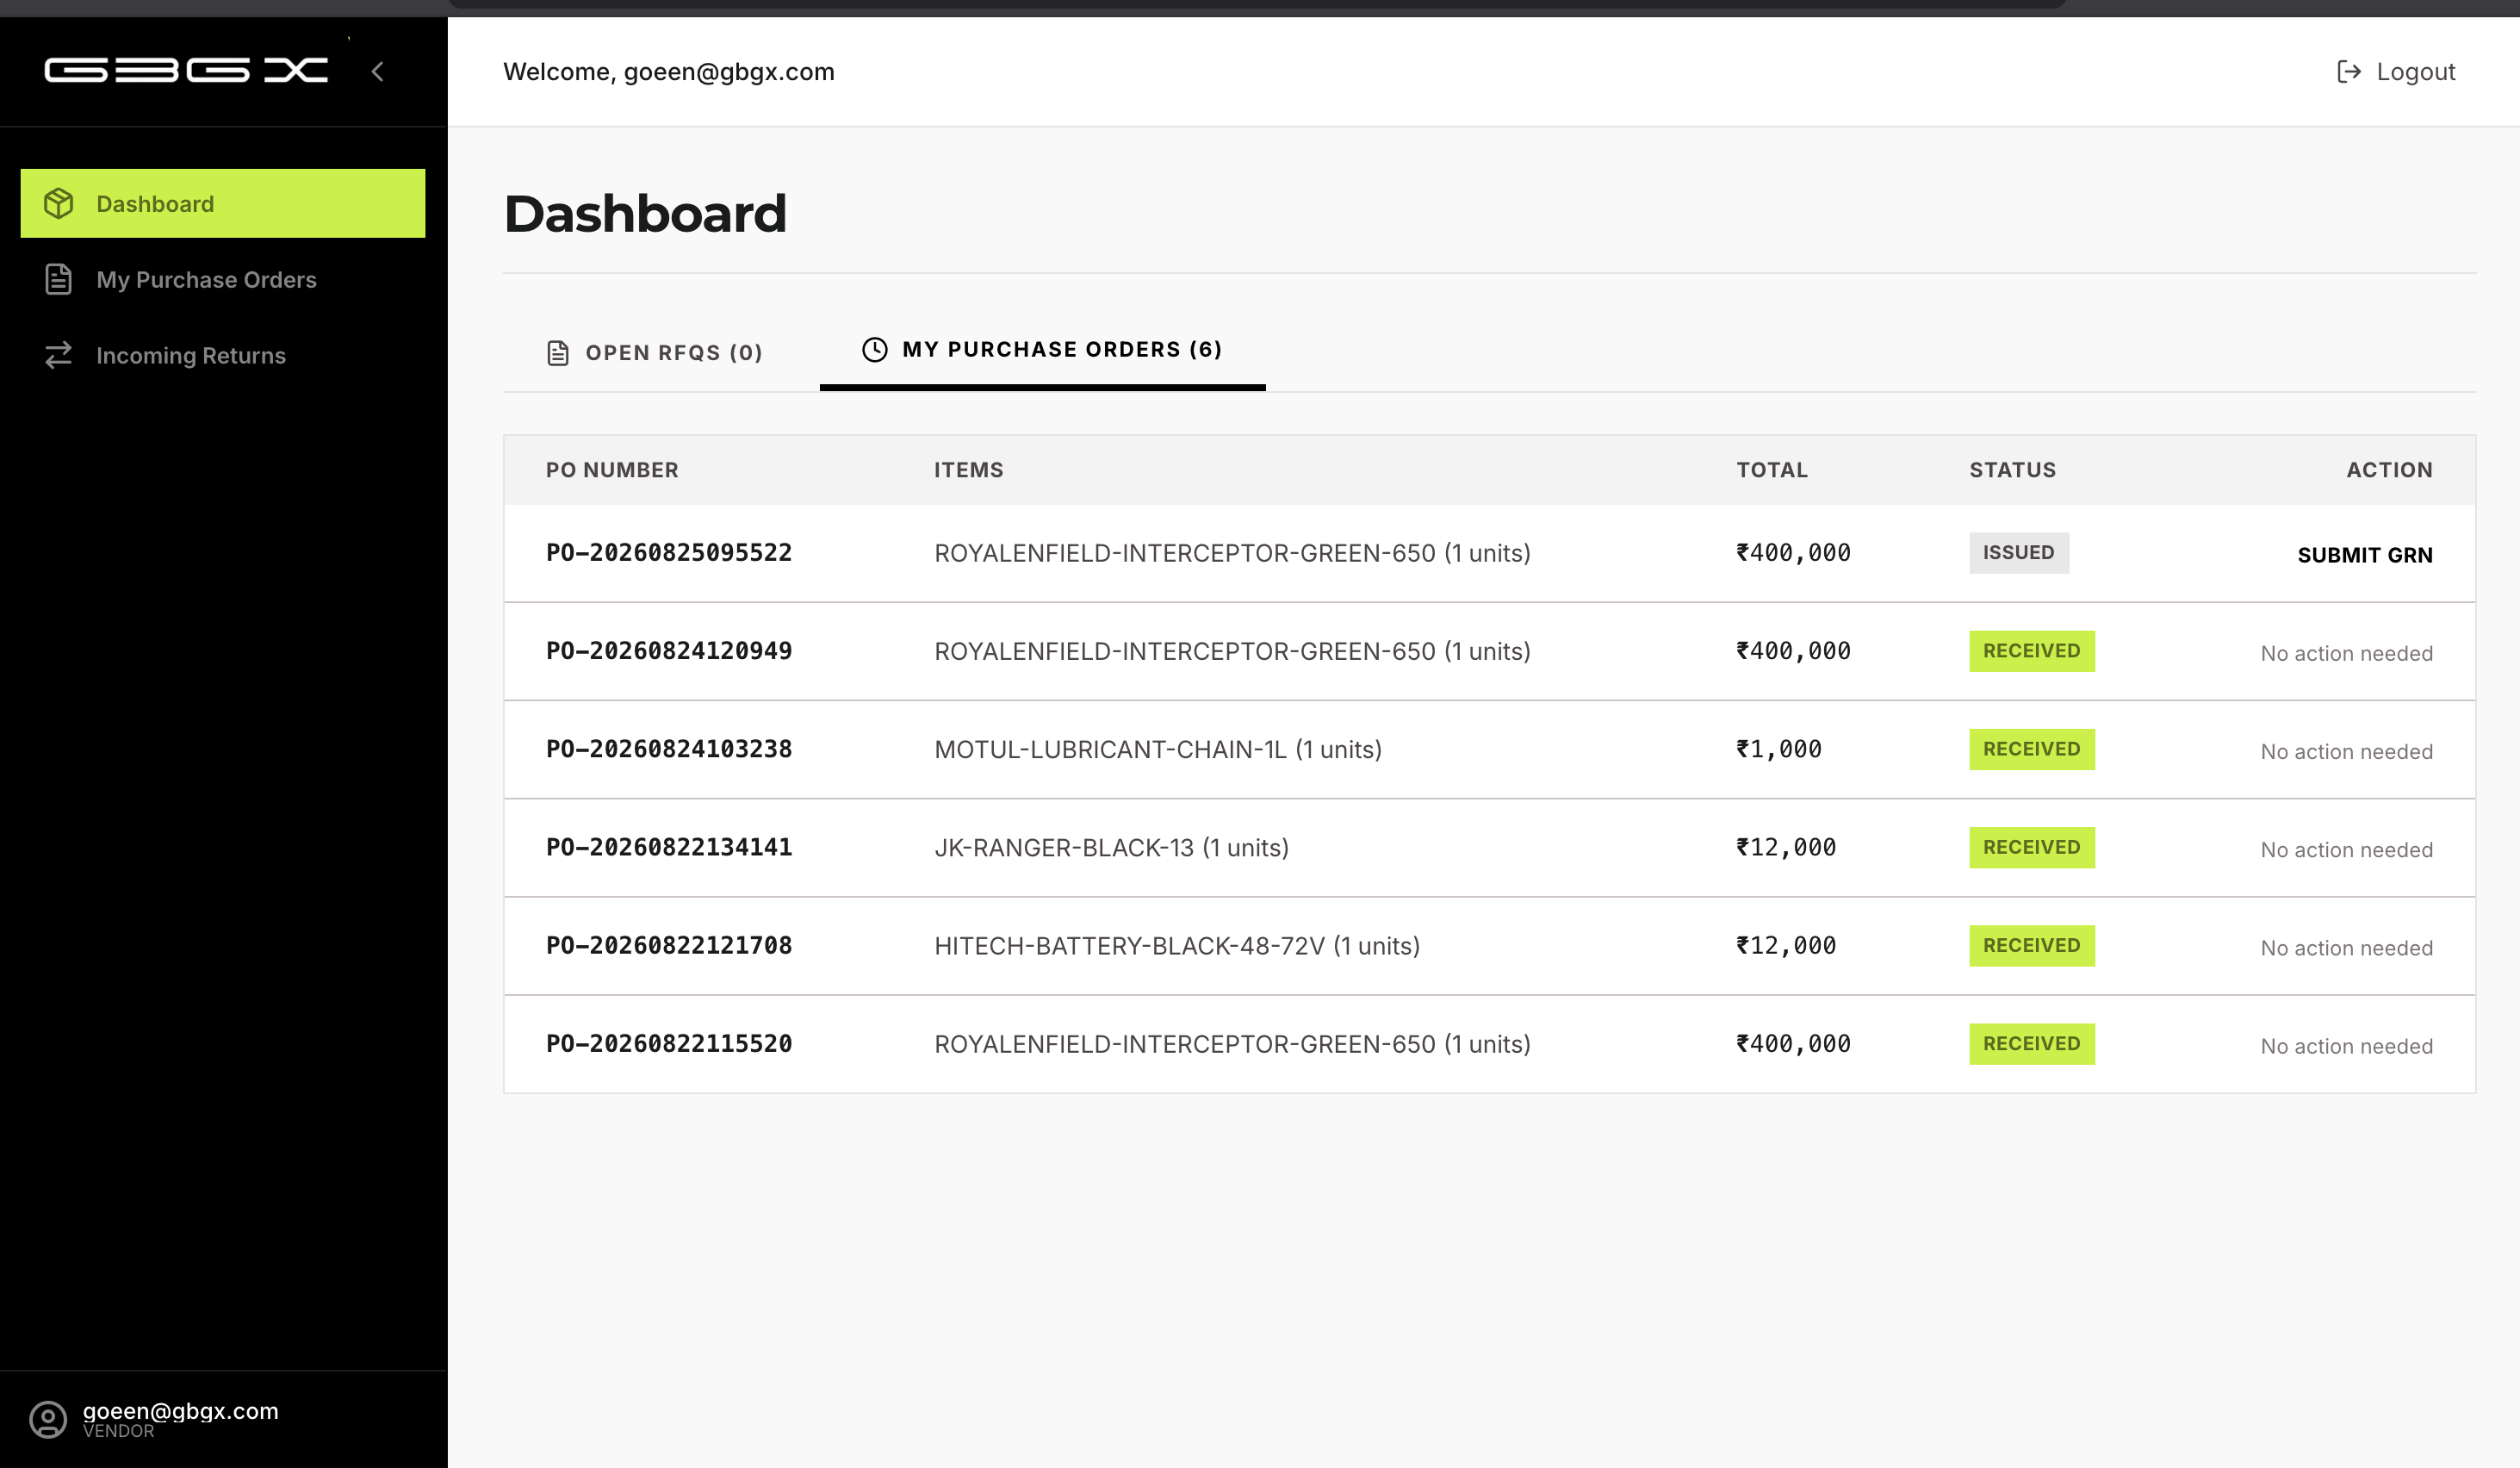
For Serialized Items: enter Serial Numbers and Manufacturing Dates manually or via CSV Upload.
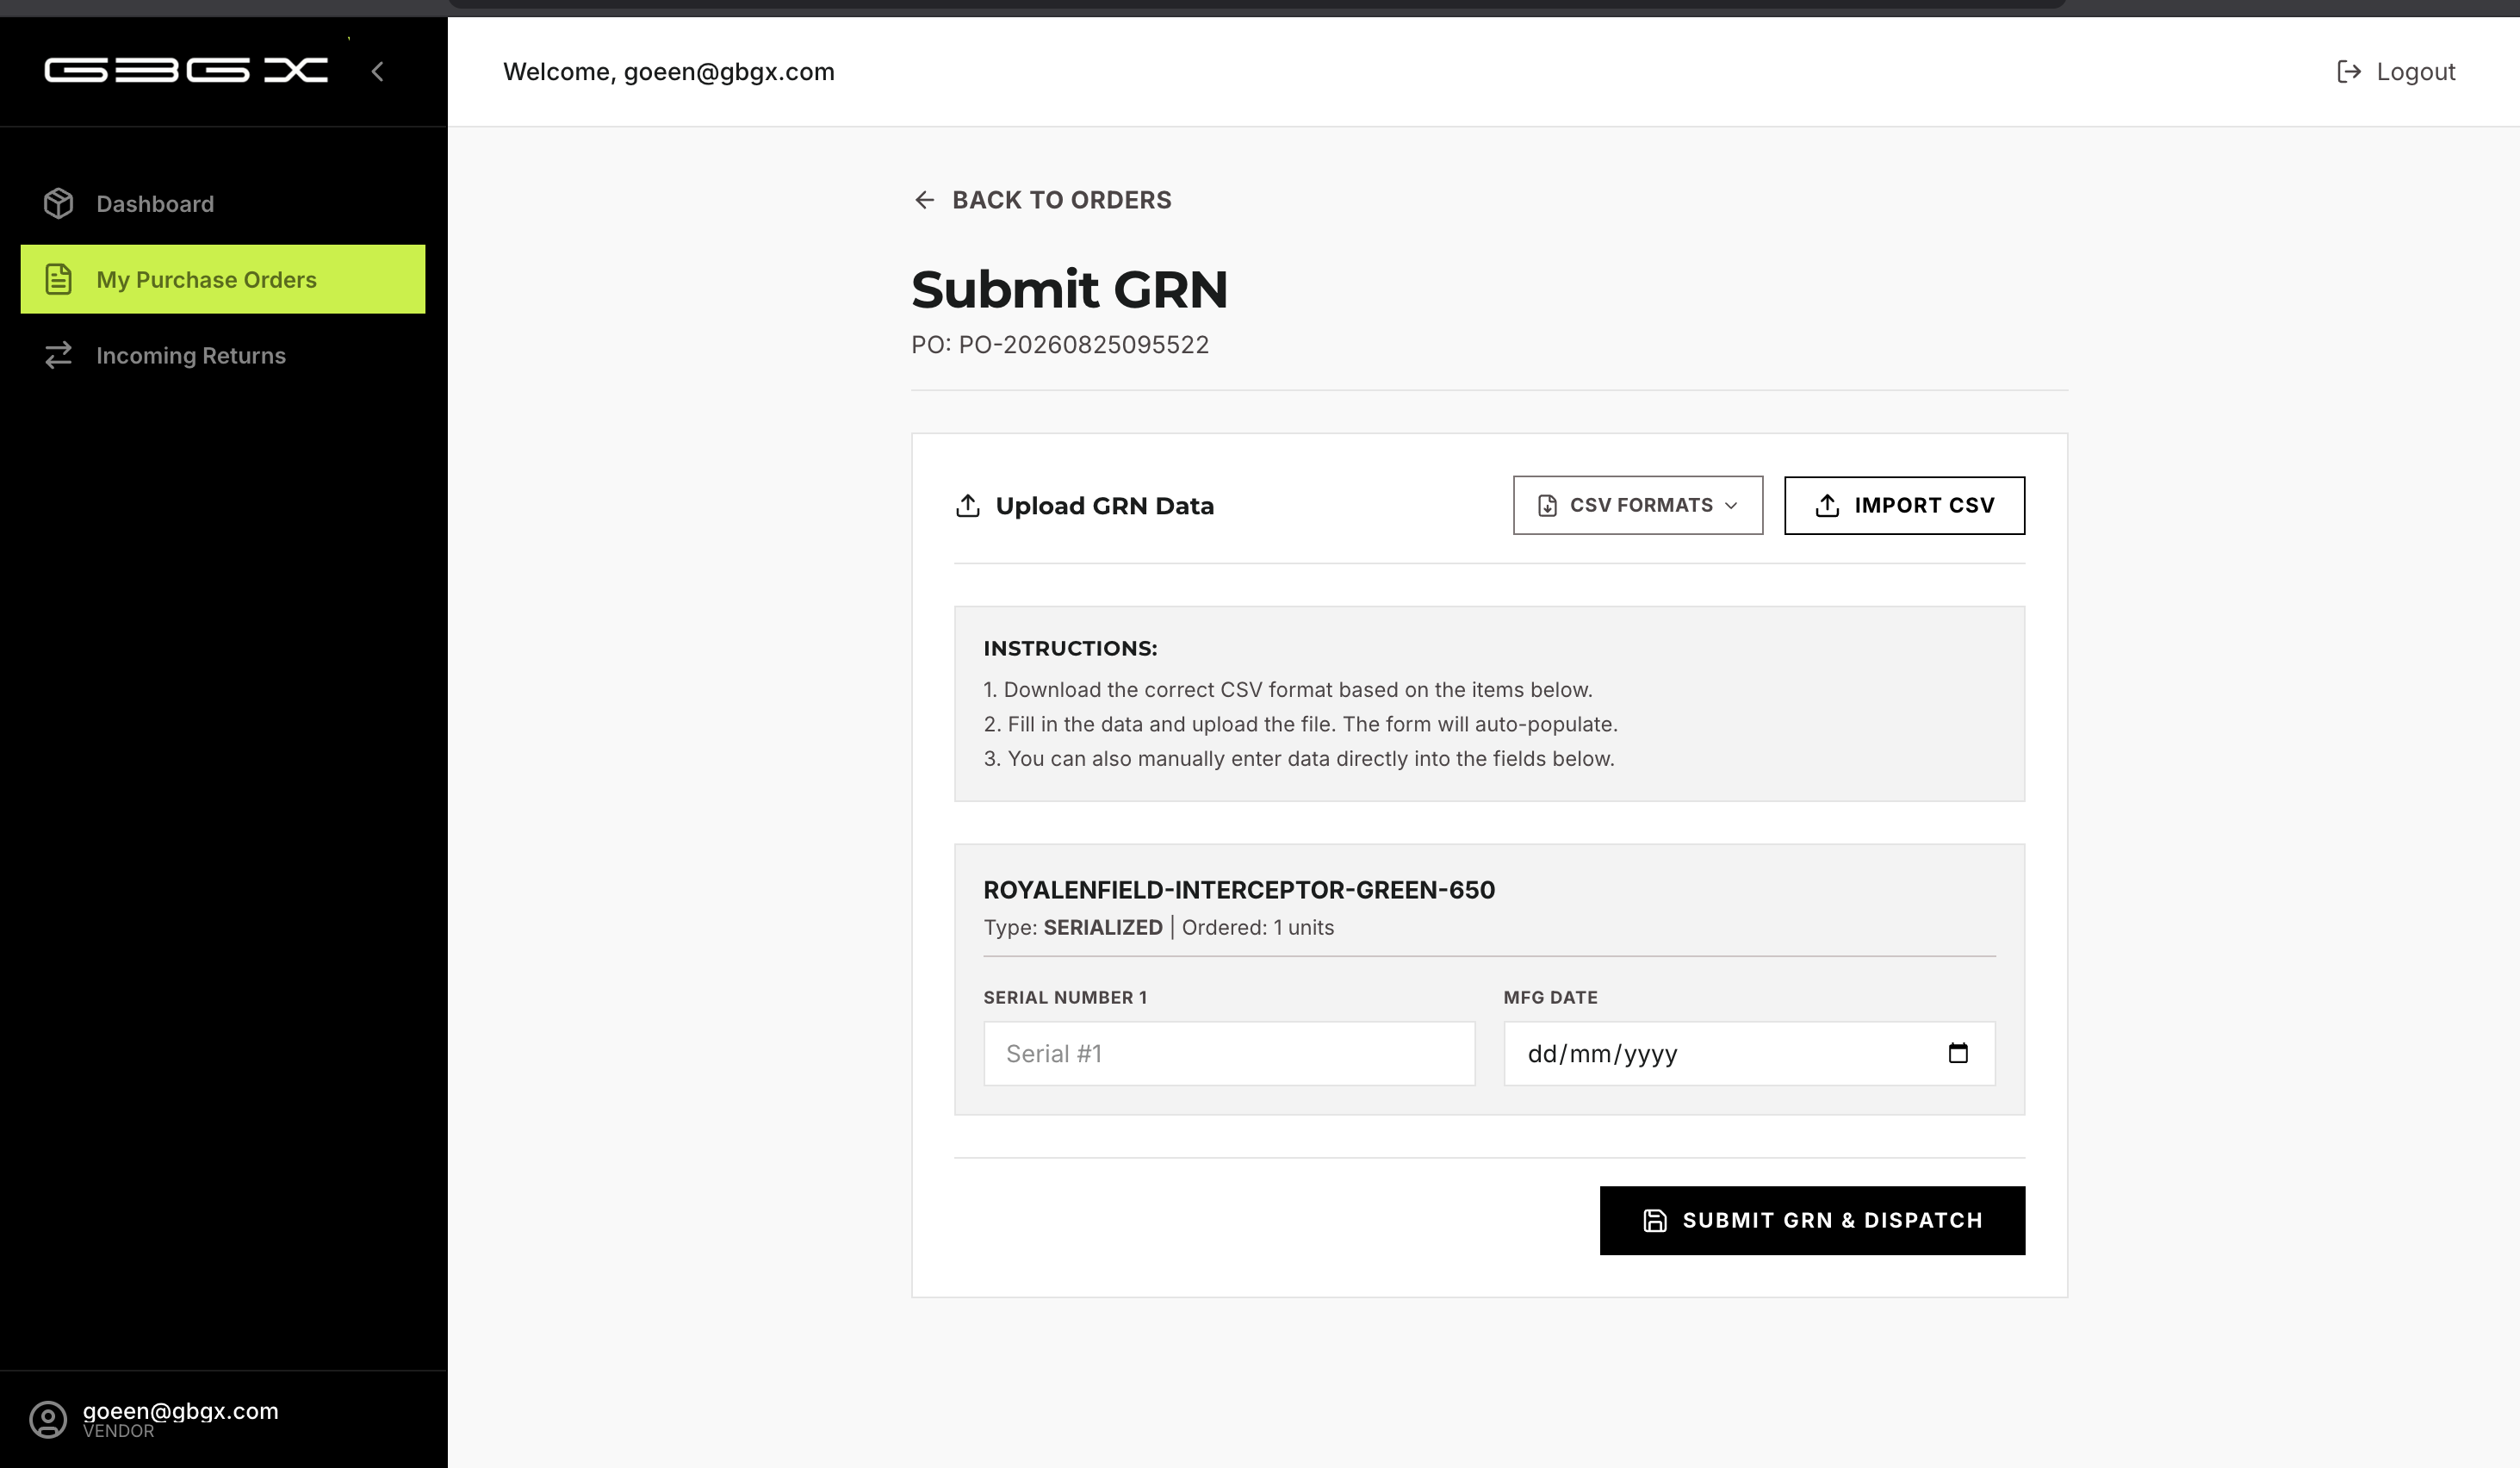
For Batch/Quantity Items: enter Quantities, Batch IDs, and Mfg Dates.
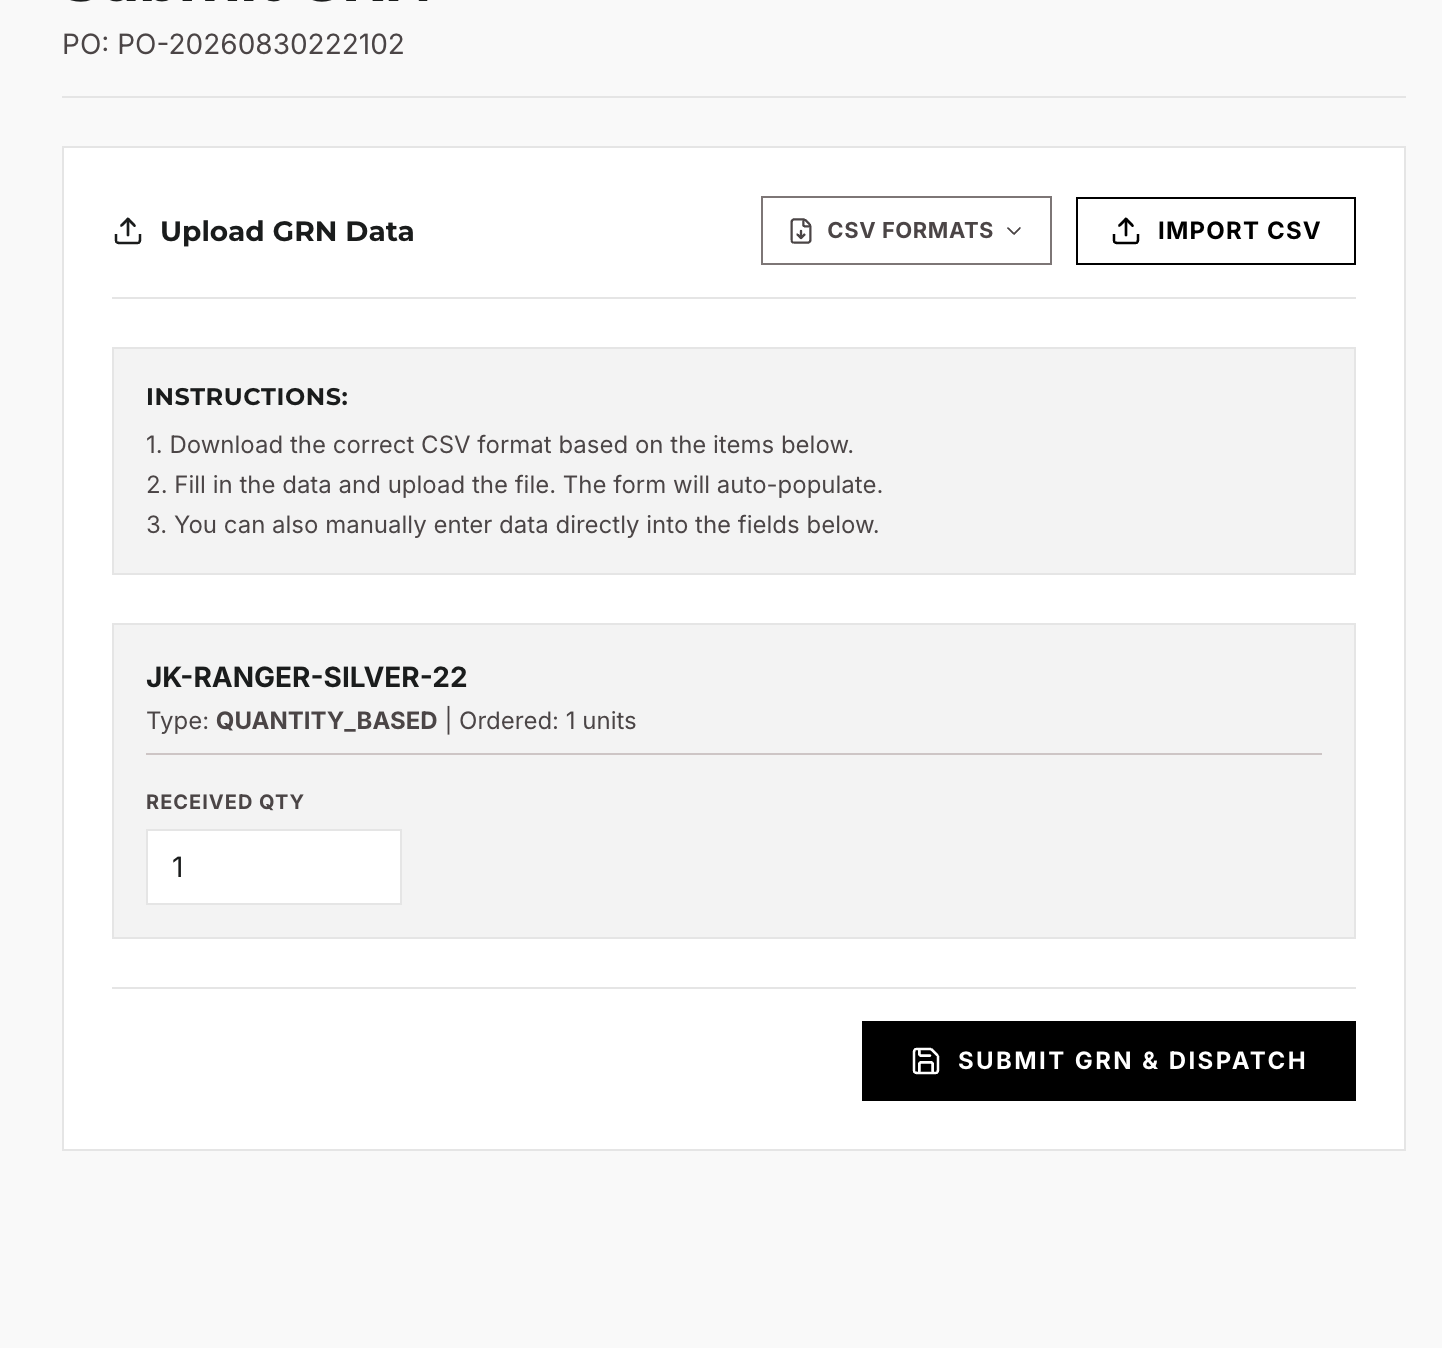
Click Submit GRN & Dispatch.
2.3 — Receiving & Putaway Queue (Central WH)
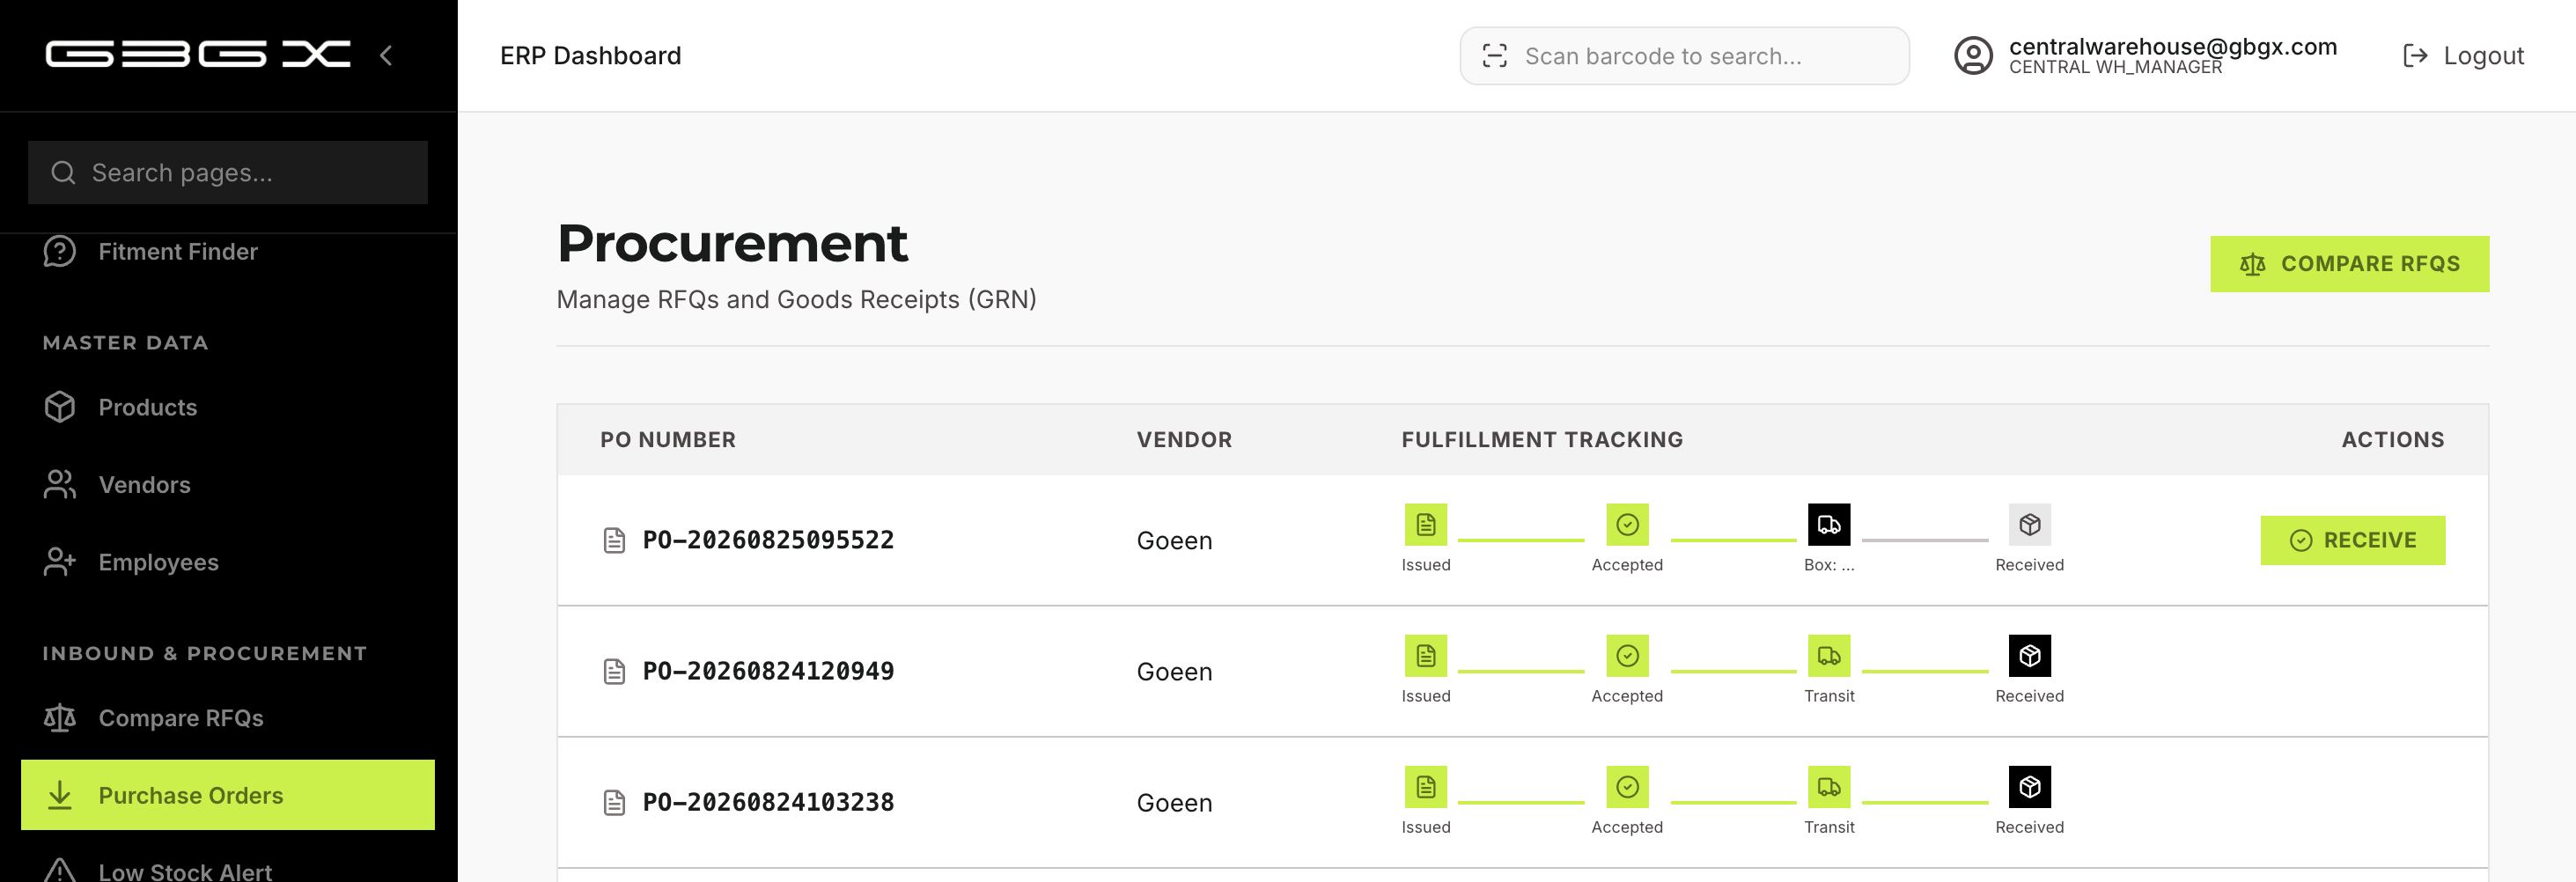
Central WH Admin navigates to Procurement.
Views PO as IN_TRANSIT; clicks Receive.
Navigate to Inventory → Putaway Queue.
Select the destination Bin and assign to an Employee.
Click Assign.
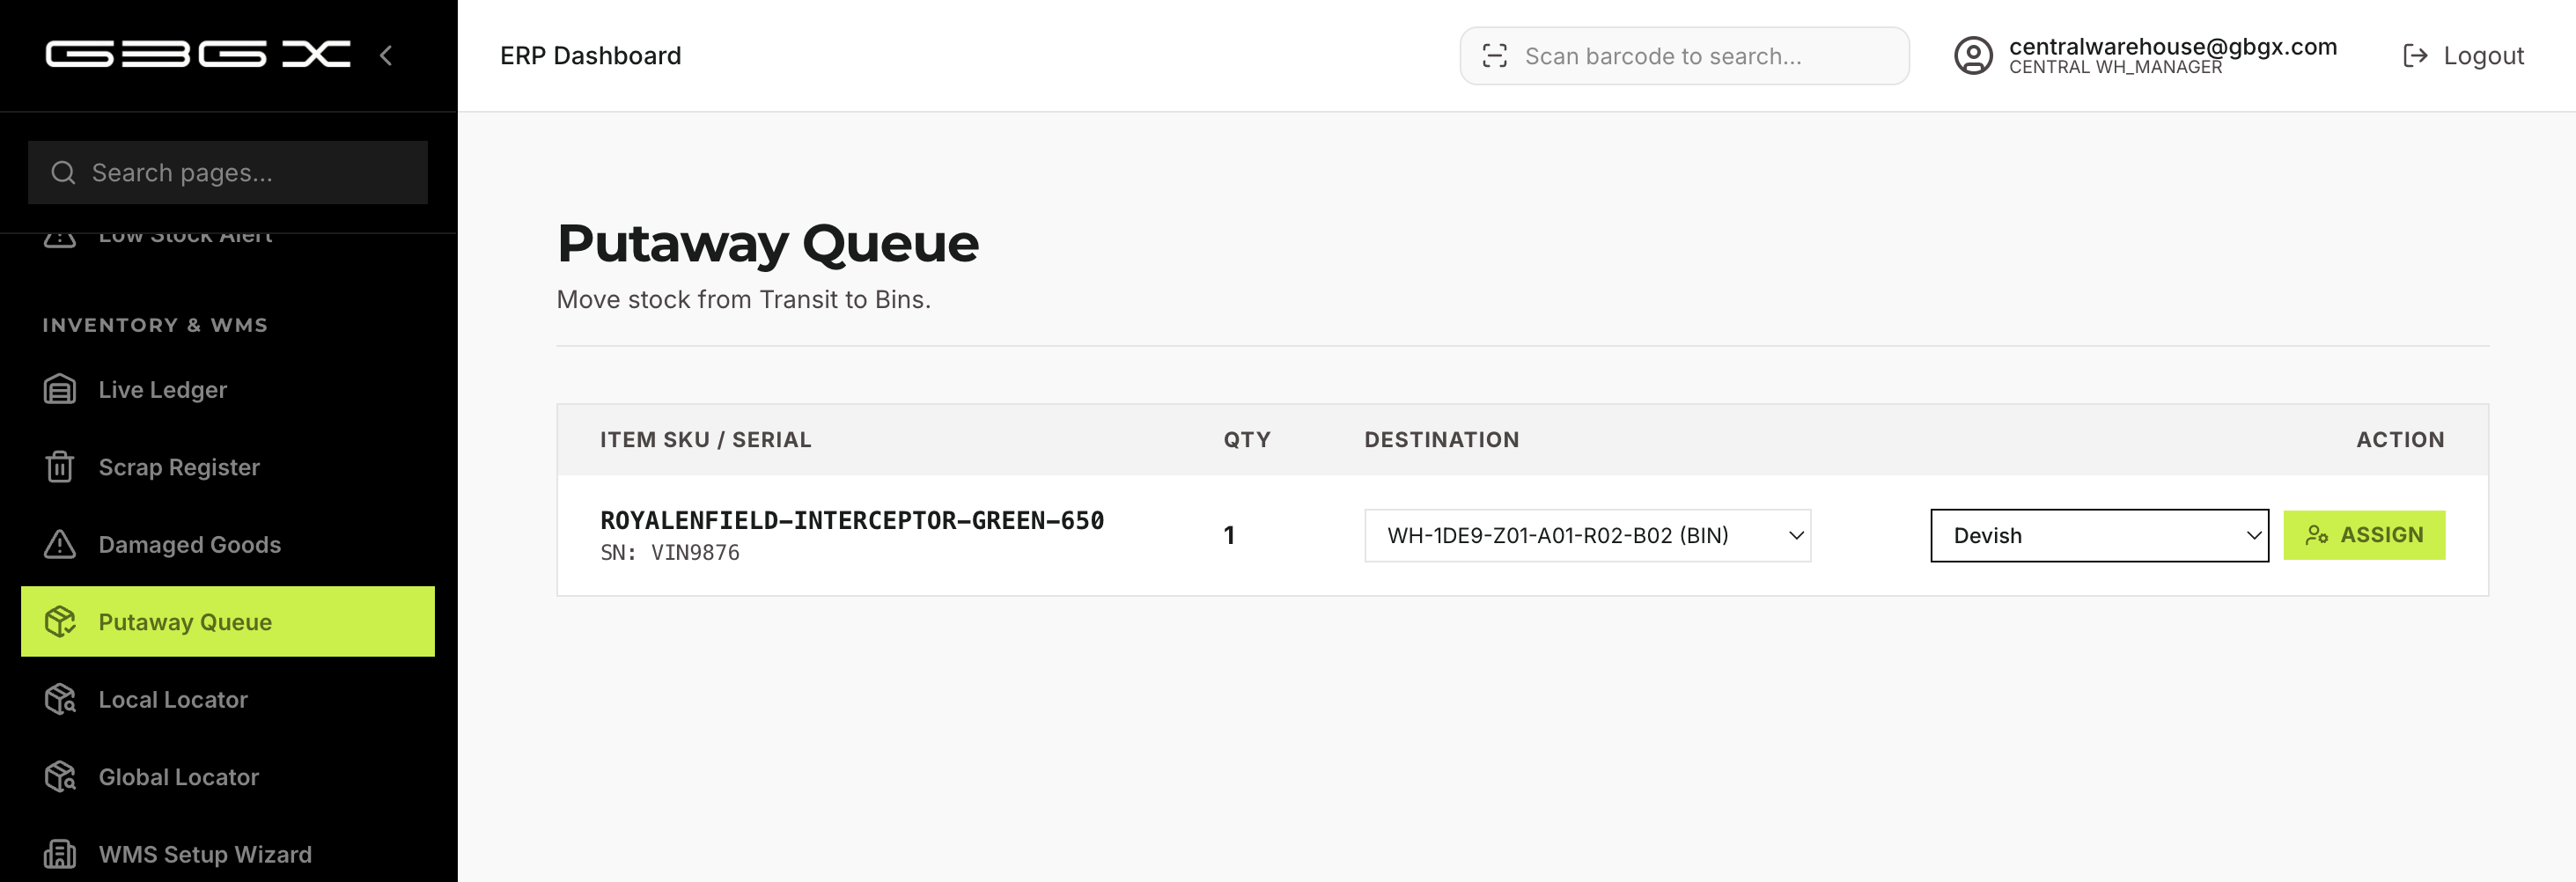
Employee executes Putaway via Employee Portal (see 5.1).
Chapter 3 — Warehouse Configuration & Live Ledger
3.1 — Warehouse Configuration (WMS Setup)
Navigate to Inventory → WMS Setup Wizard.
Enter Warehouse Code (locked to tenant ID).
Enter number of Zones, Aisles per Zone, Racks per Aisle, and Bins per Rack.
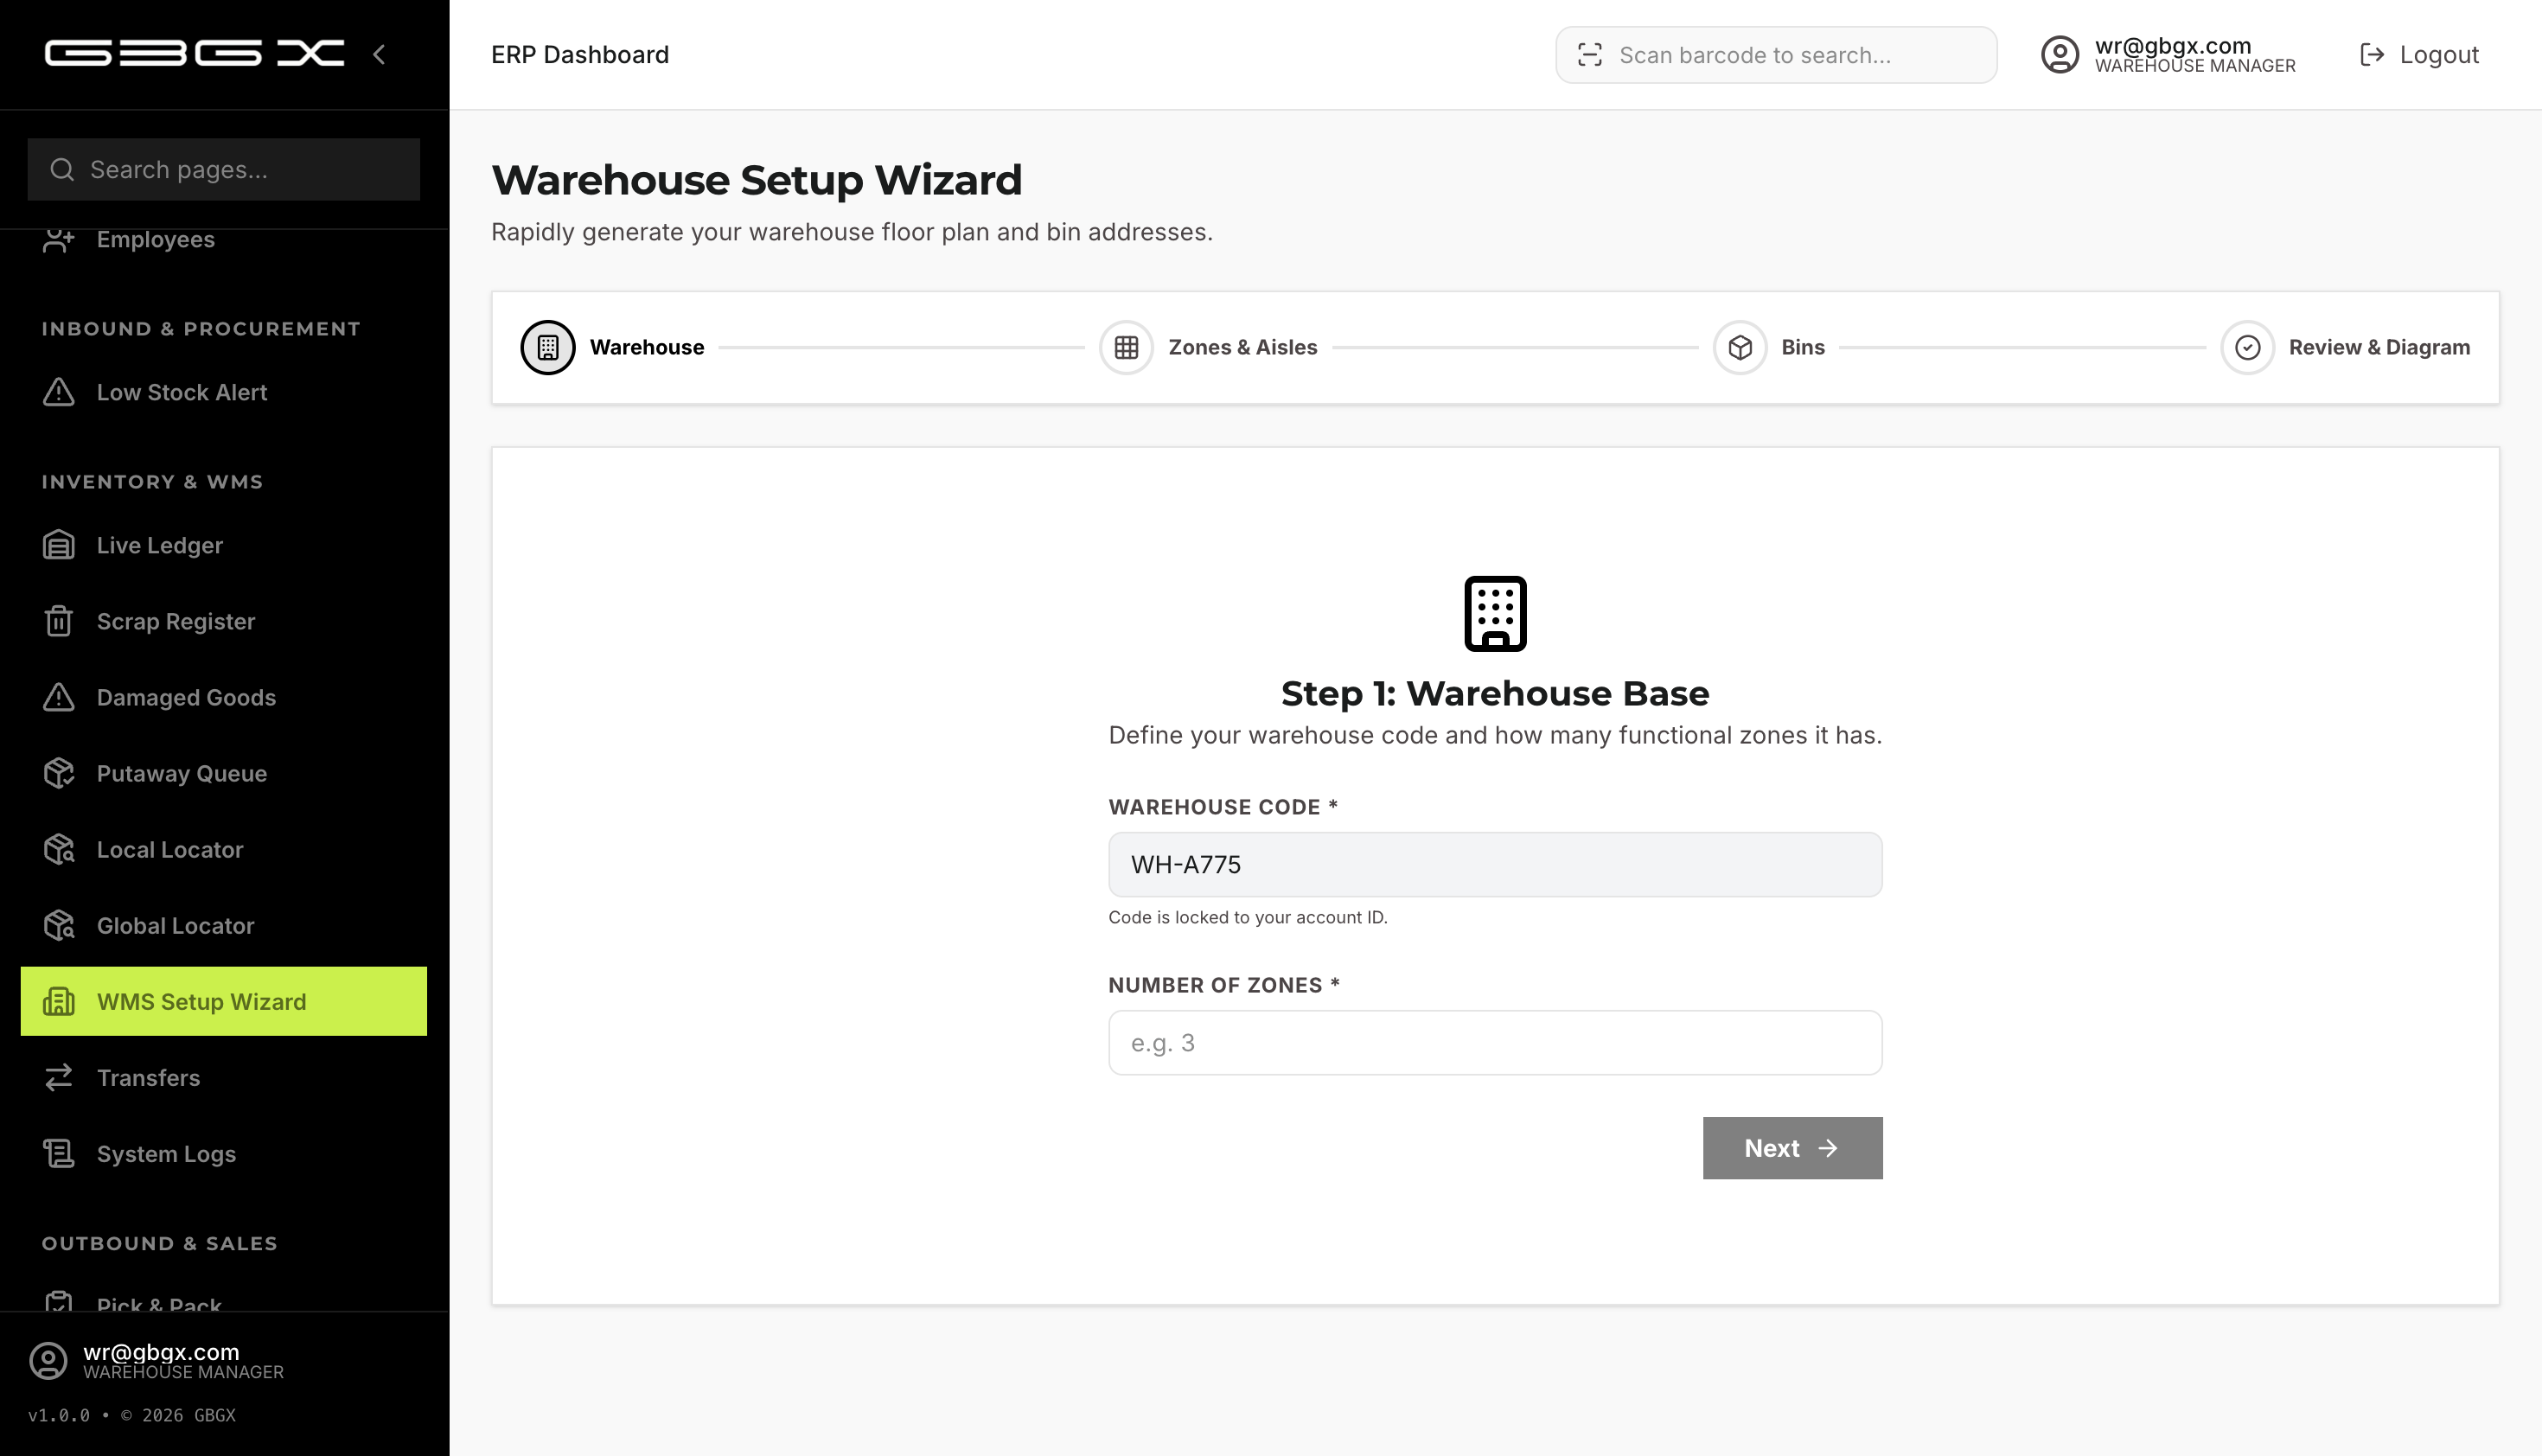
Click Generate Layout to preview.
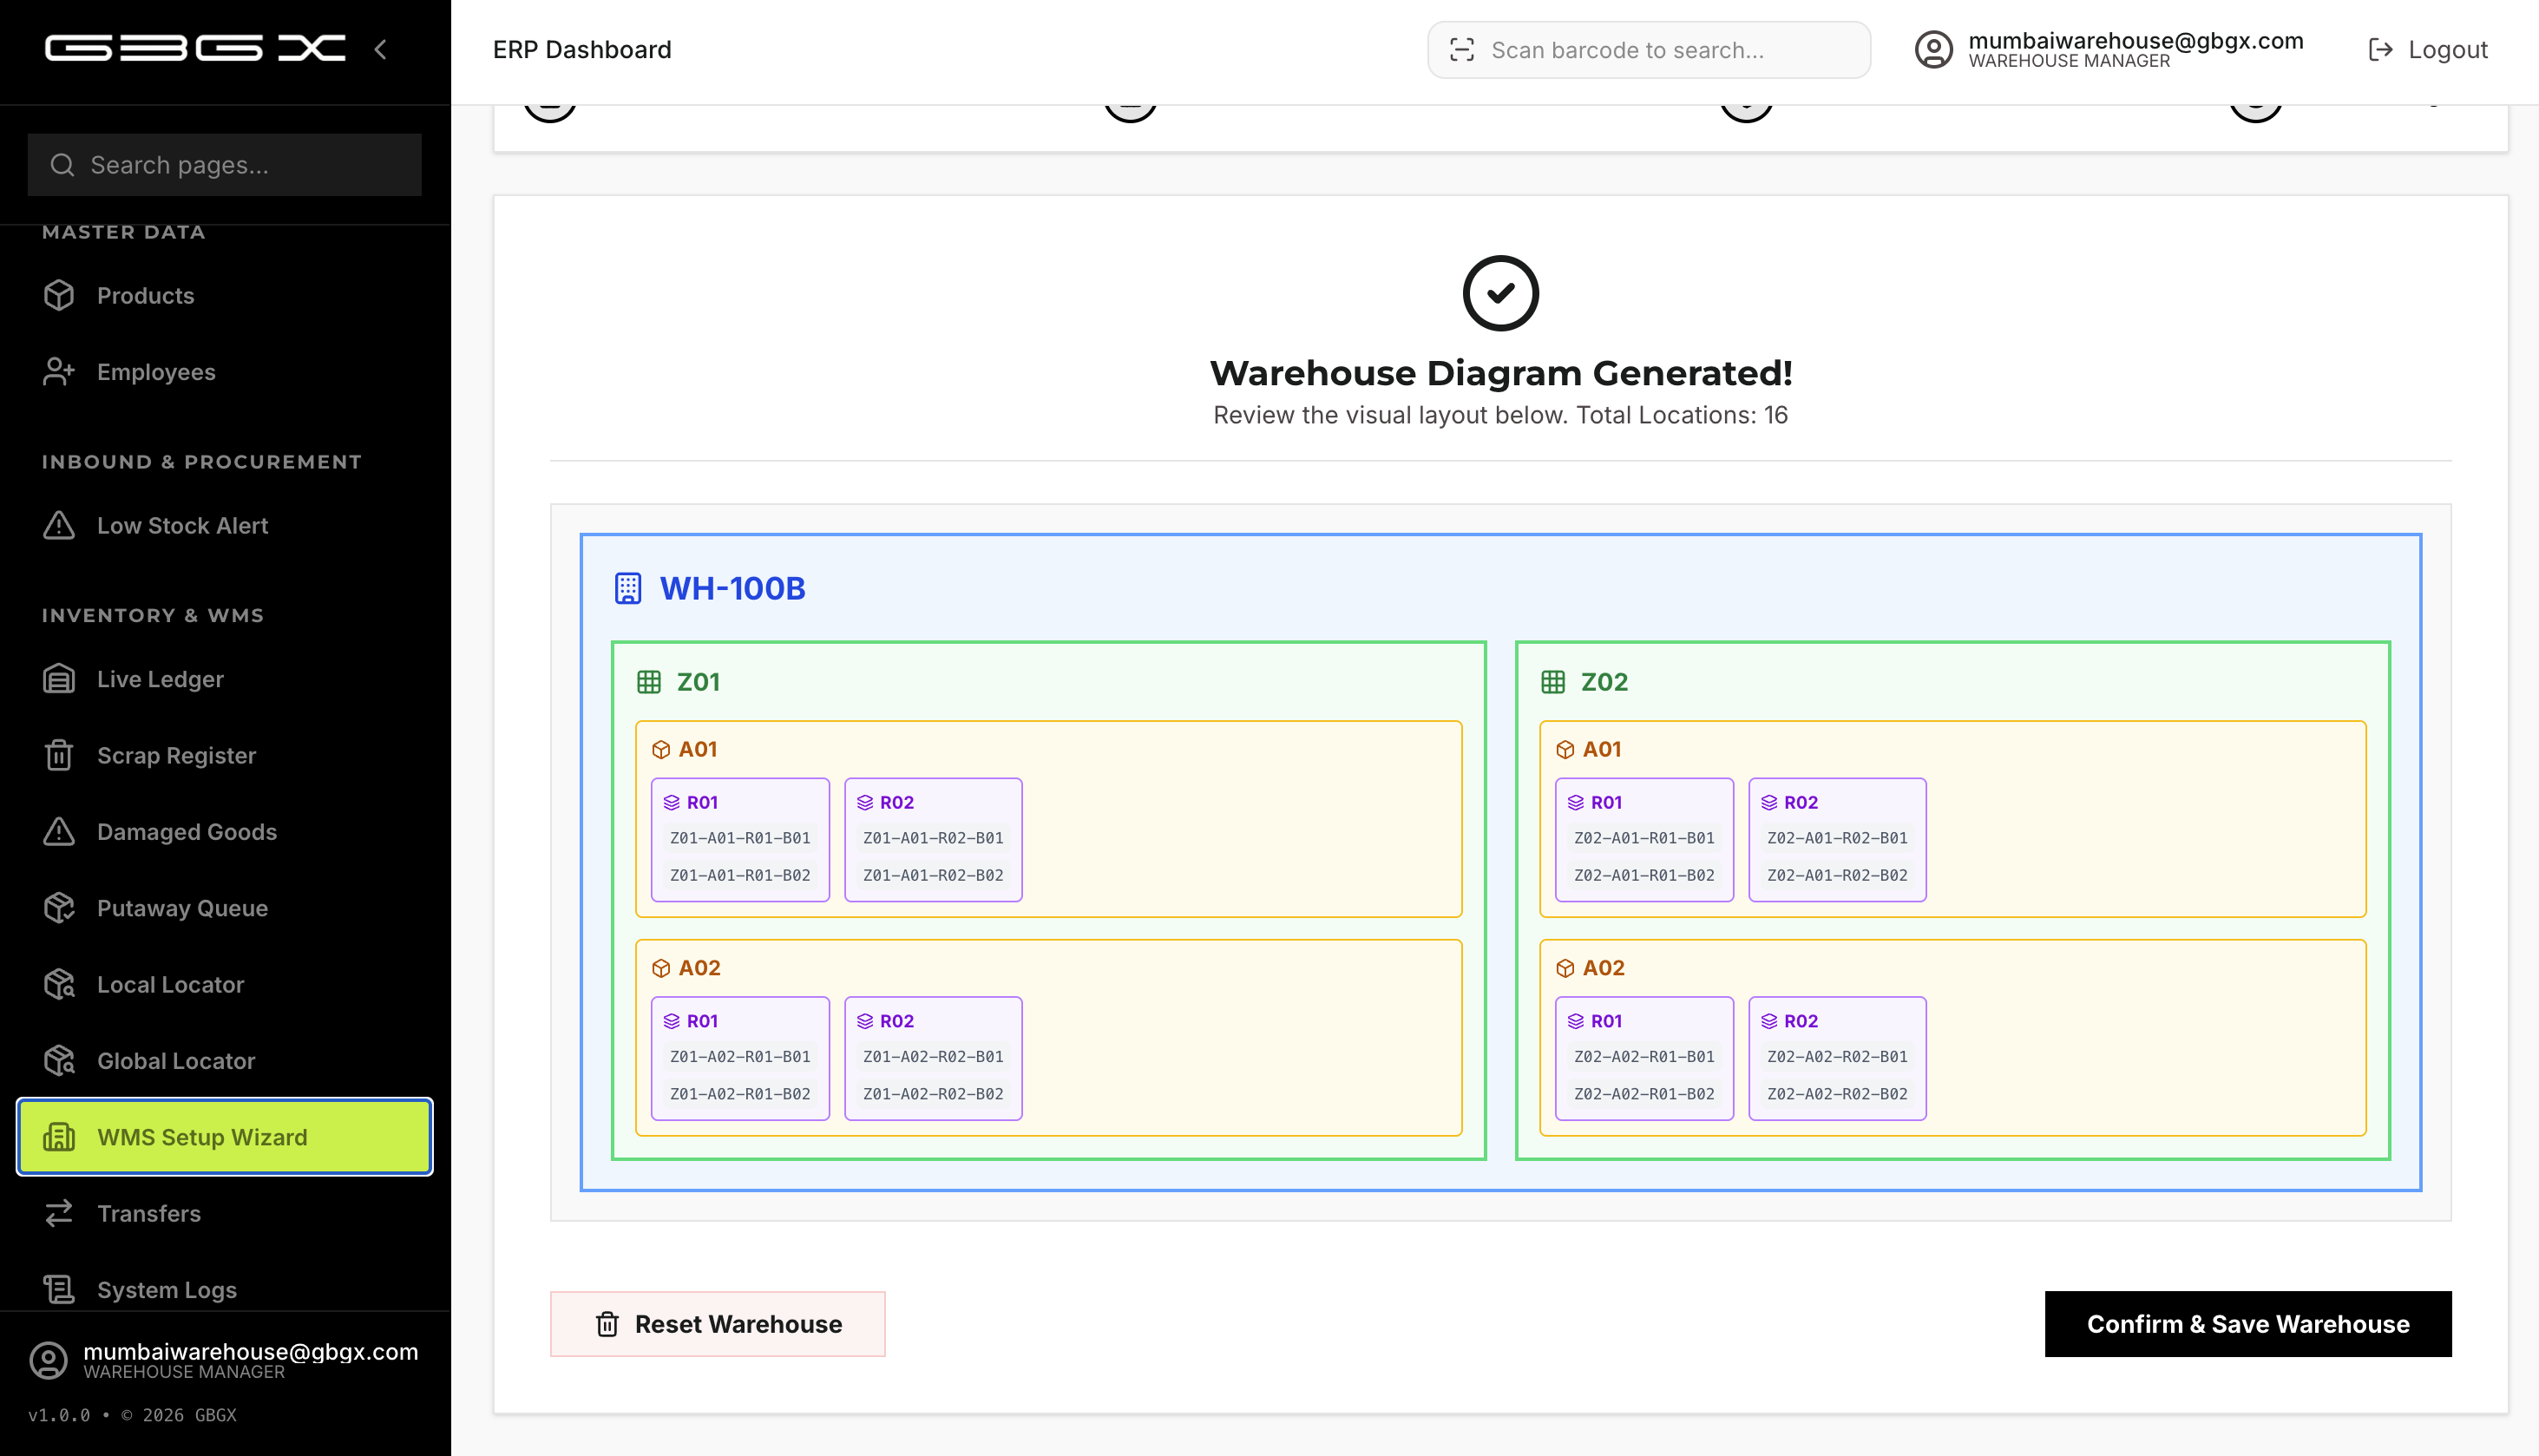
Click Confirm & Save.
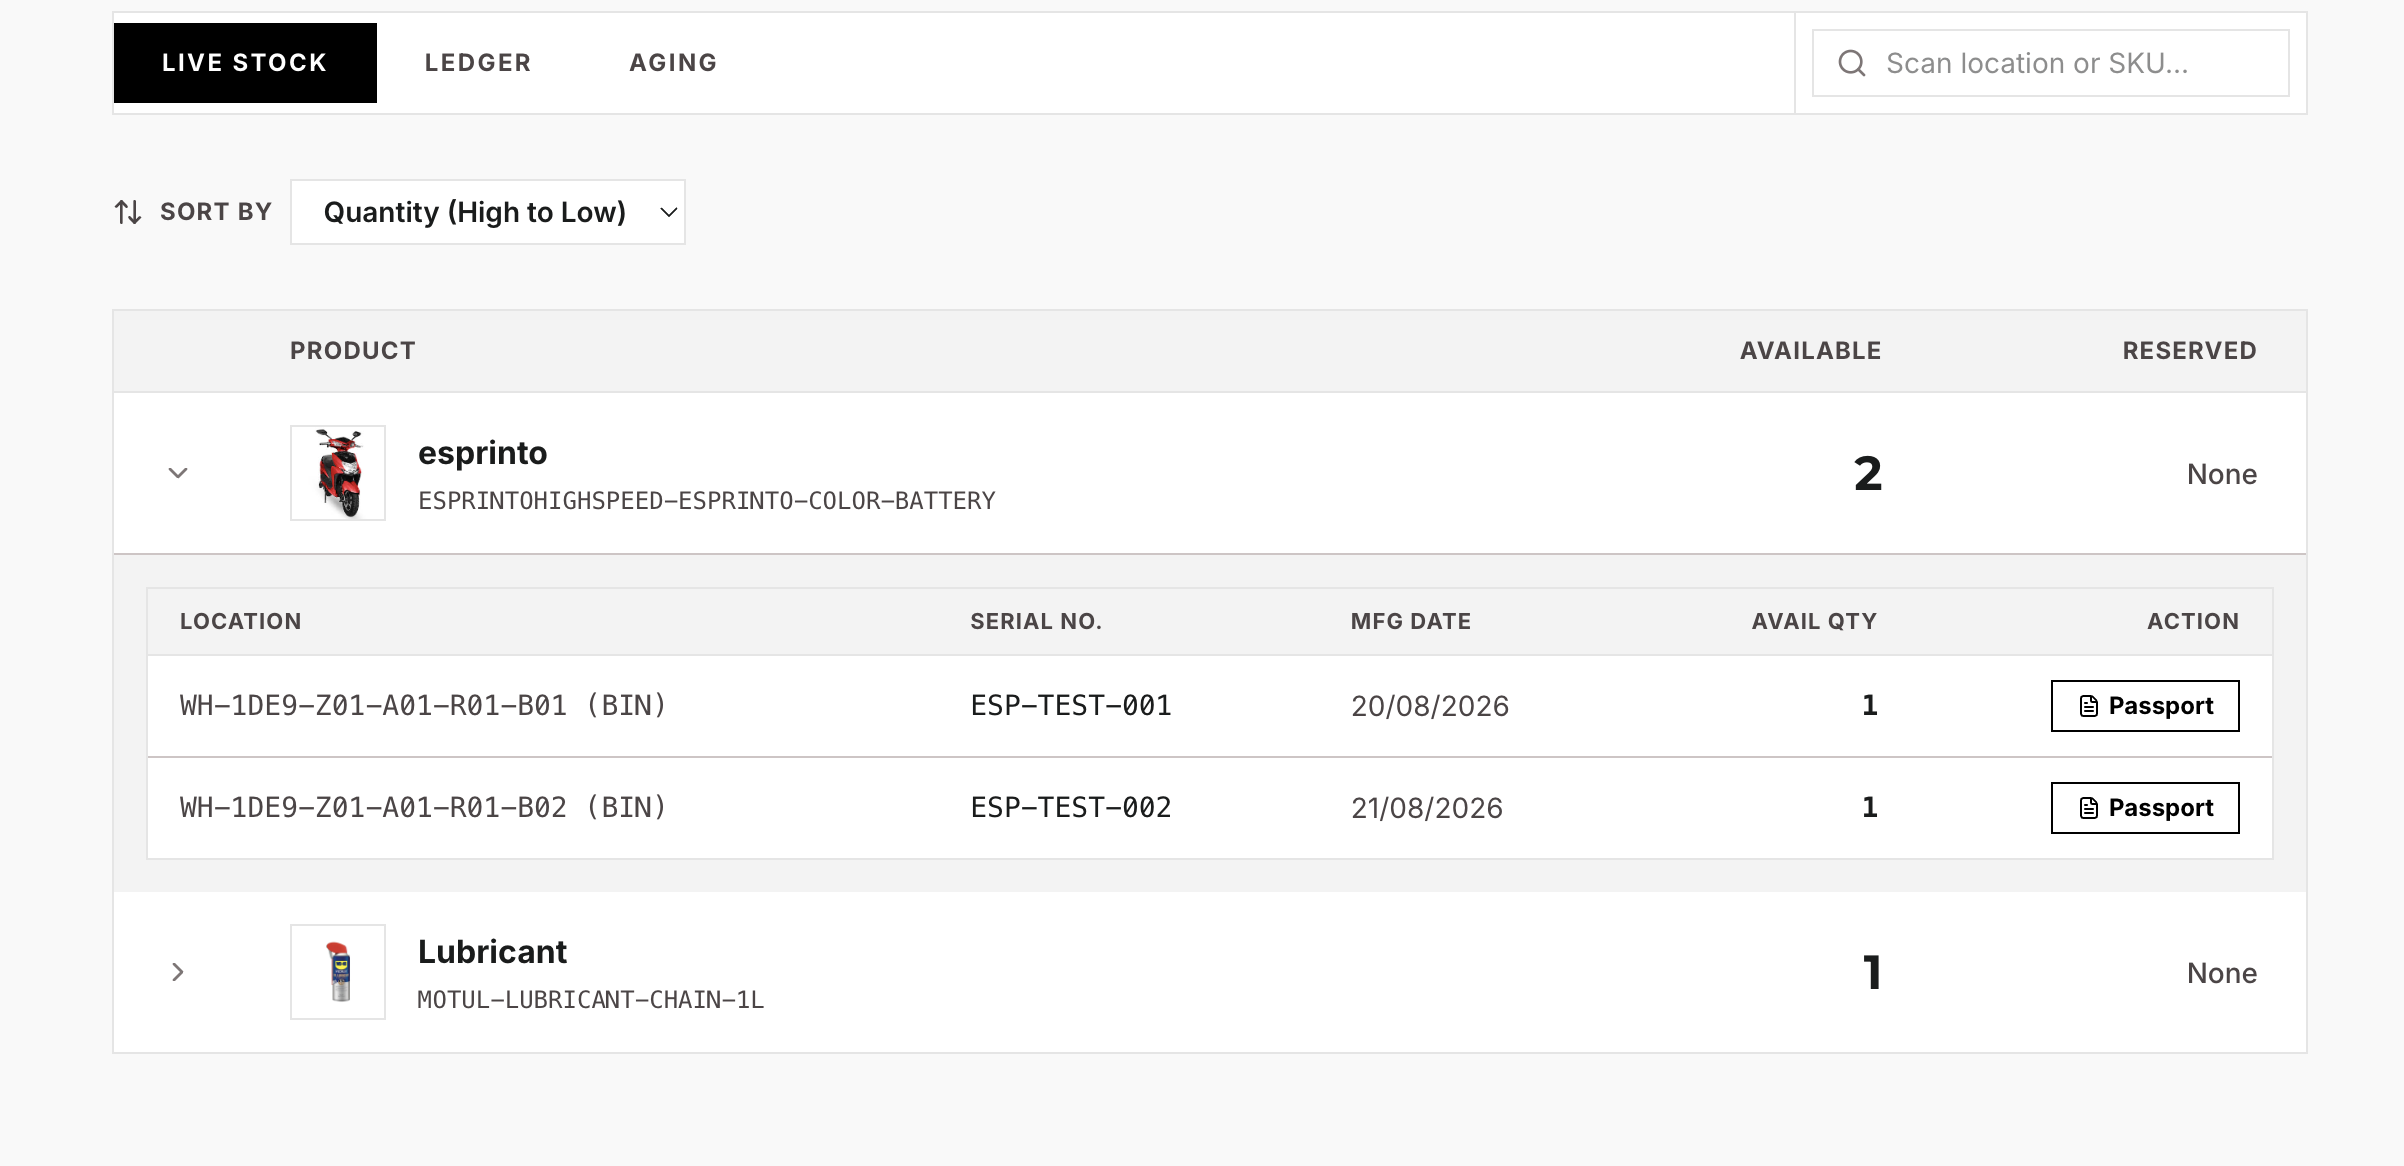
3.2 — The Live Ledger (Real-Time Quants)
Navigate to Inventory → Live Stock.
View KPI cards: Total SKUs, Total Units, Reserved Units, Inventory Value.
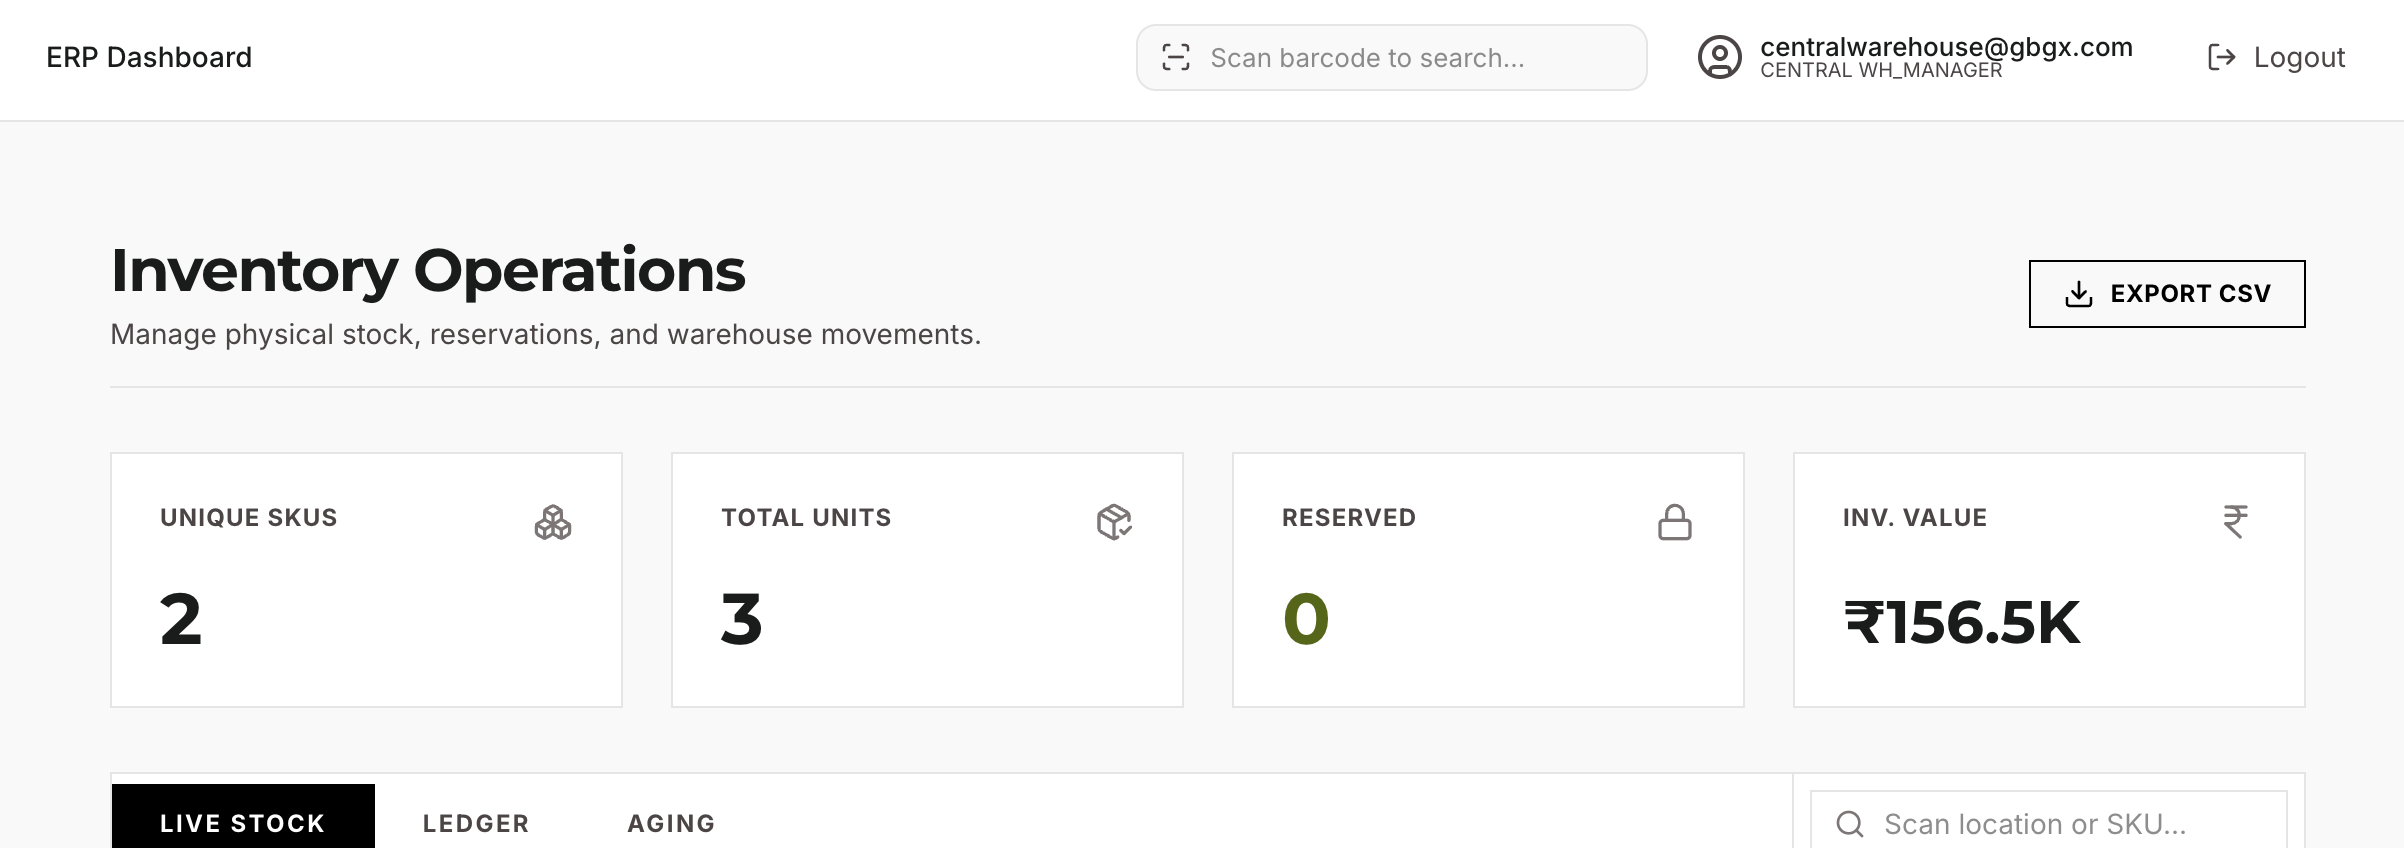
Expand an SKU row to view specific Bins, Serial Numbers, and Batch IDs.
3.3 — Internal Transfers (Entity to Entity)
Dealer logs in. Navigates to Transfers → New Transfer.
Selects Variant SKU, Quantity, and Source Entity (e.g., Central WH). Destination is locked to their own facility.
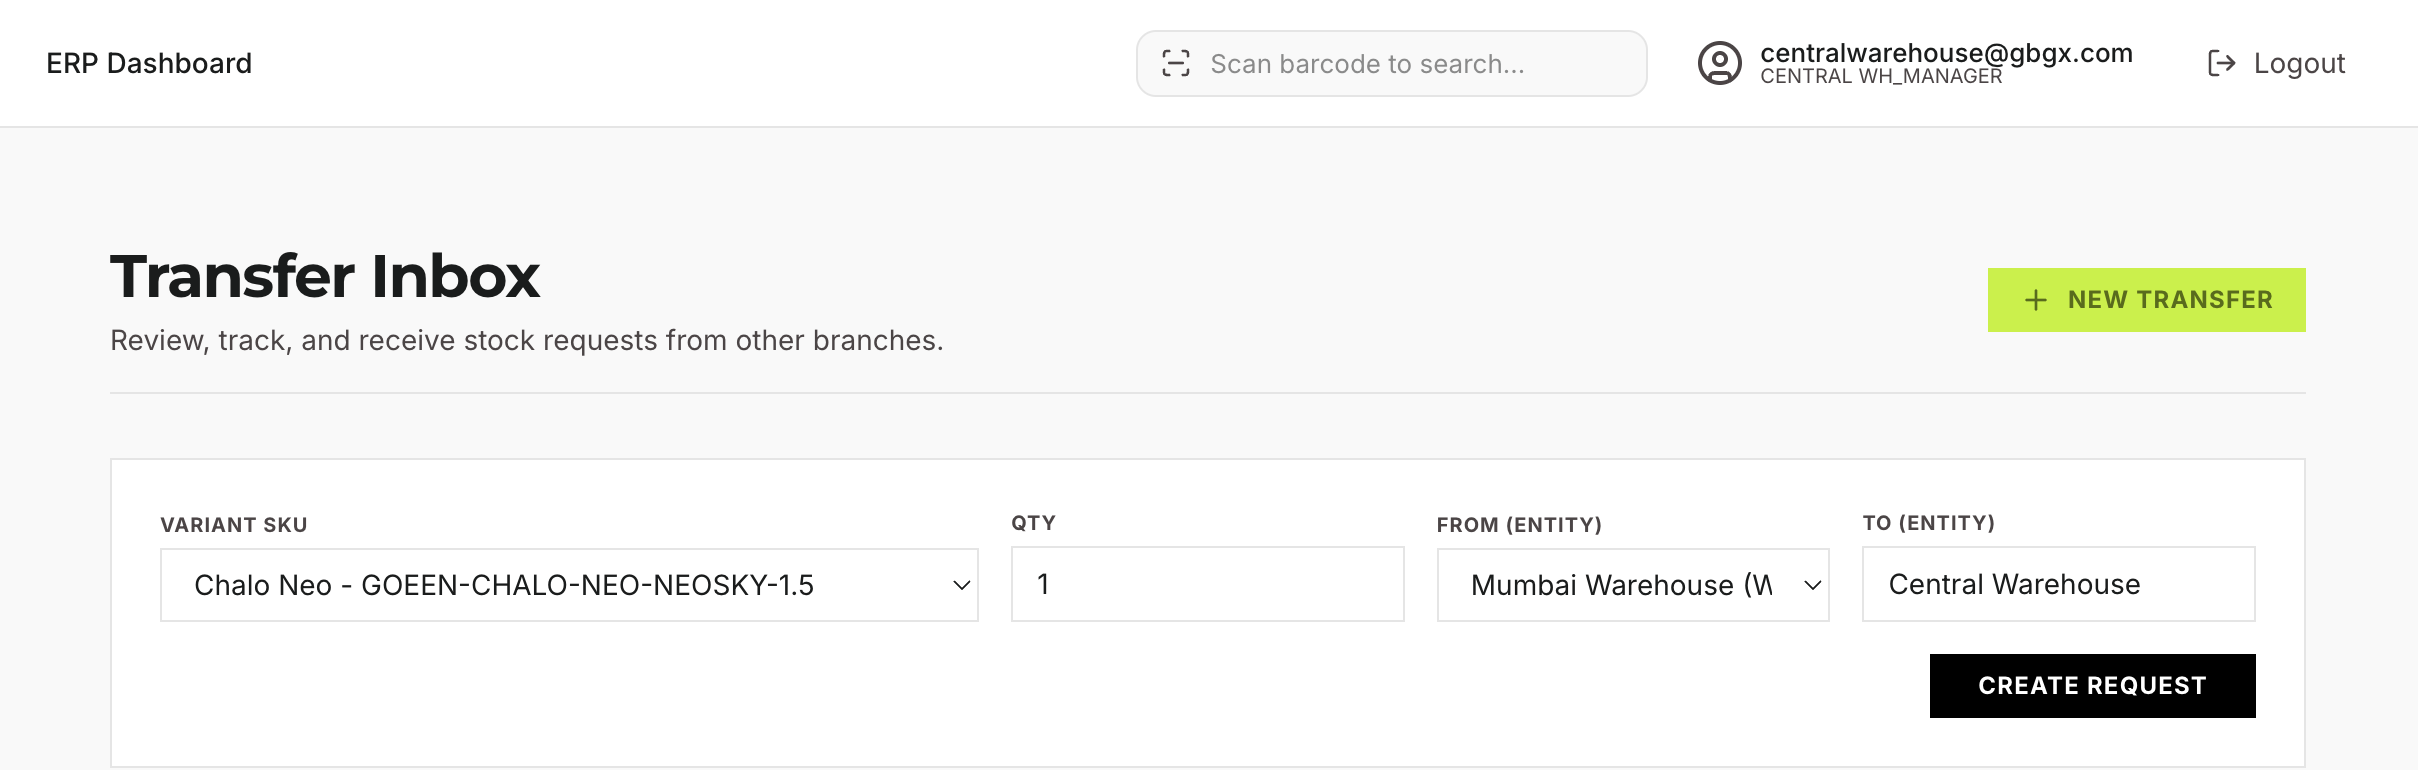
Clicks Create Request.
Navigates to Transfers. Clicks Approve & Pick on the pending request.

Picks, packs, and dispatches the item (same flow as 5.1).
Navigates to Transfers. Clicks Receive Transfer.

Dealer assigns a Putaway task to move the stock from Transit to a live Bin (see 2.3).
Chapter 4 — Sales, Service & Asset Lifecycle
4.1 — Dealer Sales Order & Finance
Dealer logs in. Navigates to Sales → Create Order.
Search Customer by 10-digit phone number; resolve multiple matches through the selection dropdown.
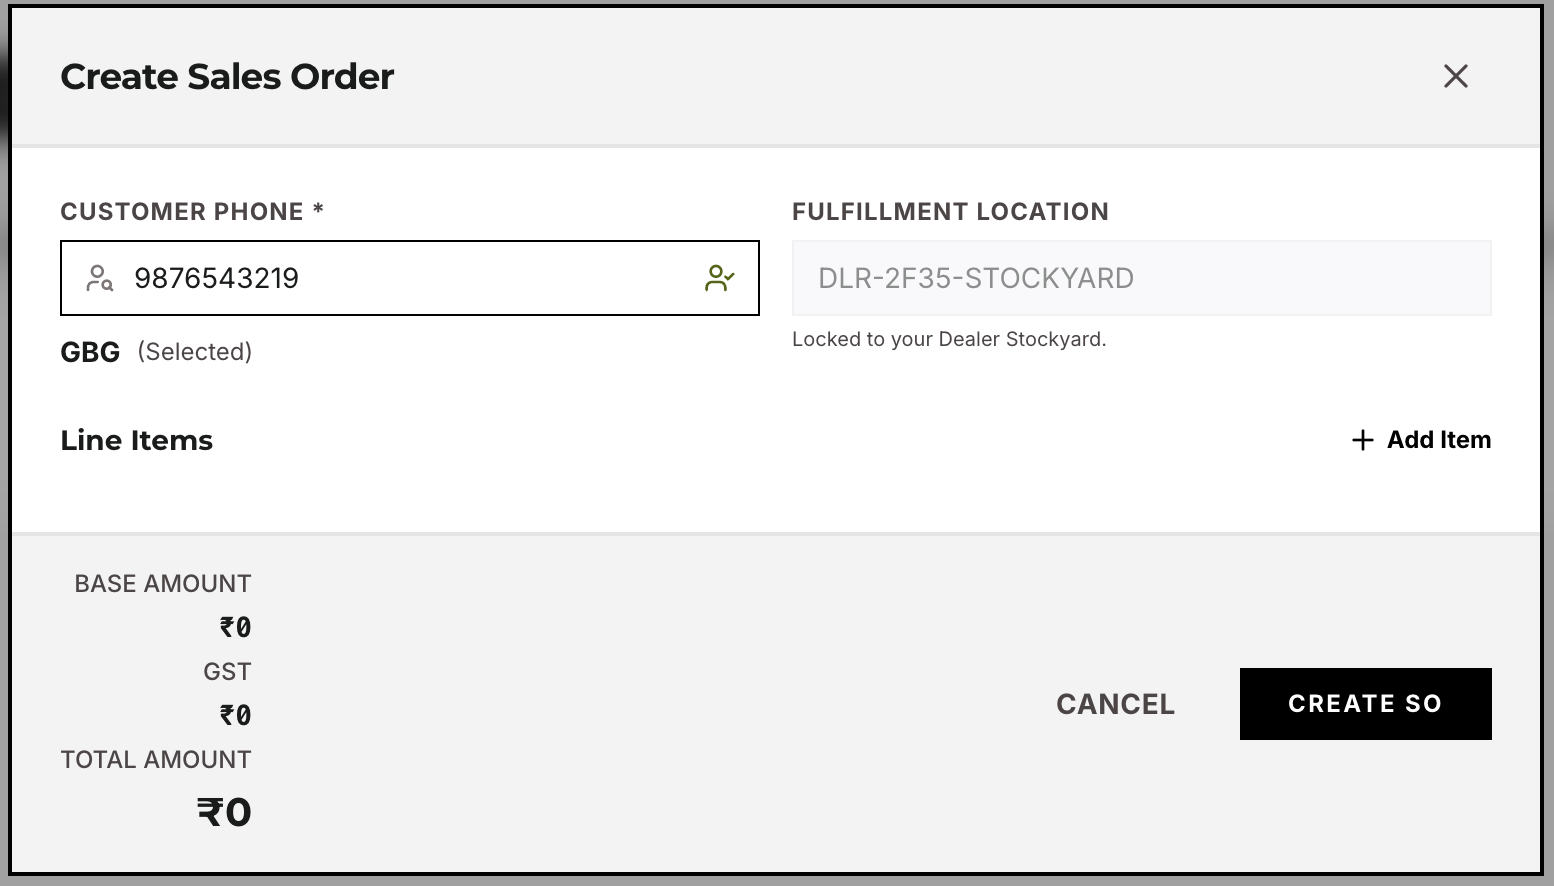
Select Variant SKU. If serialized, select the specific Serial Number.
Click Create SO.
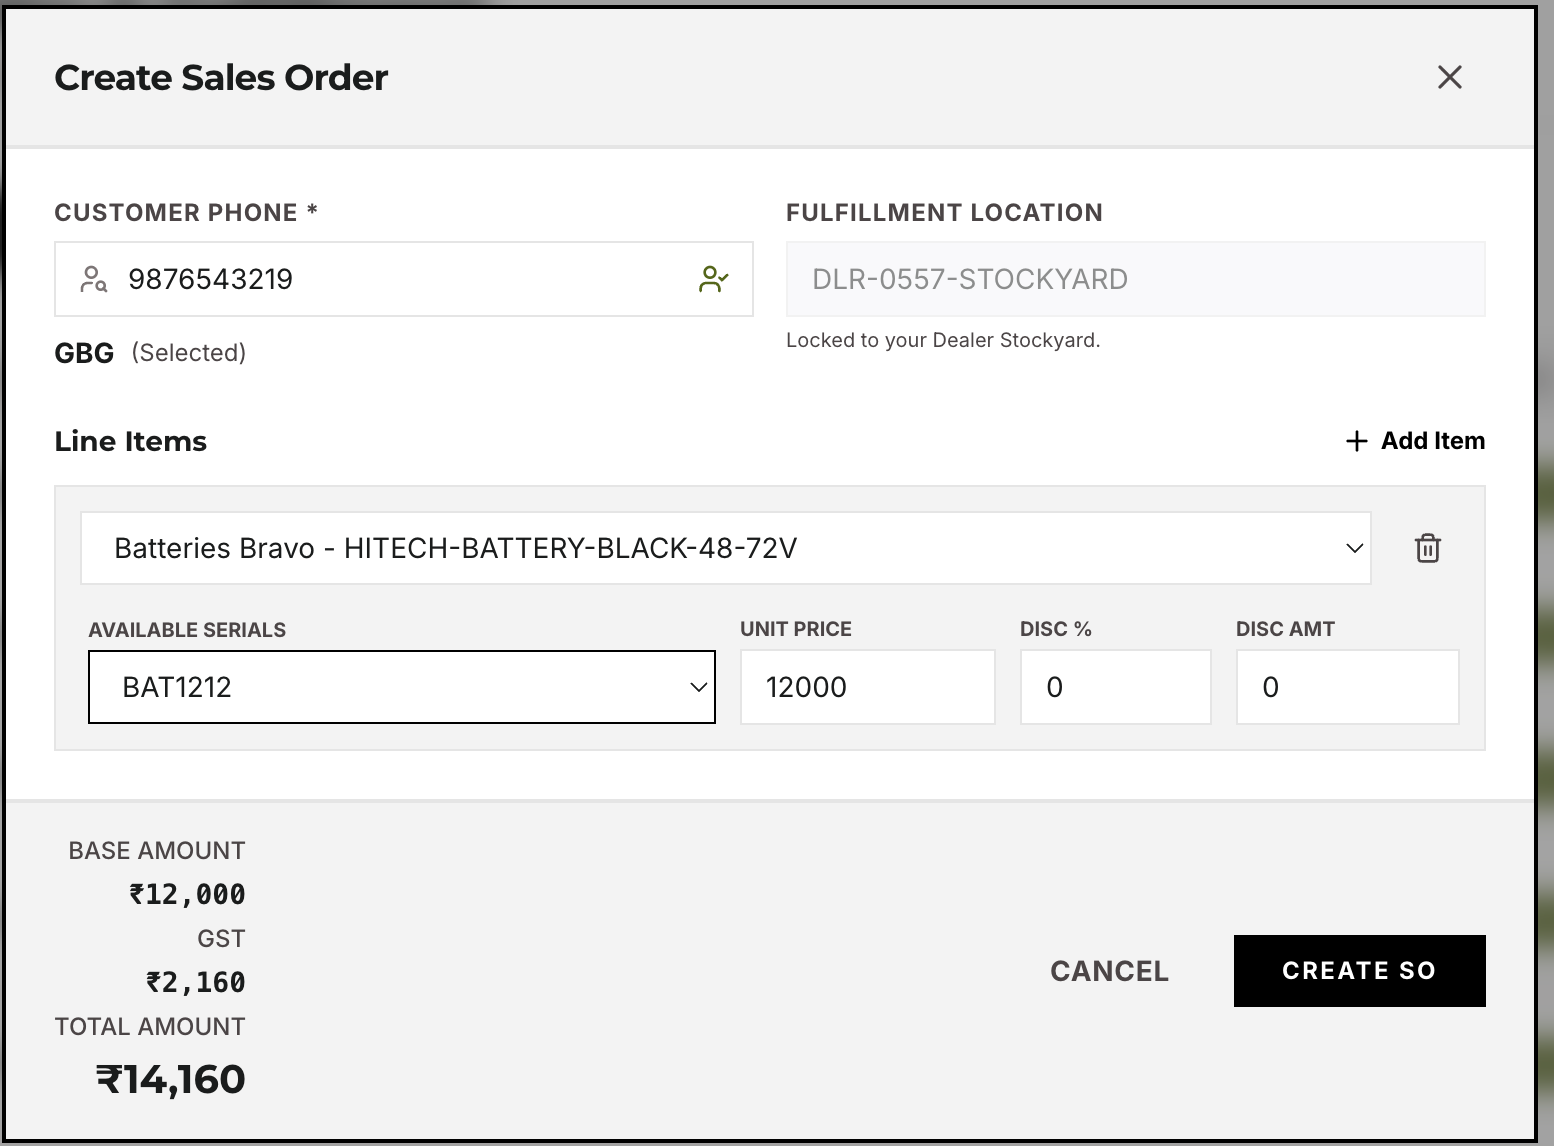
Log Payment. Click Pack & Challan.

Click Deliver.

4.2 — Finance & Credit Notes
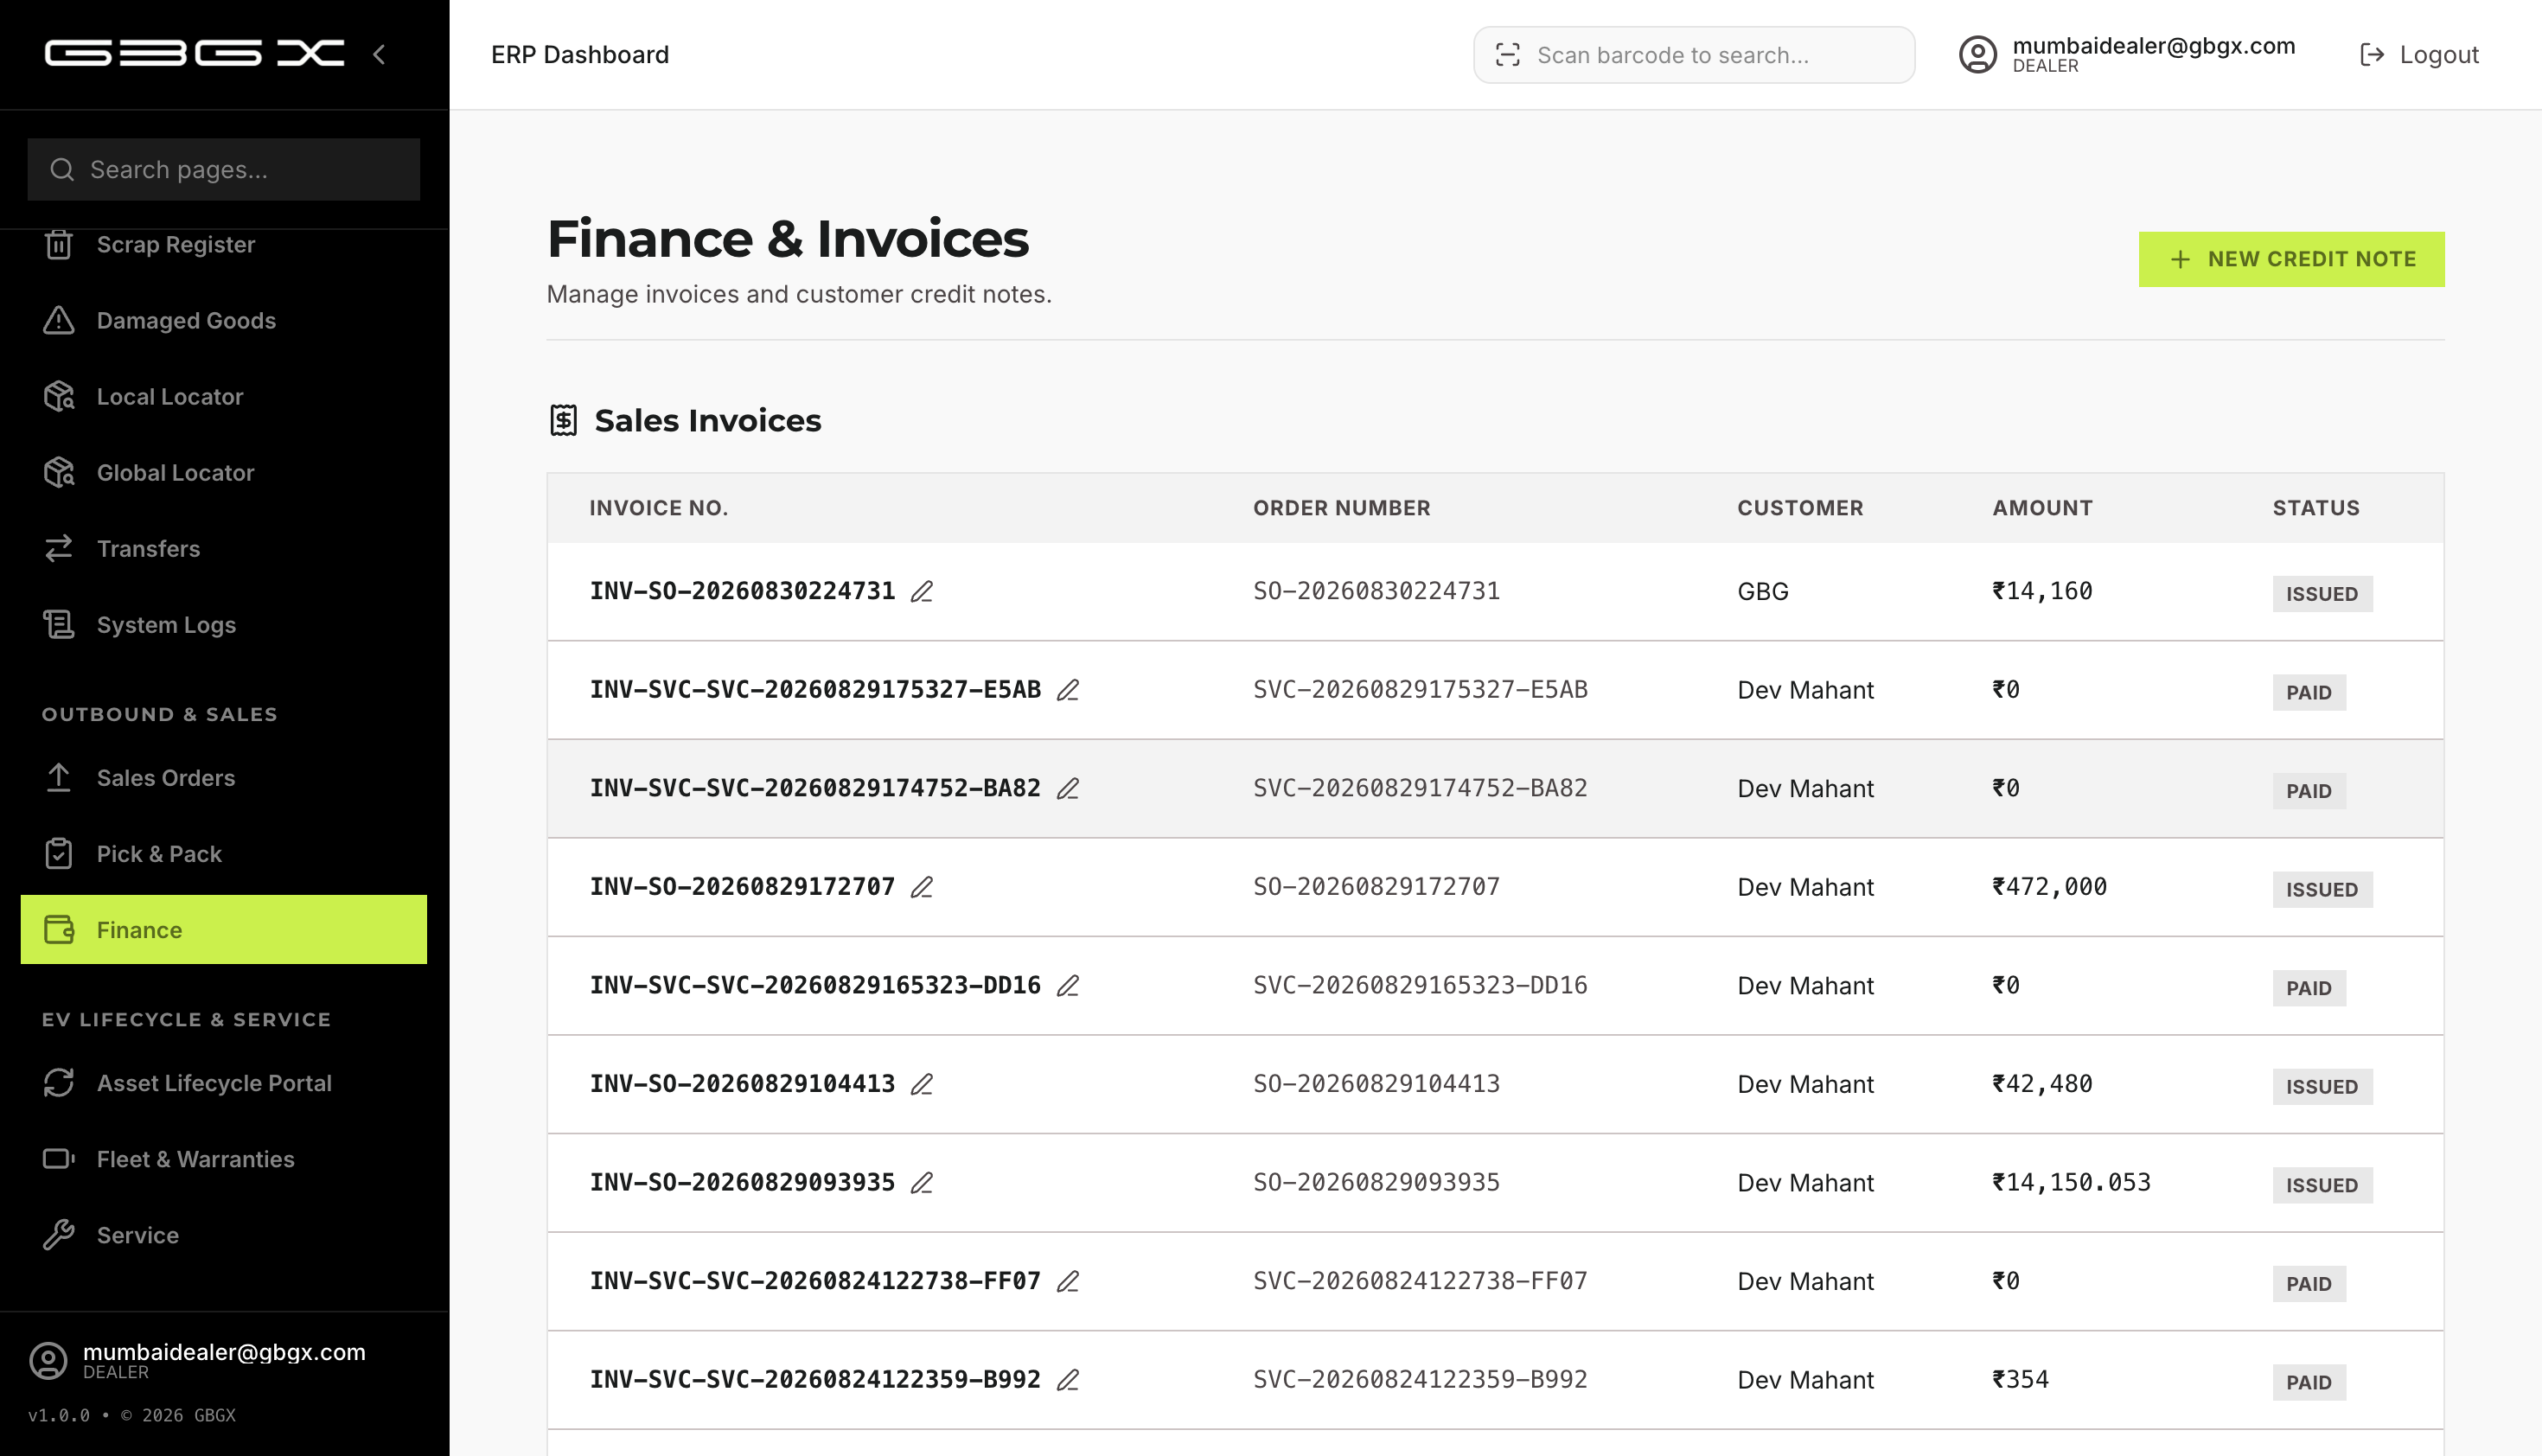
Navigate to Finance.
View Sales Invoices. Update physical invoice numbers if needed (to sync with GST books).
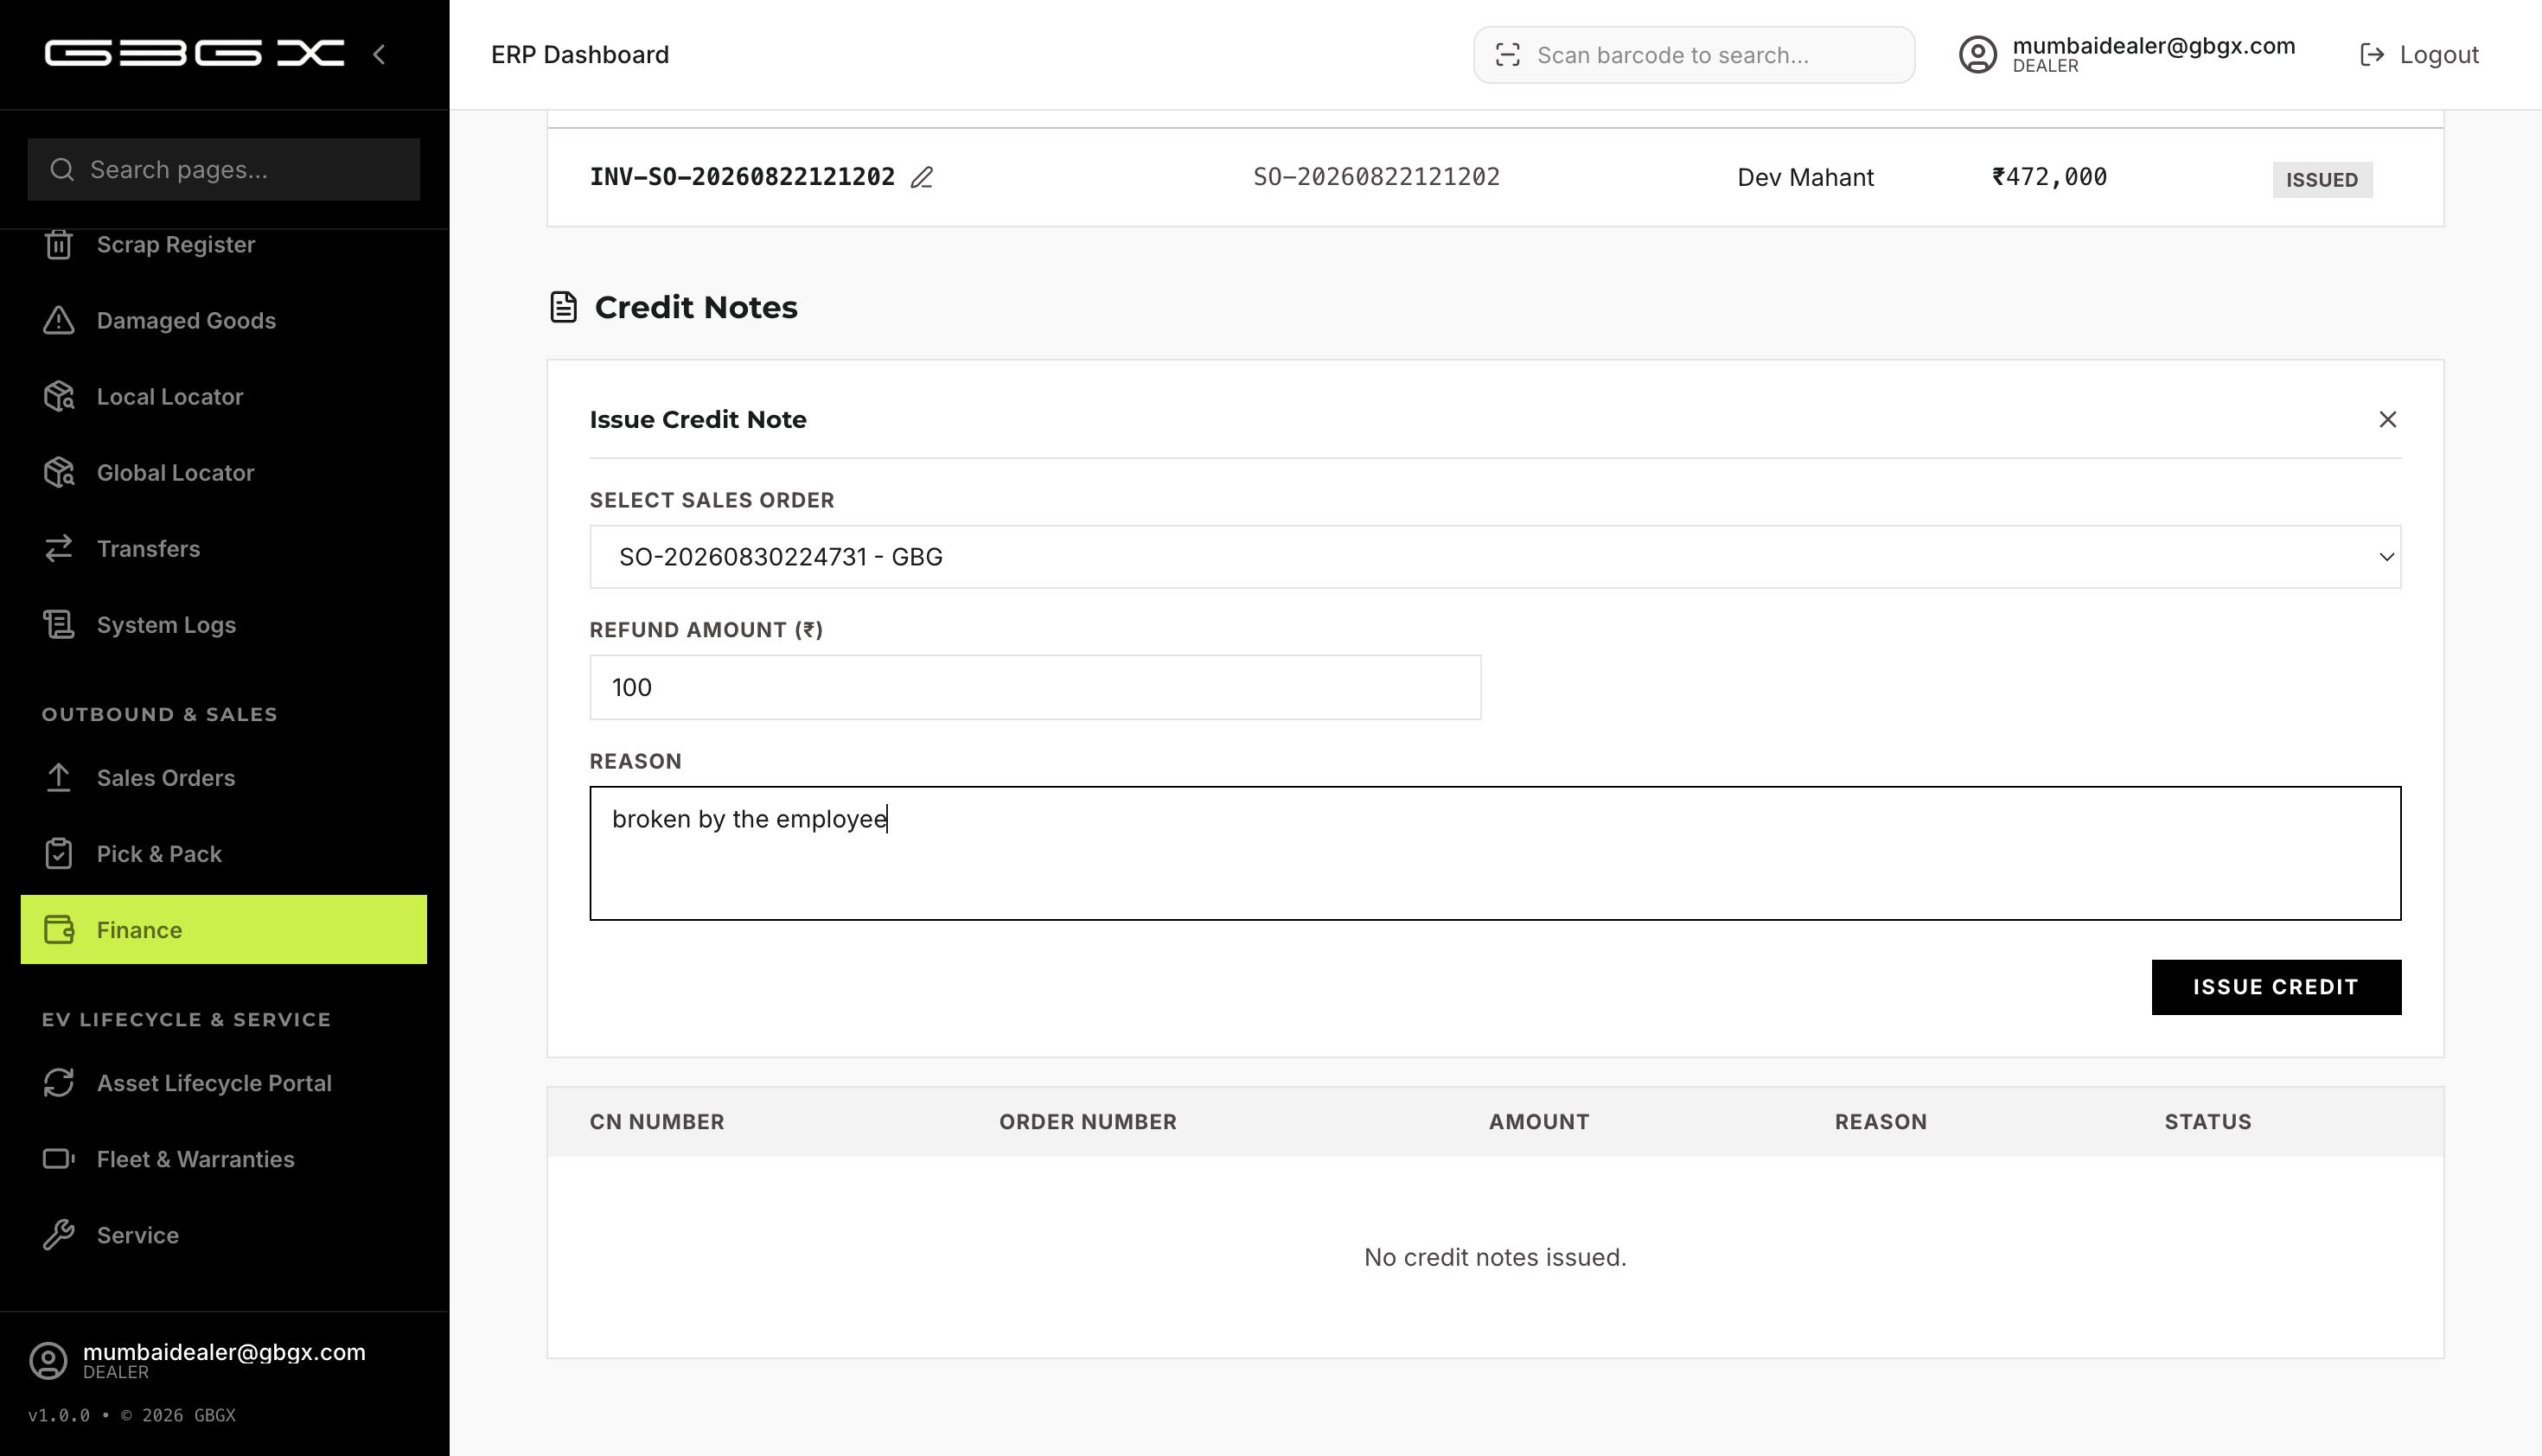
Under Credit Notes, issue a refund against a sales order with a reason.
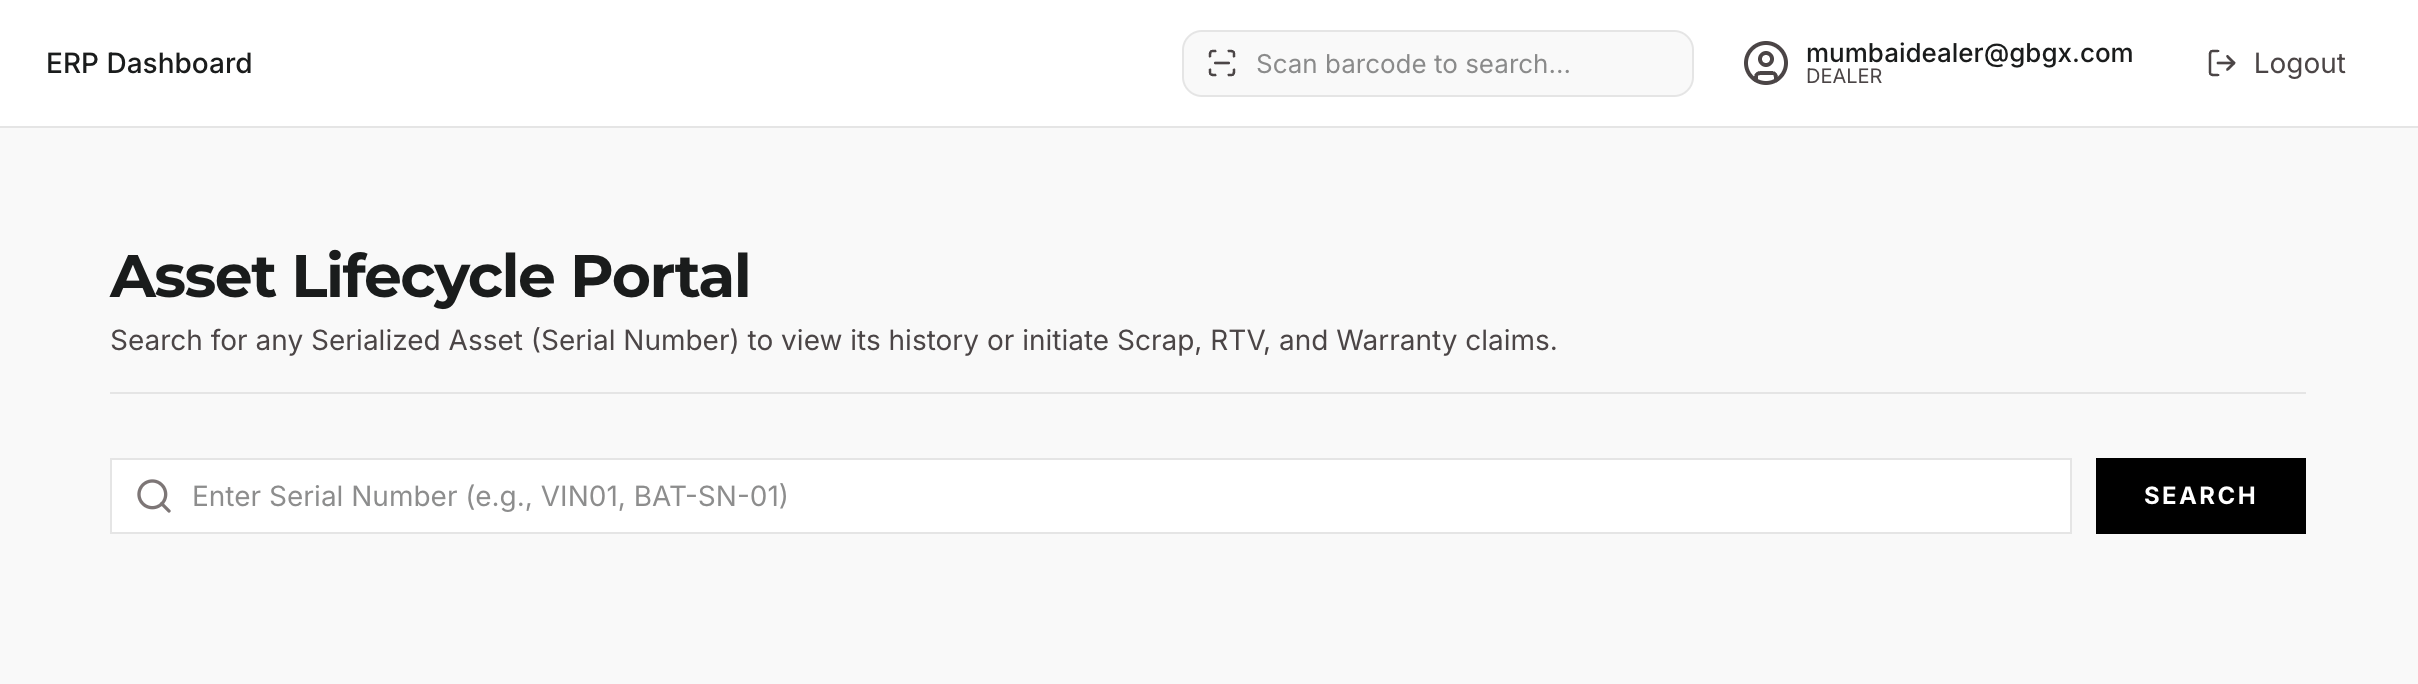
4.3 — Asset Lifecycle Portal (Tracking Serialized Assets)
Navigate to Assets → Lifecycle.
Enter a Serial Number or VIN.
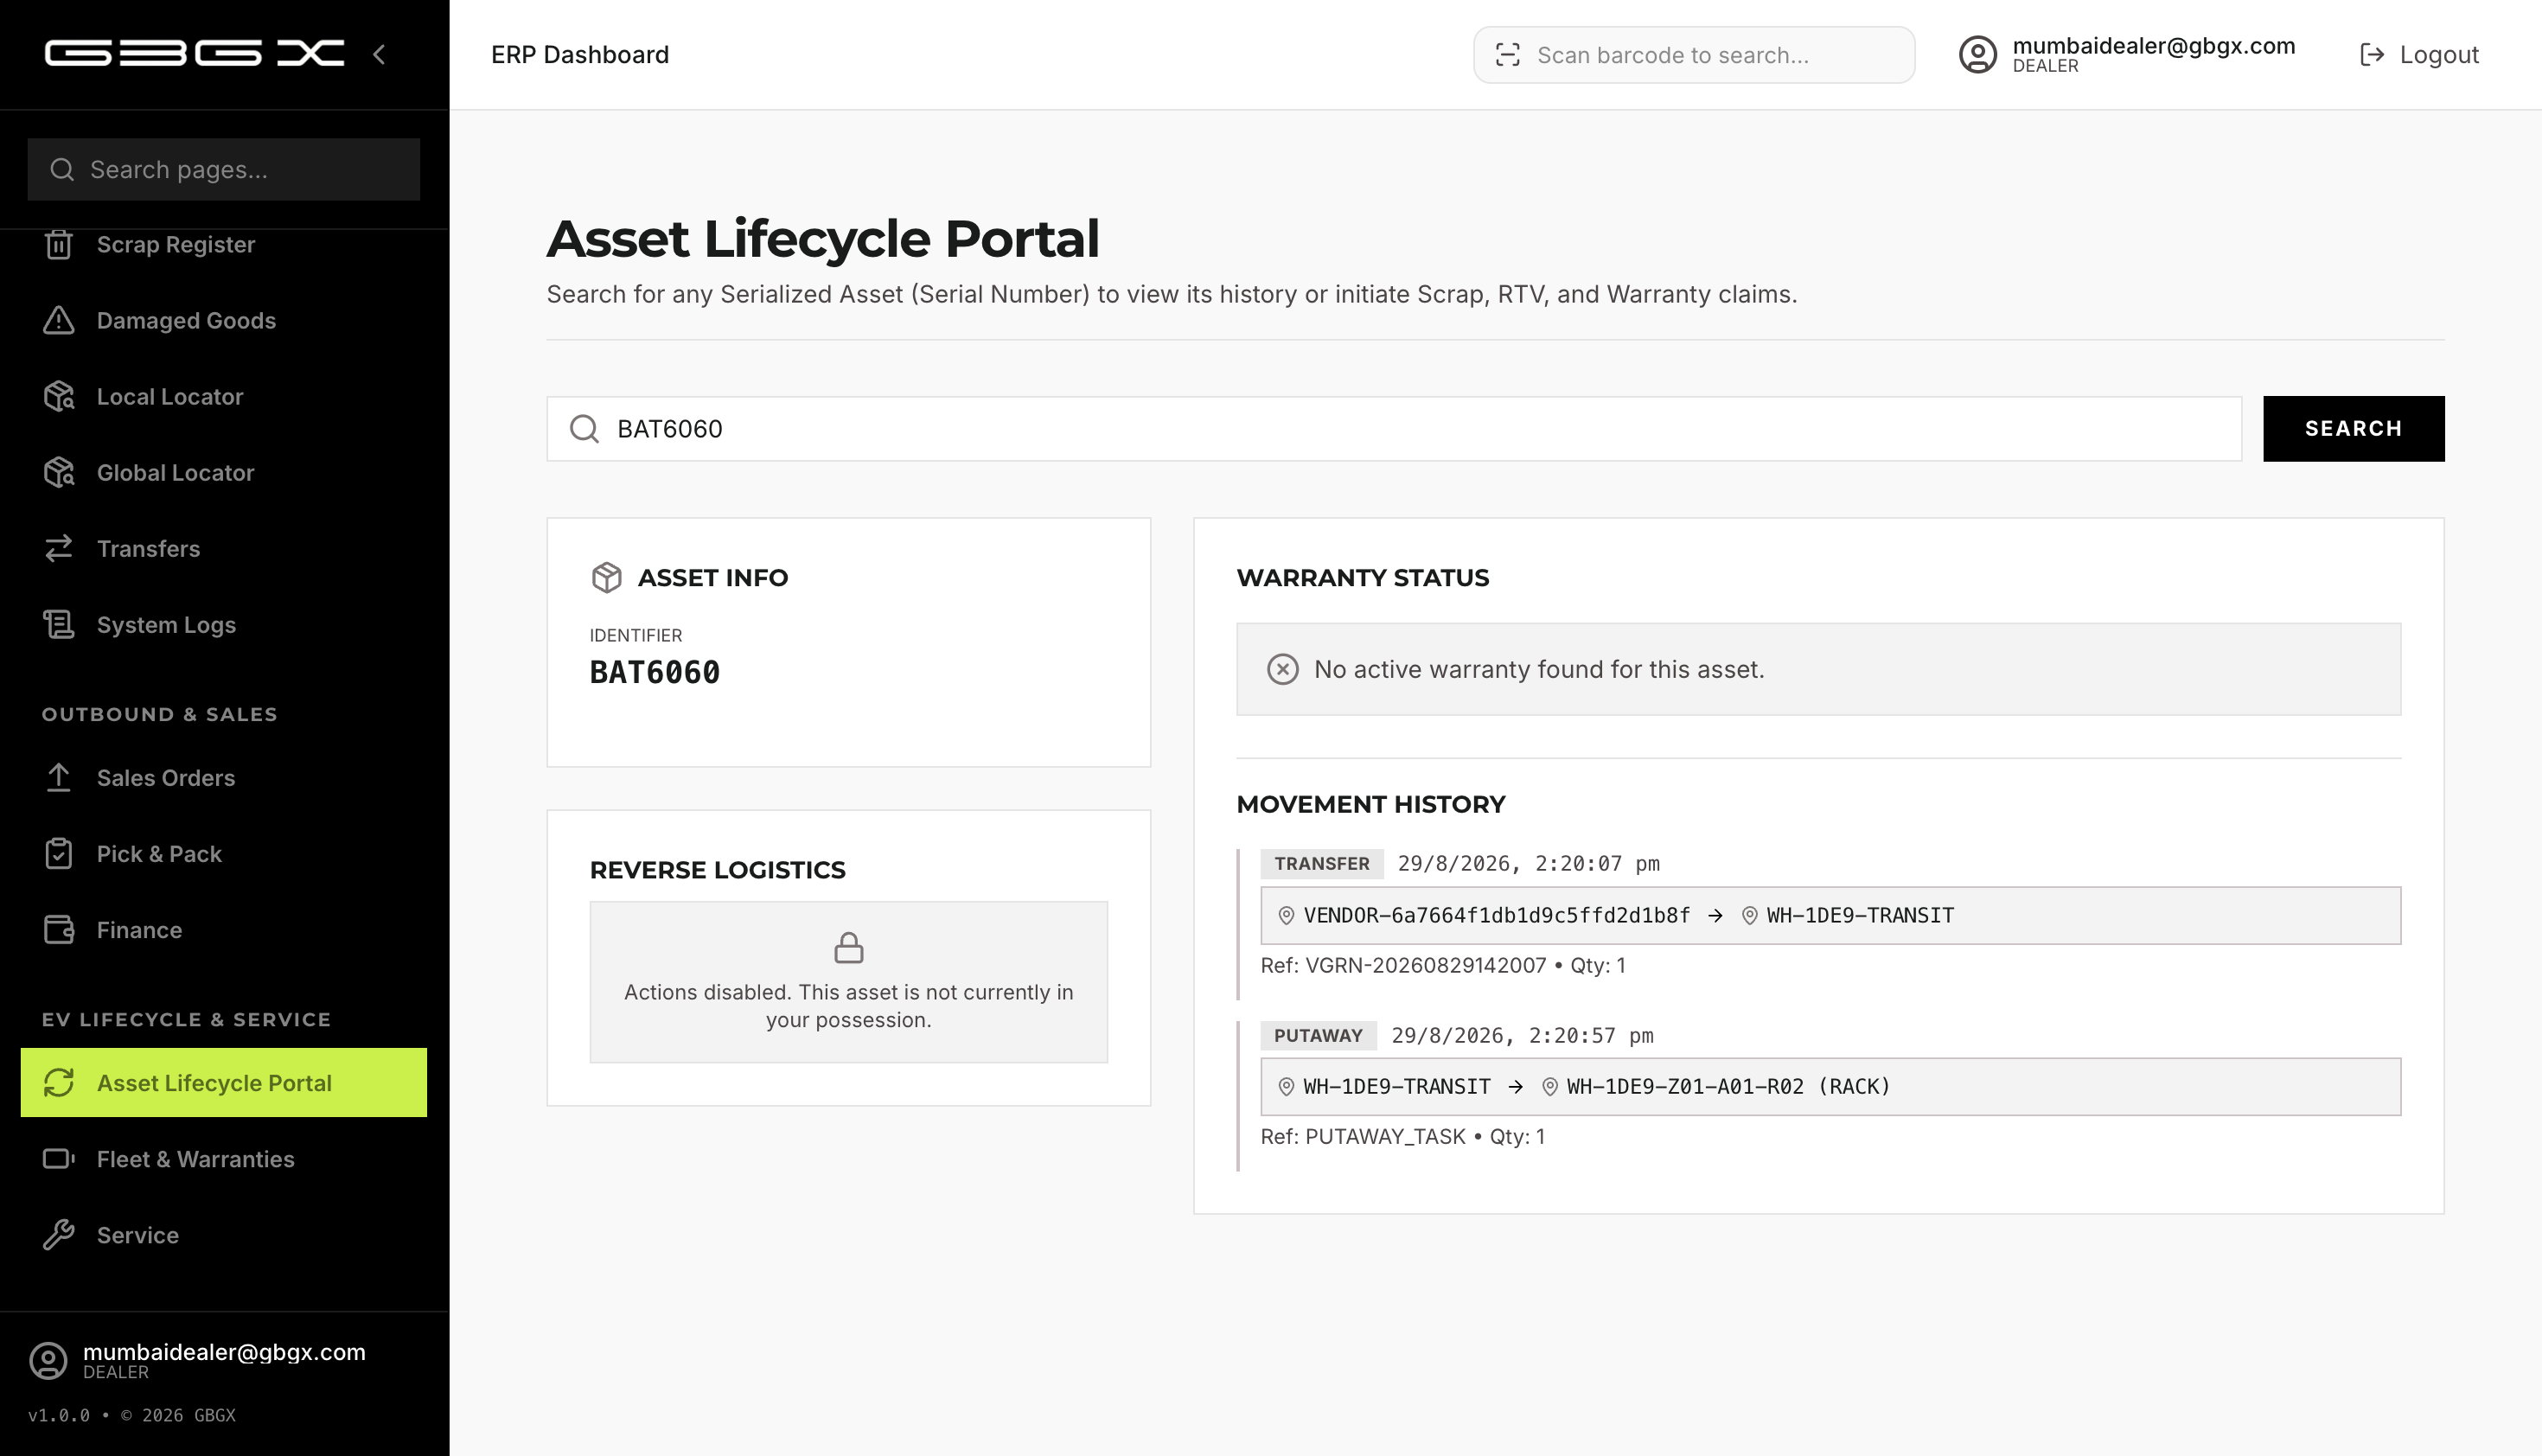
View the asset's full profile:
- Movement History — Transfer, Putaway, Outbound.
- Warranty Status — Active Expired Claimed Voided
- Current Location.
4.4 — Service Ticket & Vehicle Servicing
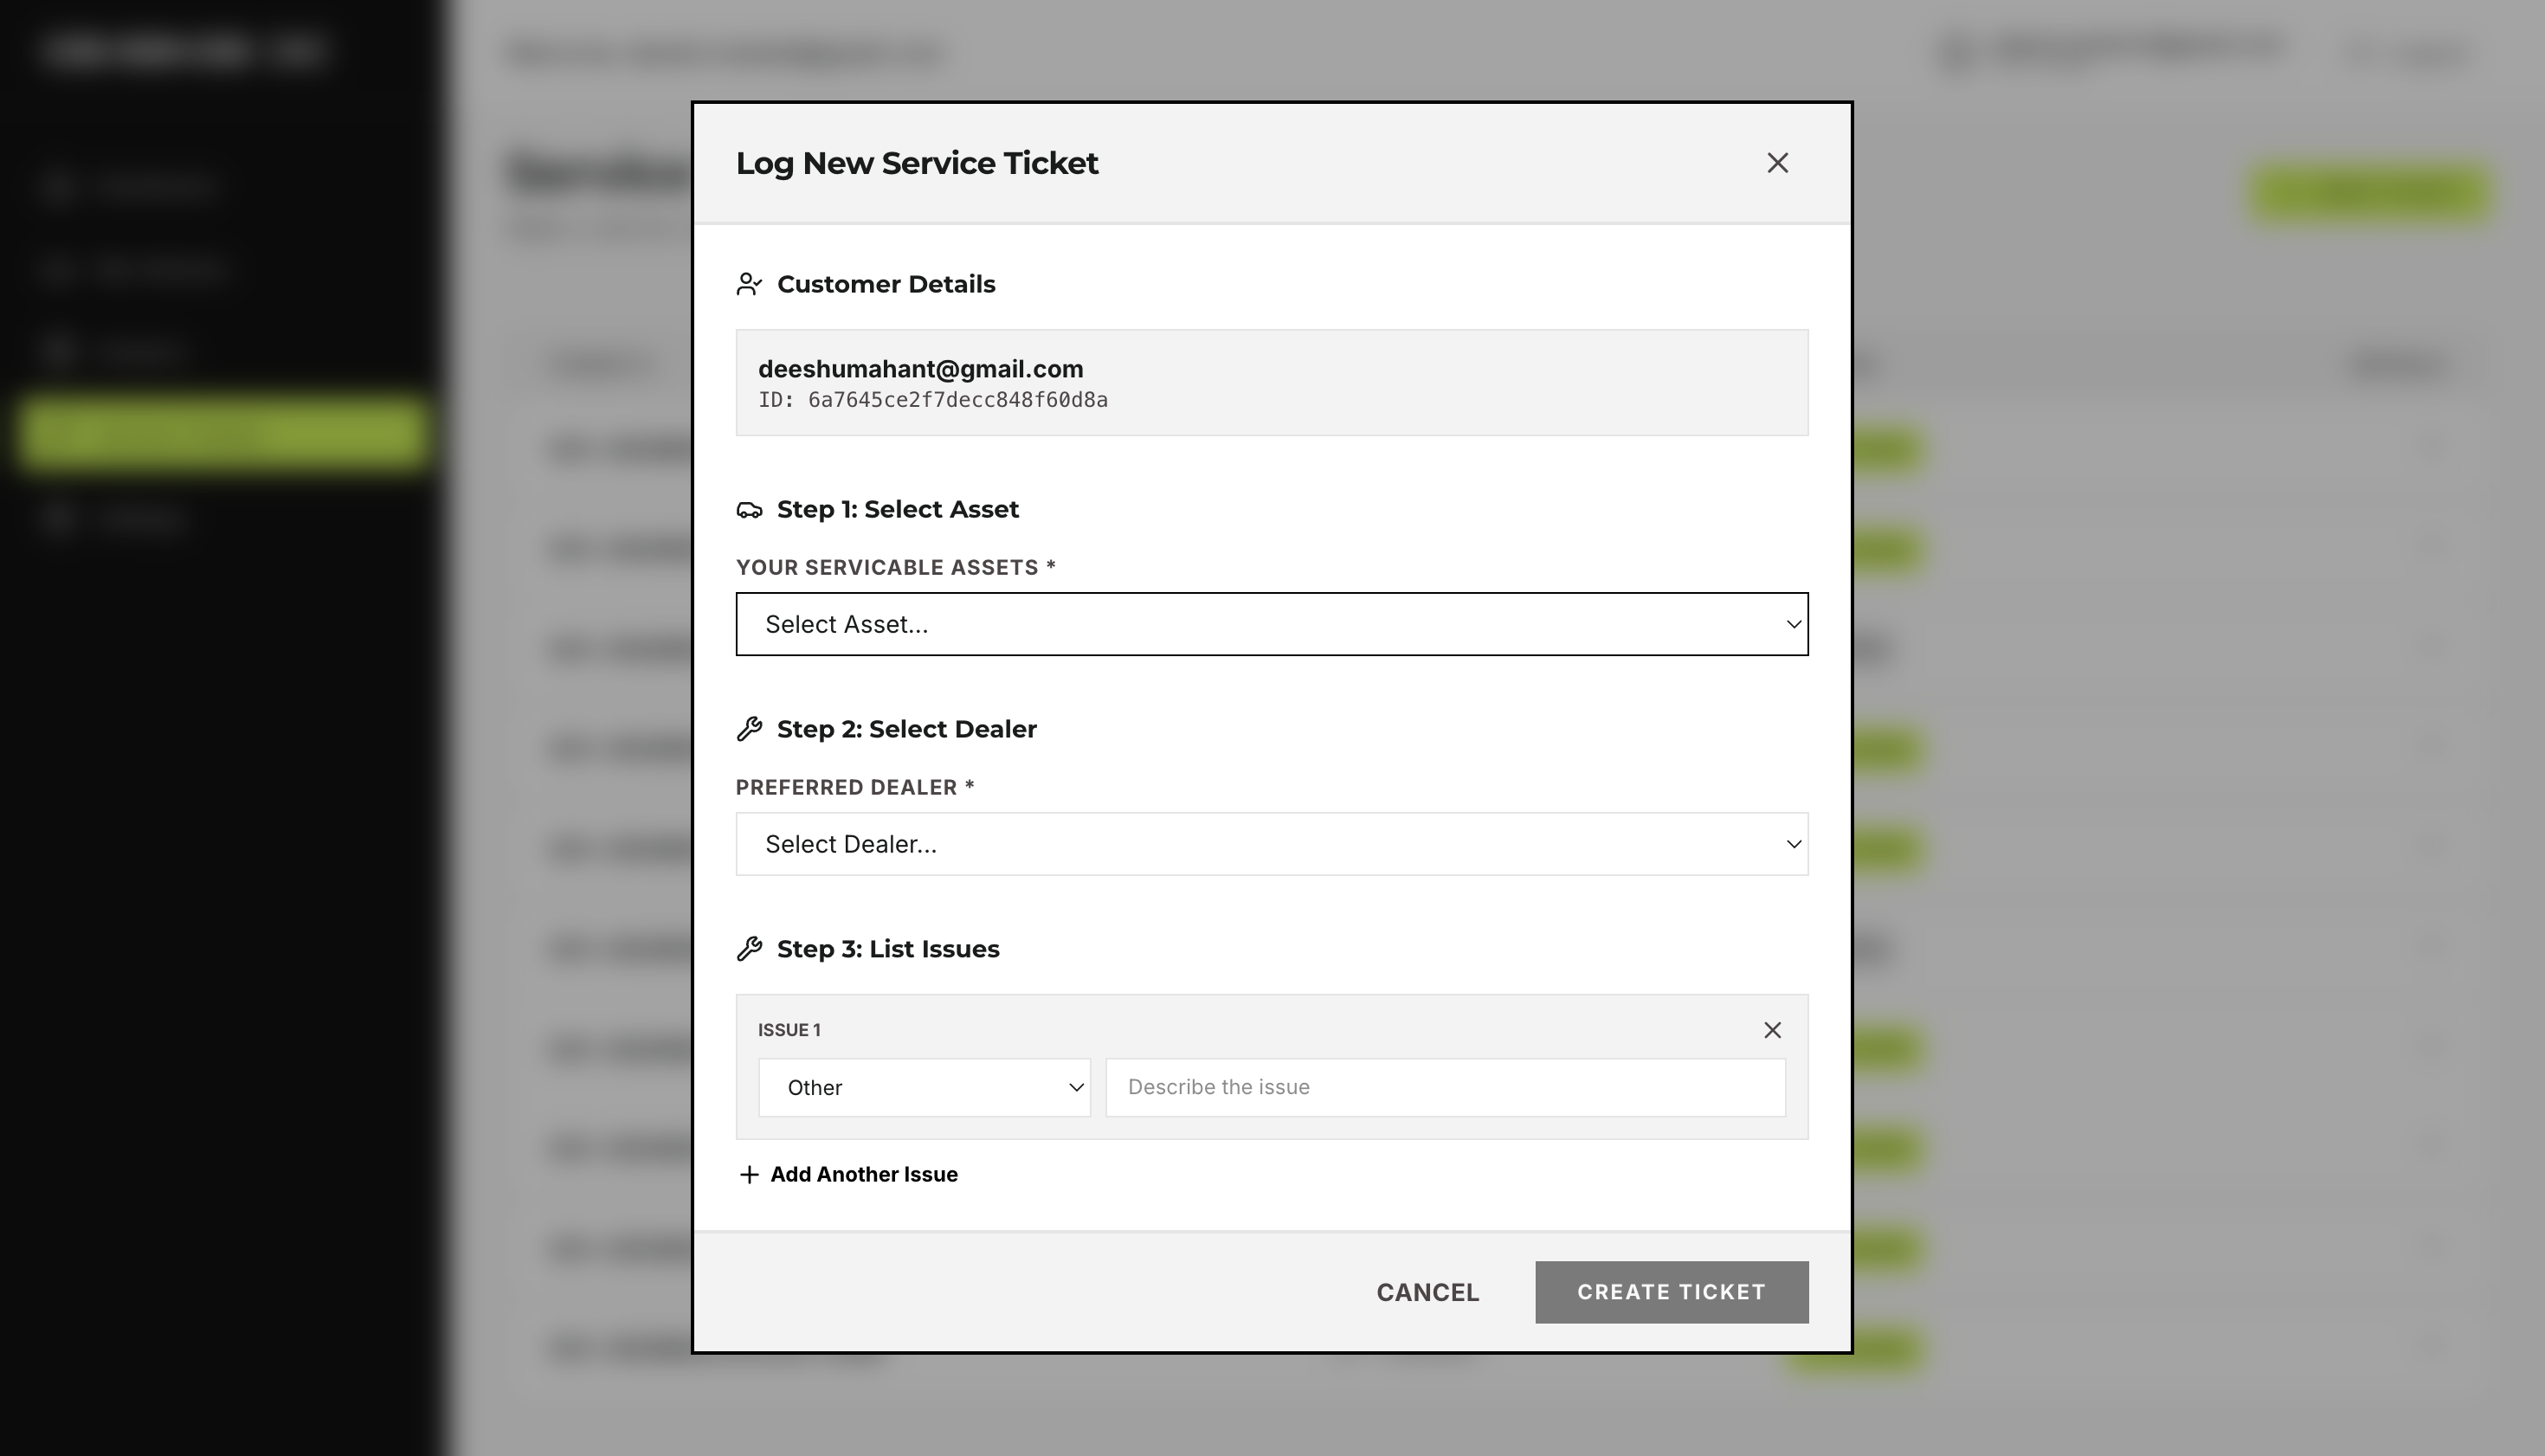
Navigate to Service → New Ticket.
Select Customer and Asset (VIN/Serial). Enter complaints.
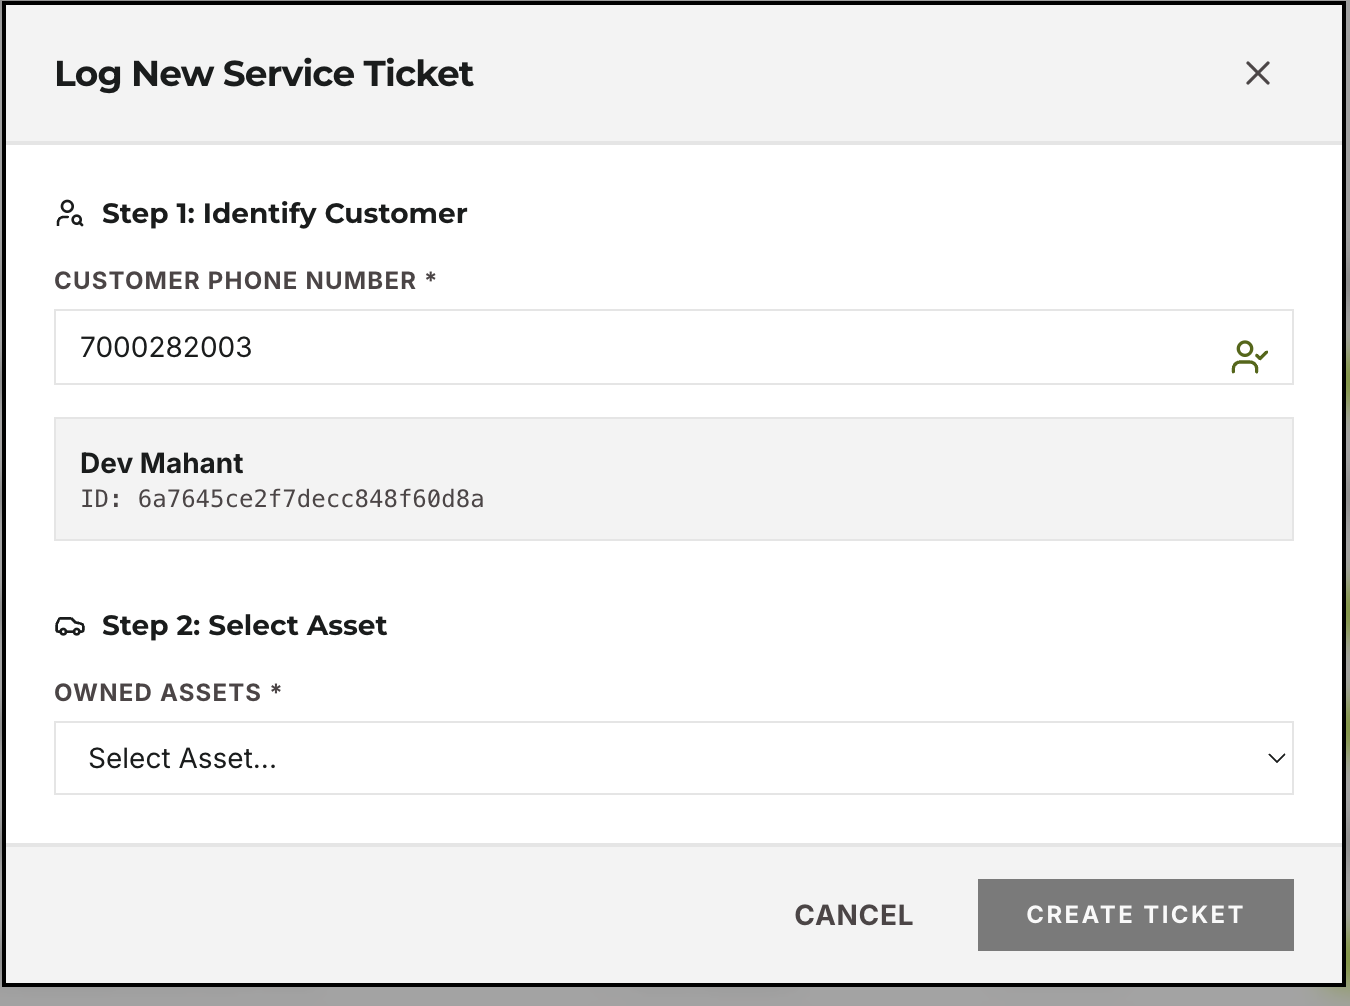
Open the ticket. Go to Execute Repair.
Add Parts to the cart (select serials for serialized parts).
Add Labor Charges.
If claiming warranty for a defective part, tick Claim Warranty.
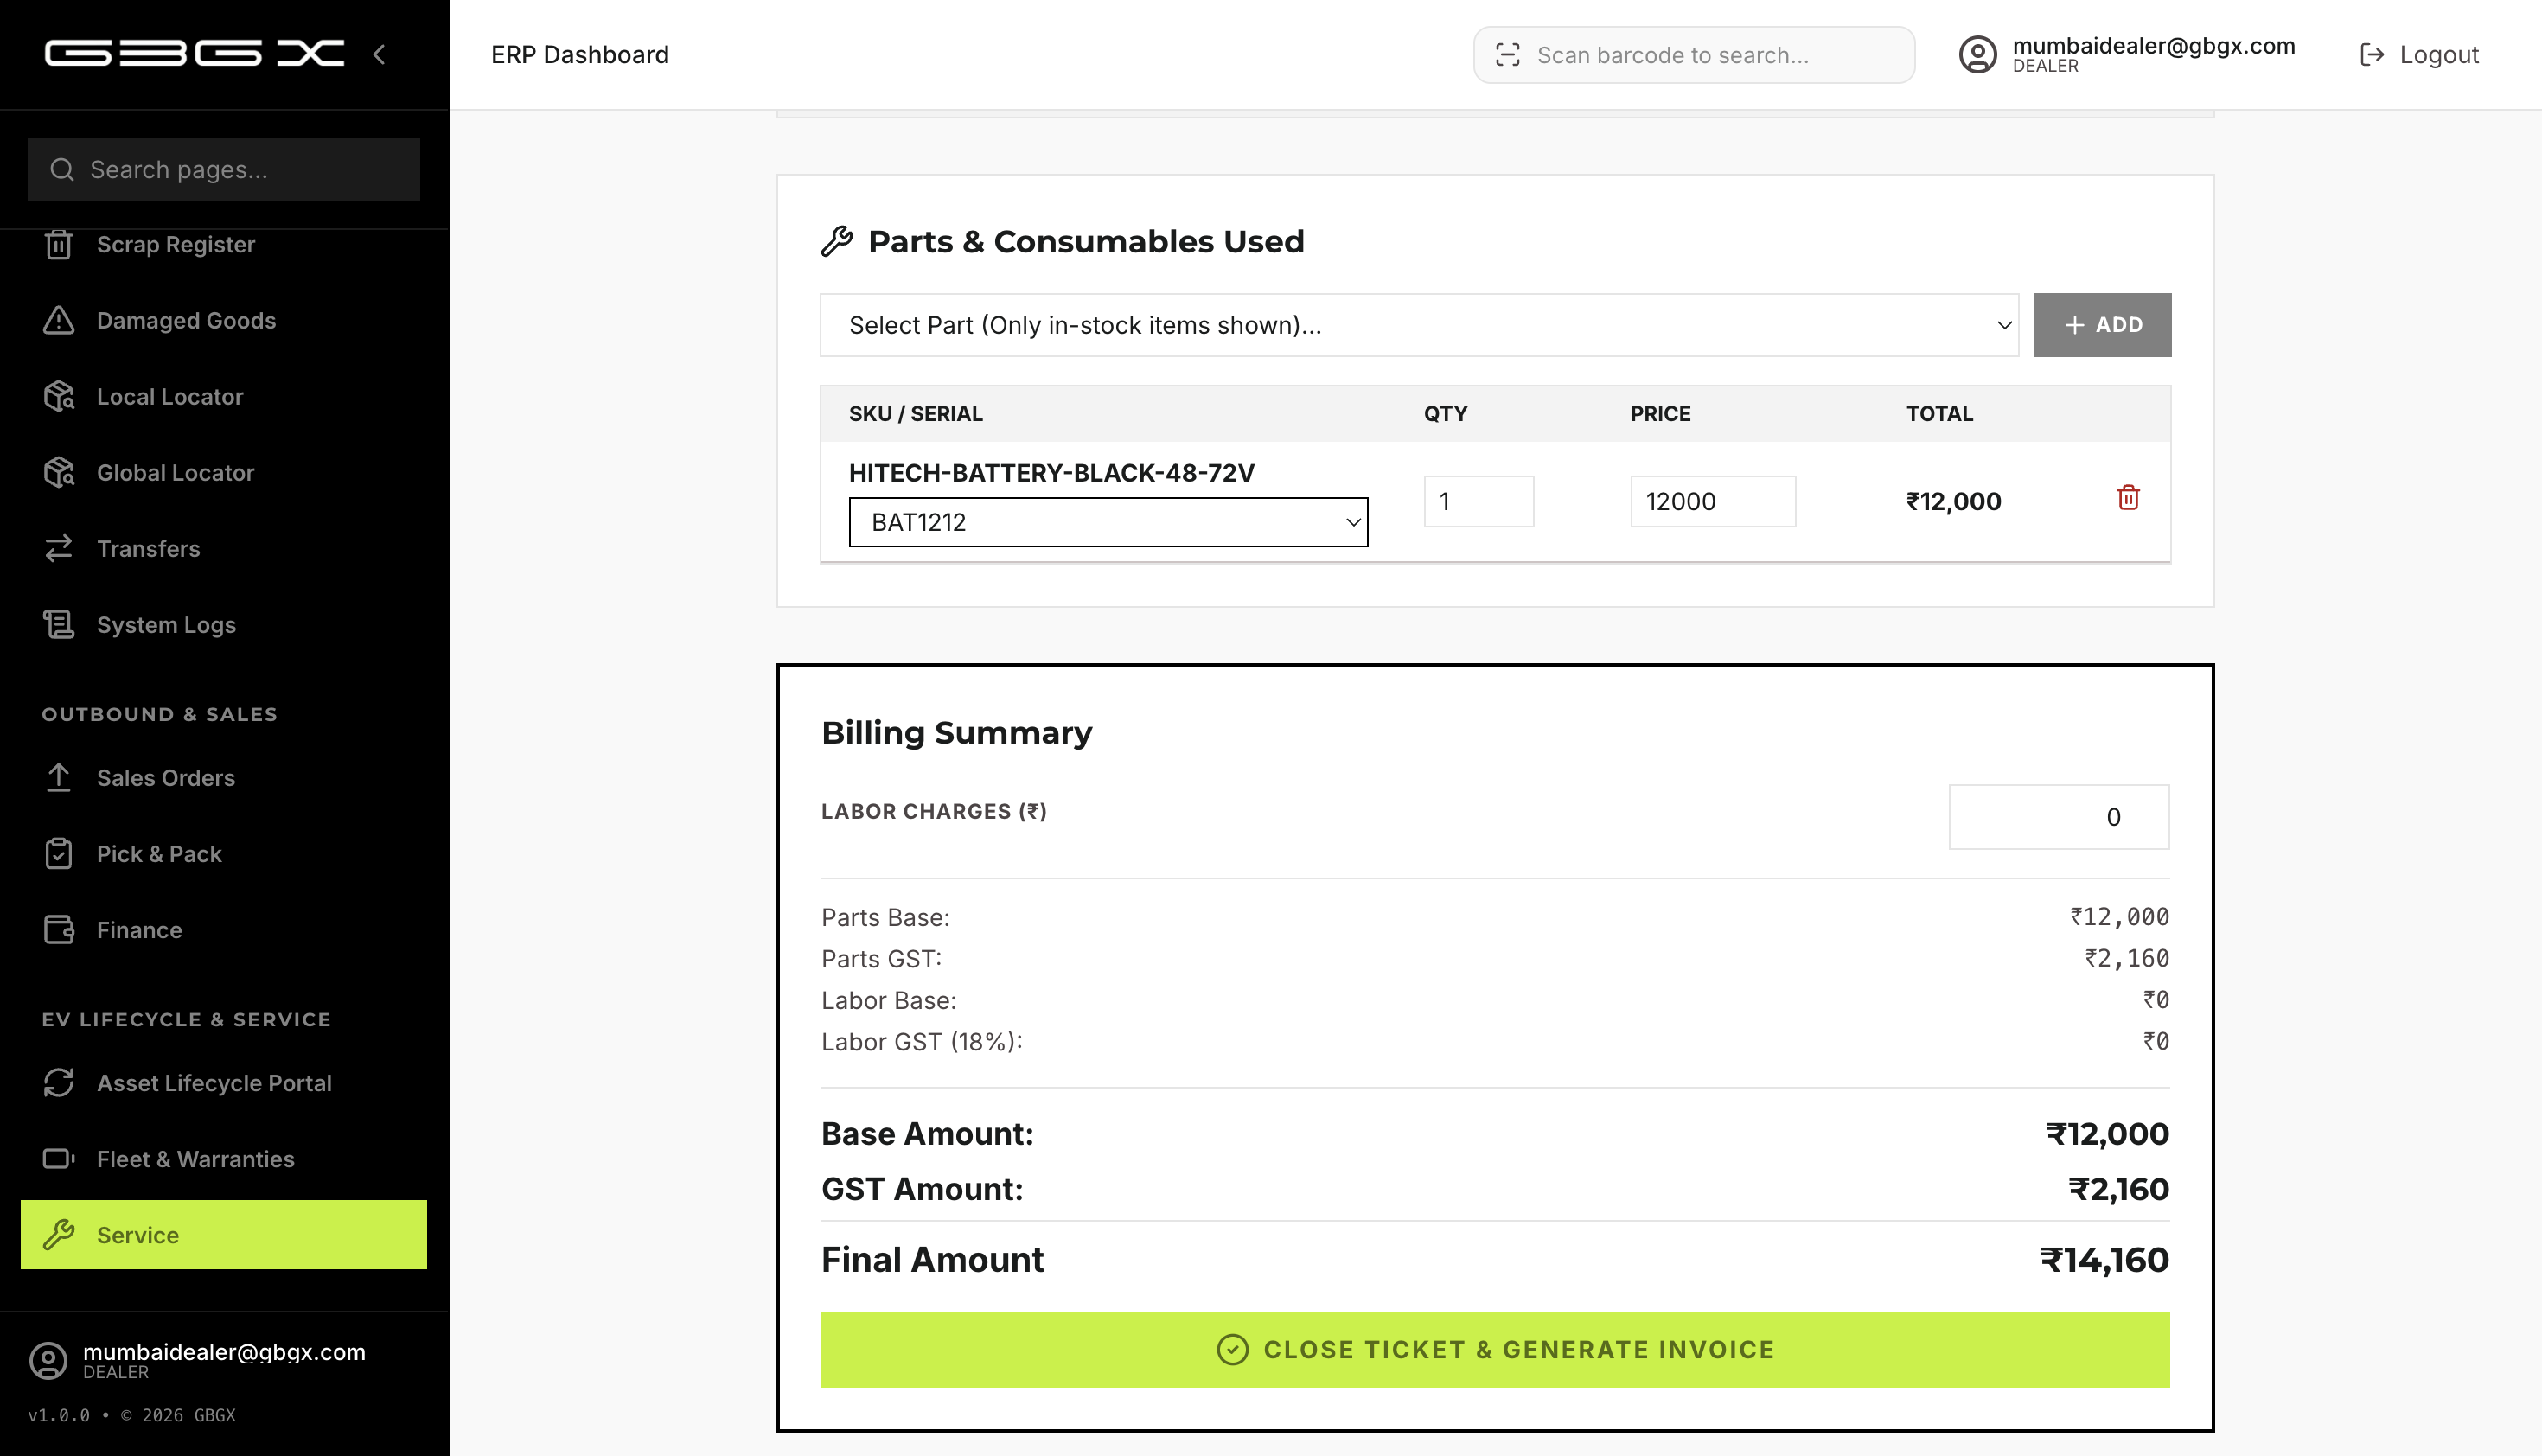
Click Close Ticket & Generate Invoice.

4.5 — Auto Warranty Registration

Chapter 5 — Portals (Employee & Customer)
5.1 — Employee Portal (Mobile Task Execution)
Pick Tab
Employee logs into /employee-portal.
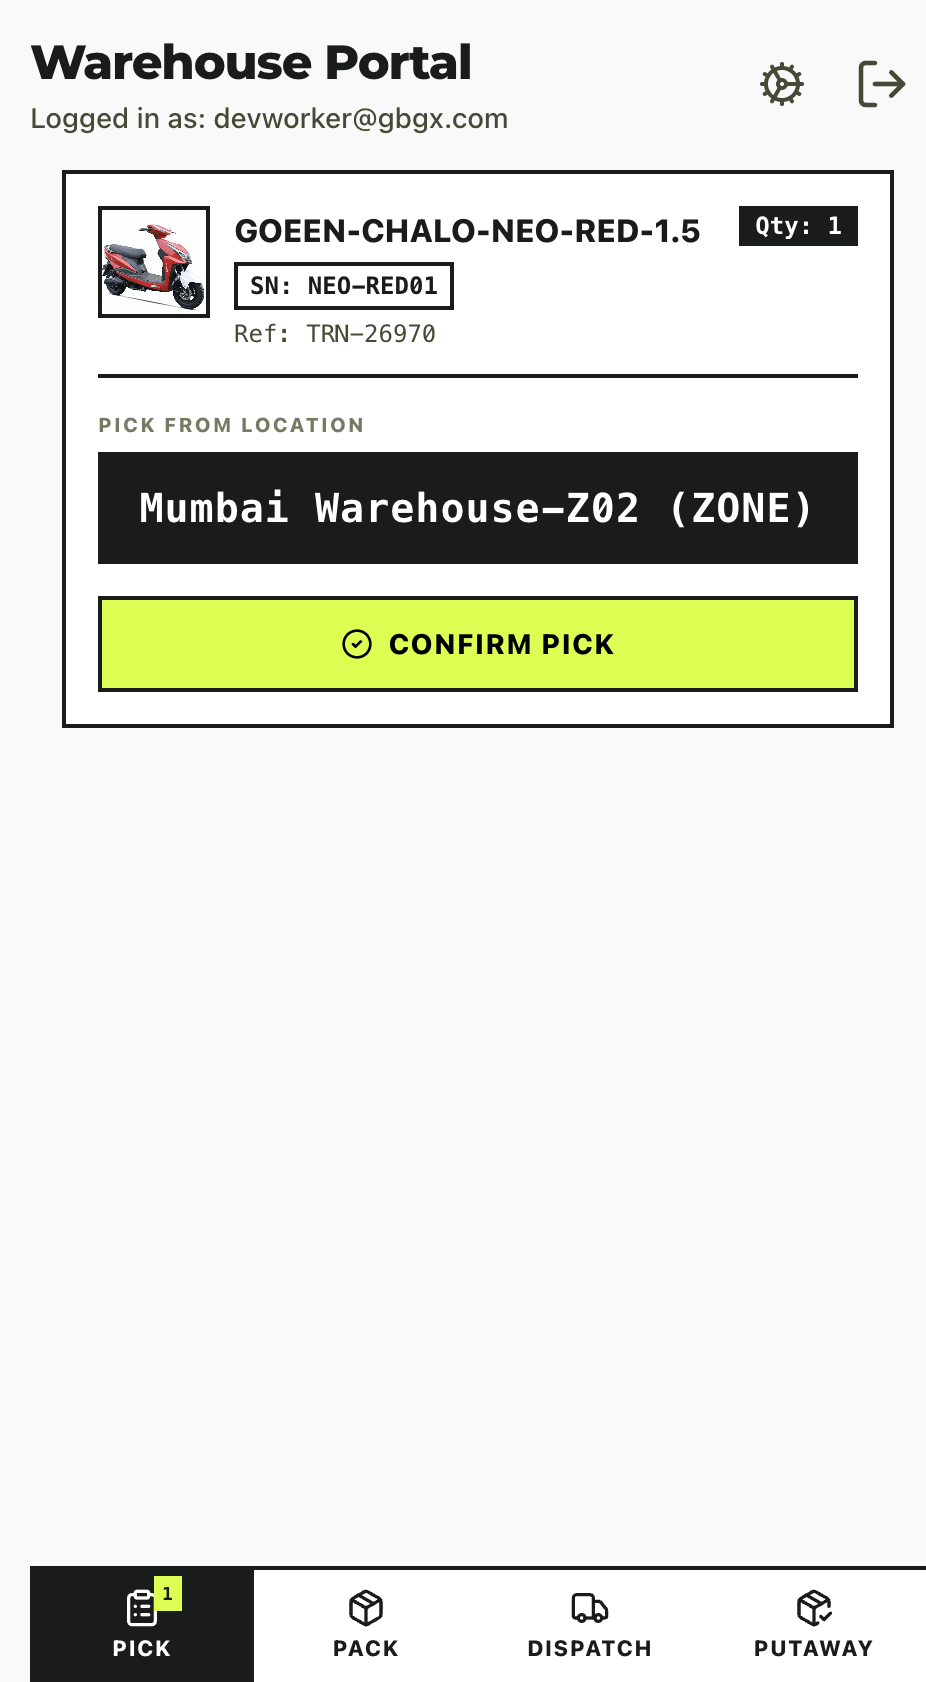
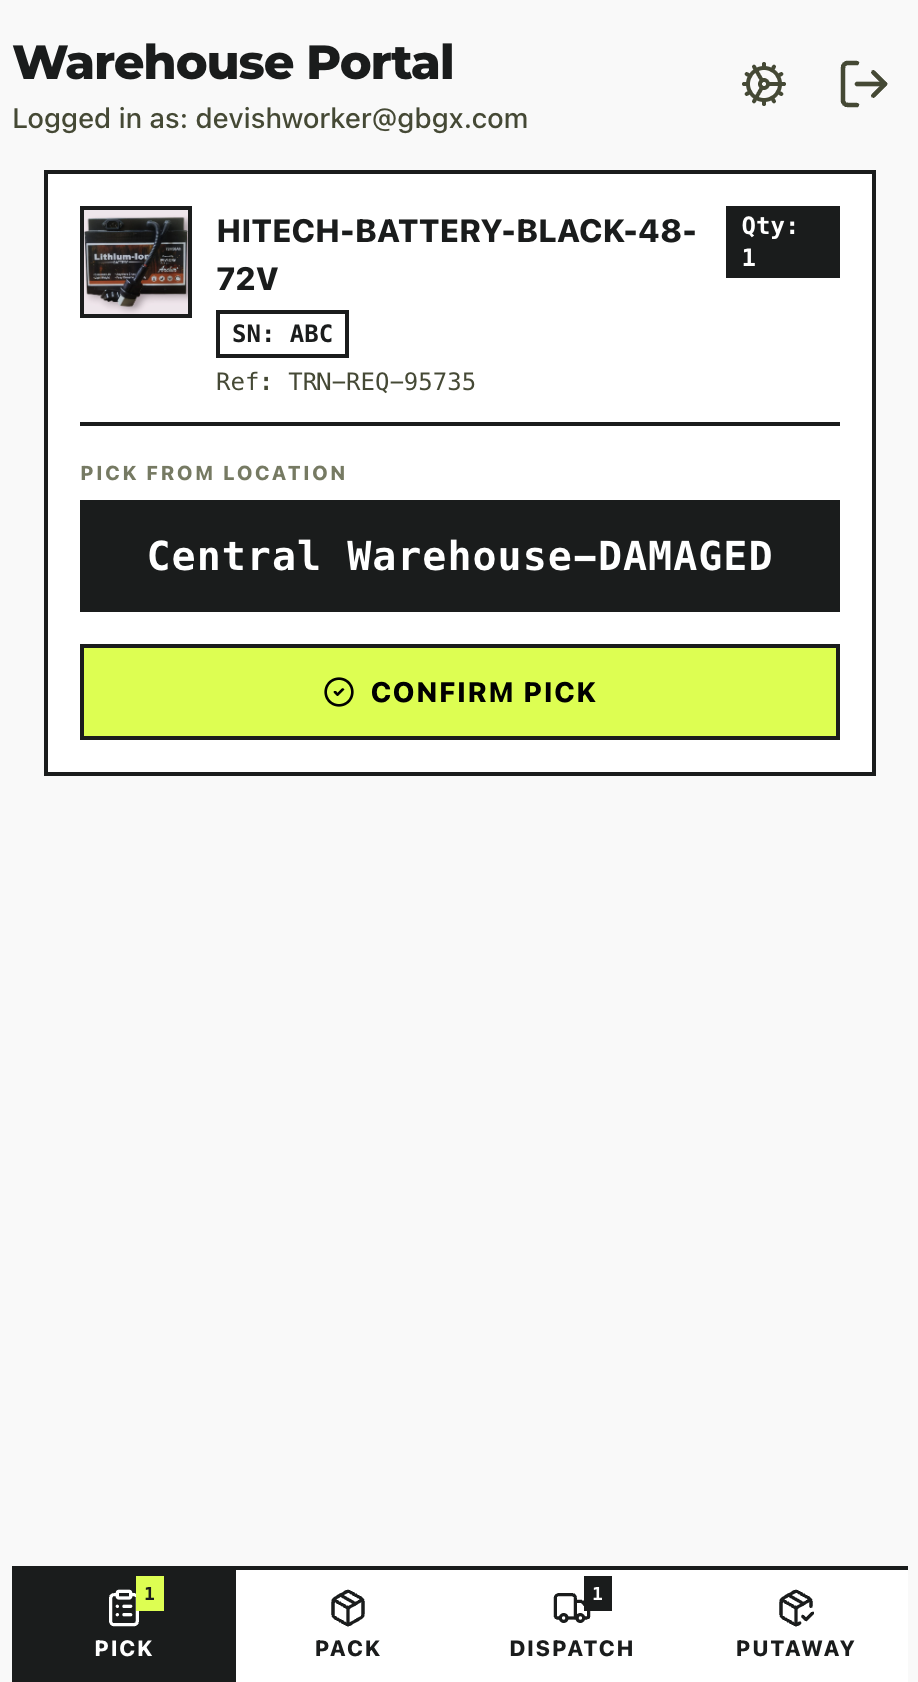
Open the Pick tab. Views bold location IDs (e.g., WH-100B-Z01-A01-R01).
Enters Bin → clicks Confirm Pick.
Pack Tab
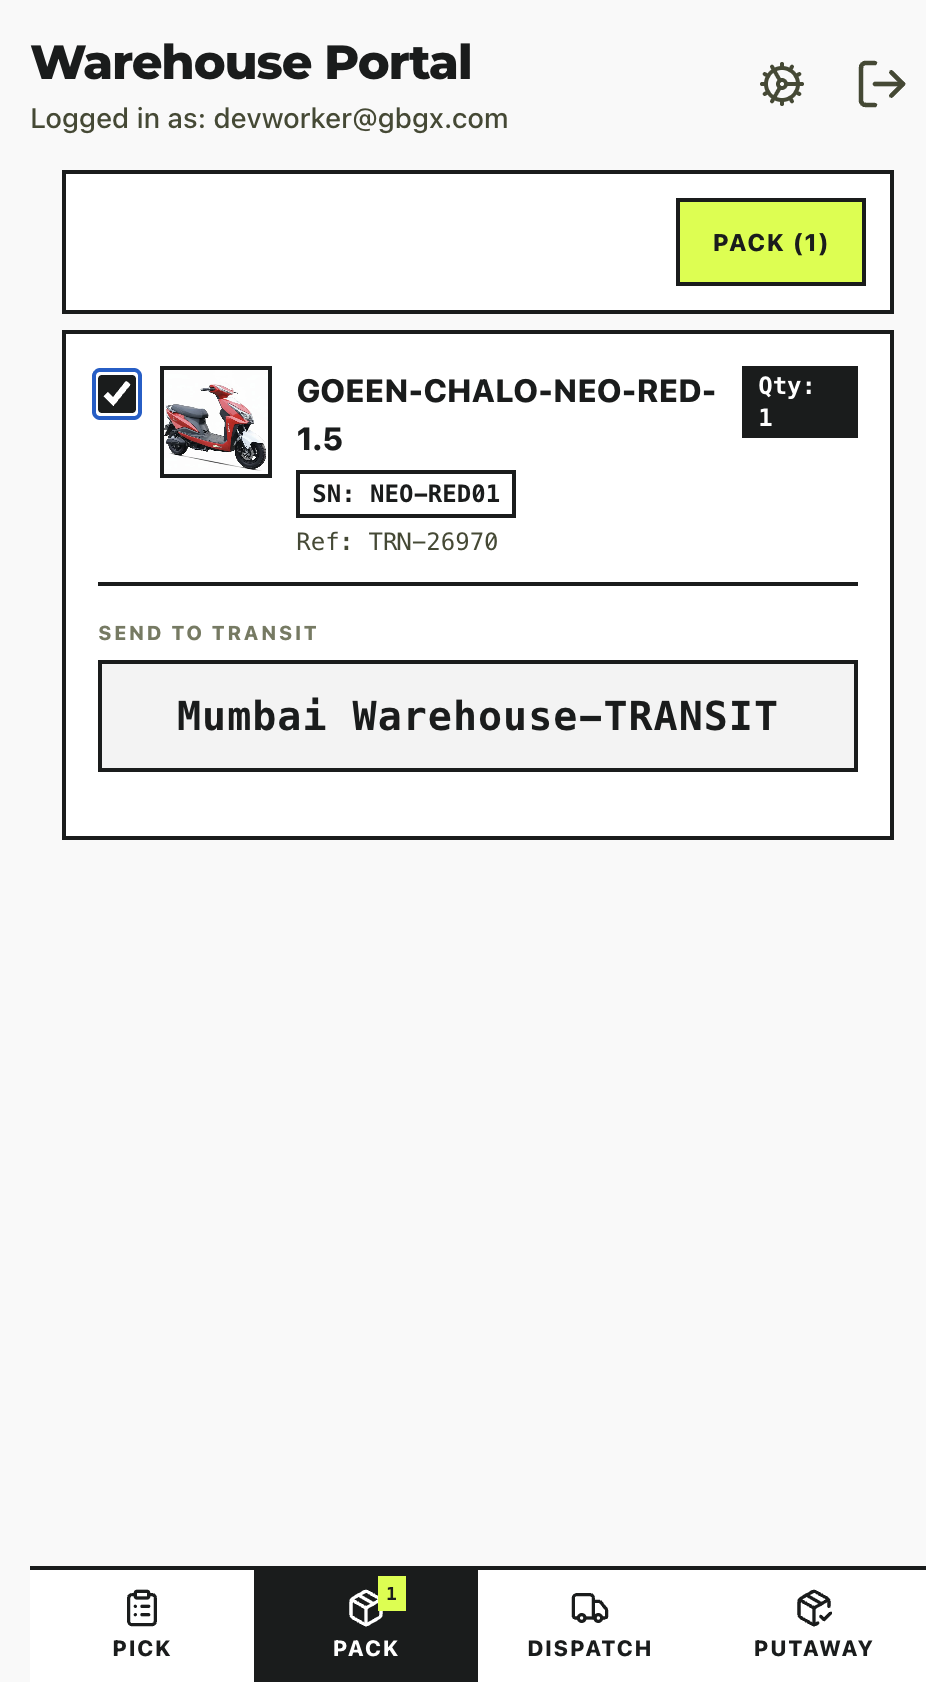
Open the Pack tab. Enters Box Number.
Clicks Pack.
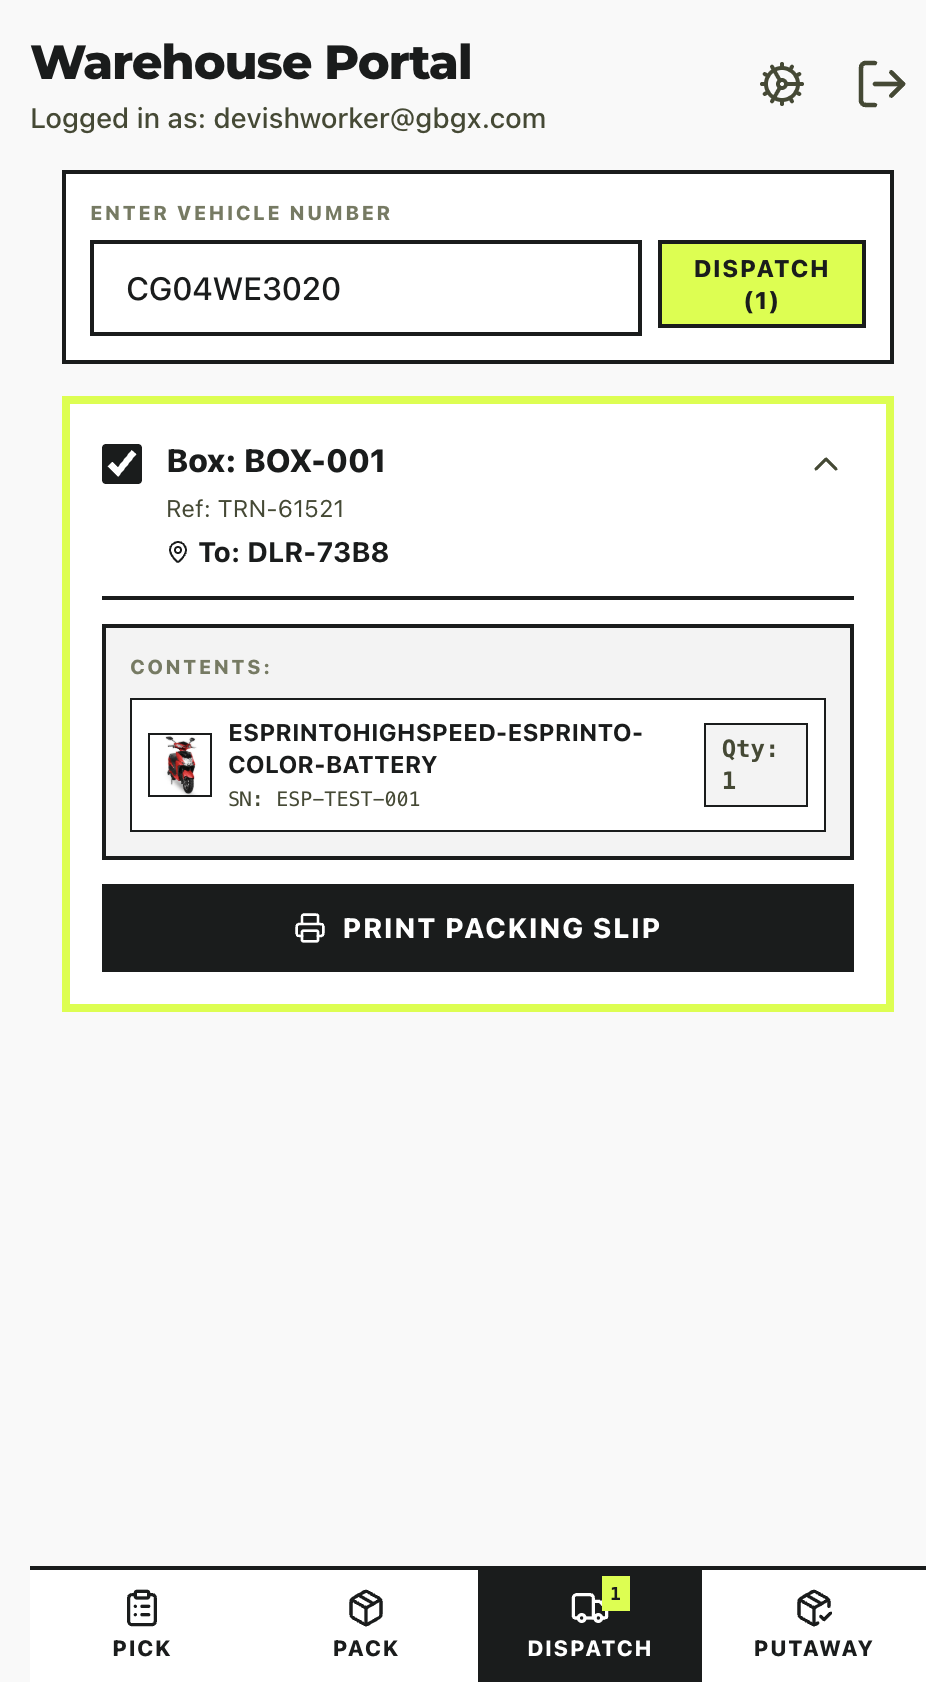
Dispatch Tab
Open the Dispatch tab. Selects packed boxes, enters Vehicle Number.
Clicks Dispatch.
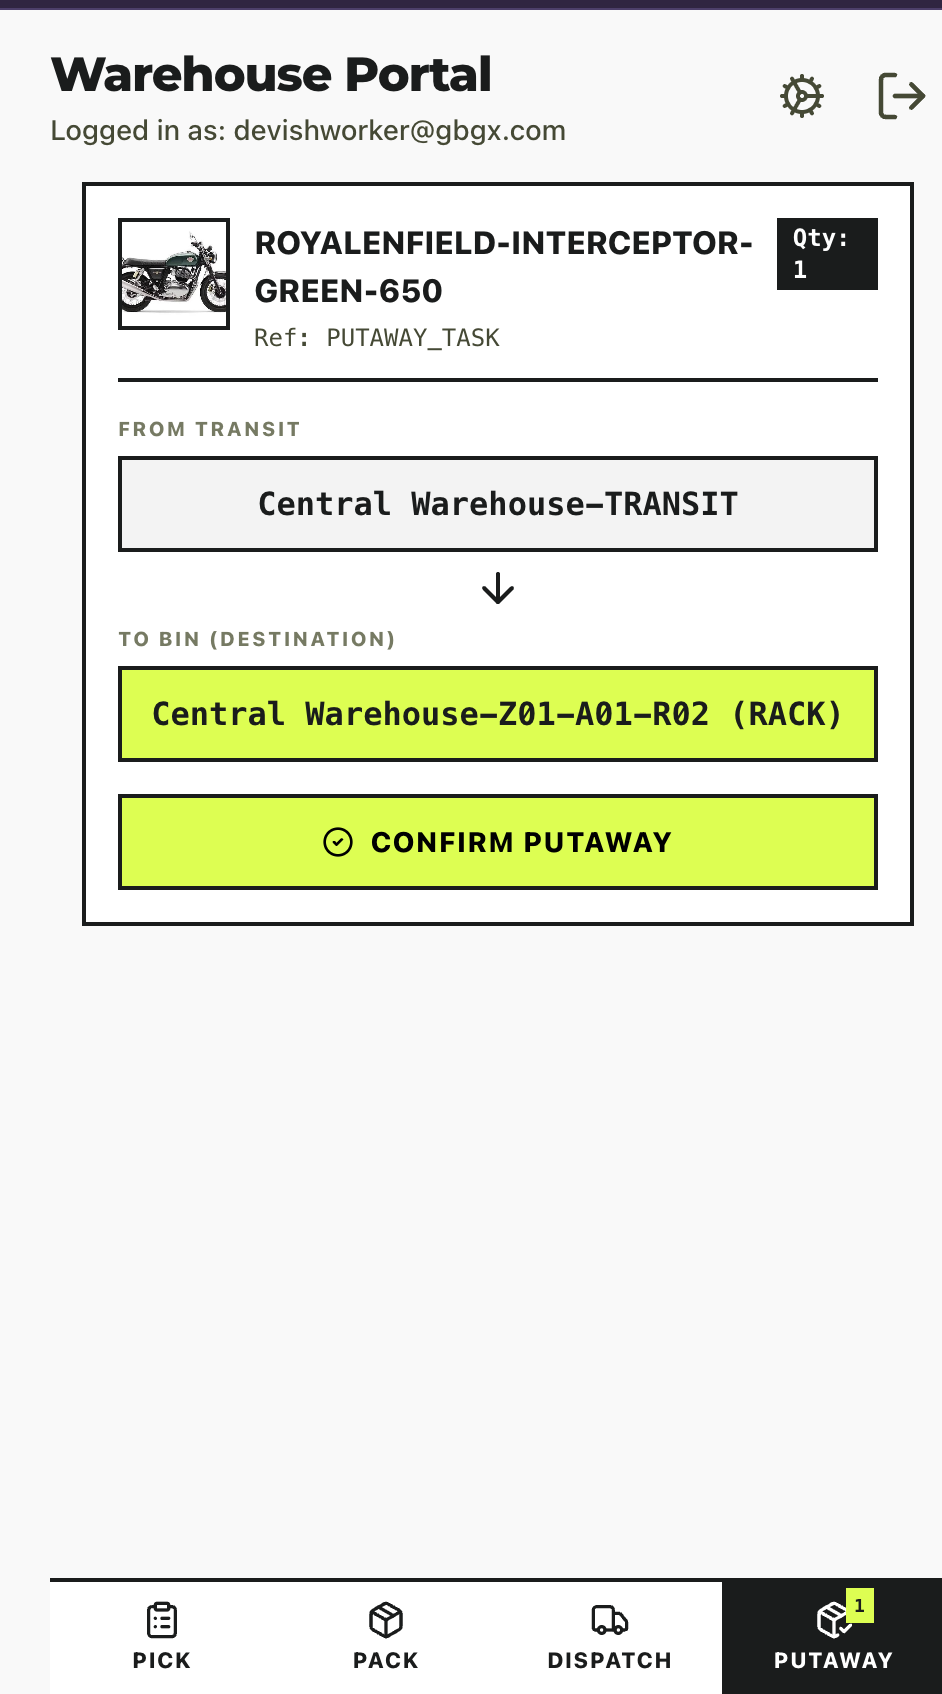
Putaway Tab
Open the Putaway tab. Views Transit → Bin mapping.
Clicks Confirm Putaway.
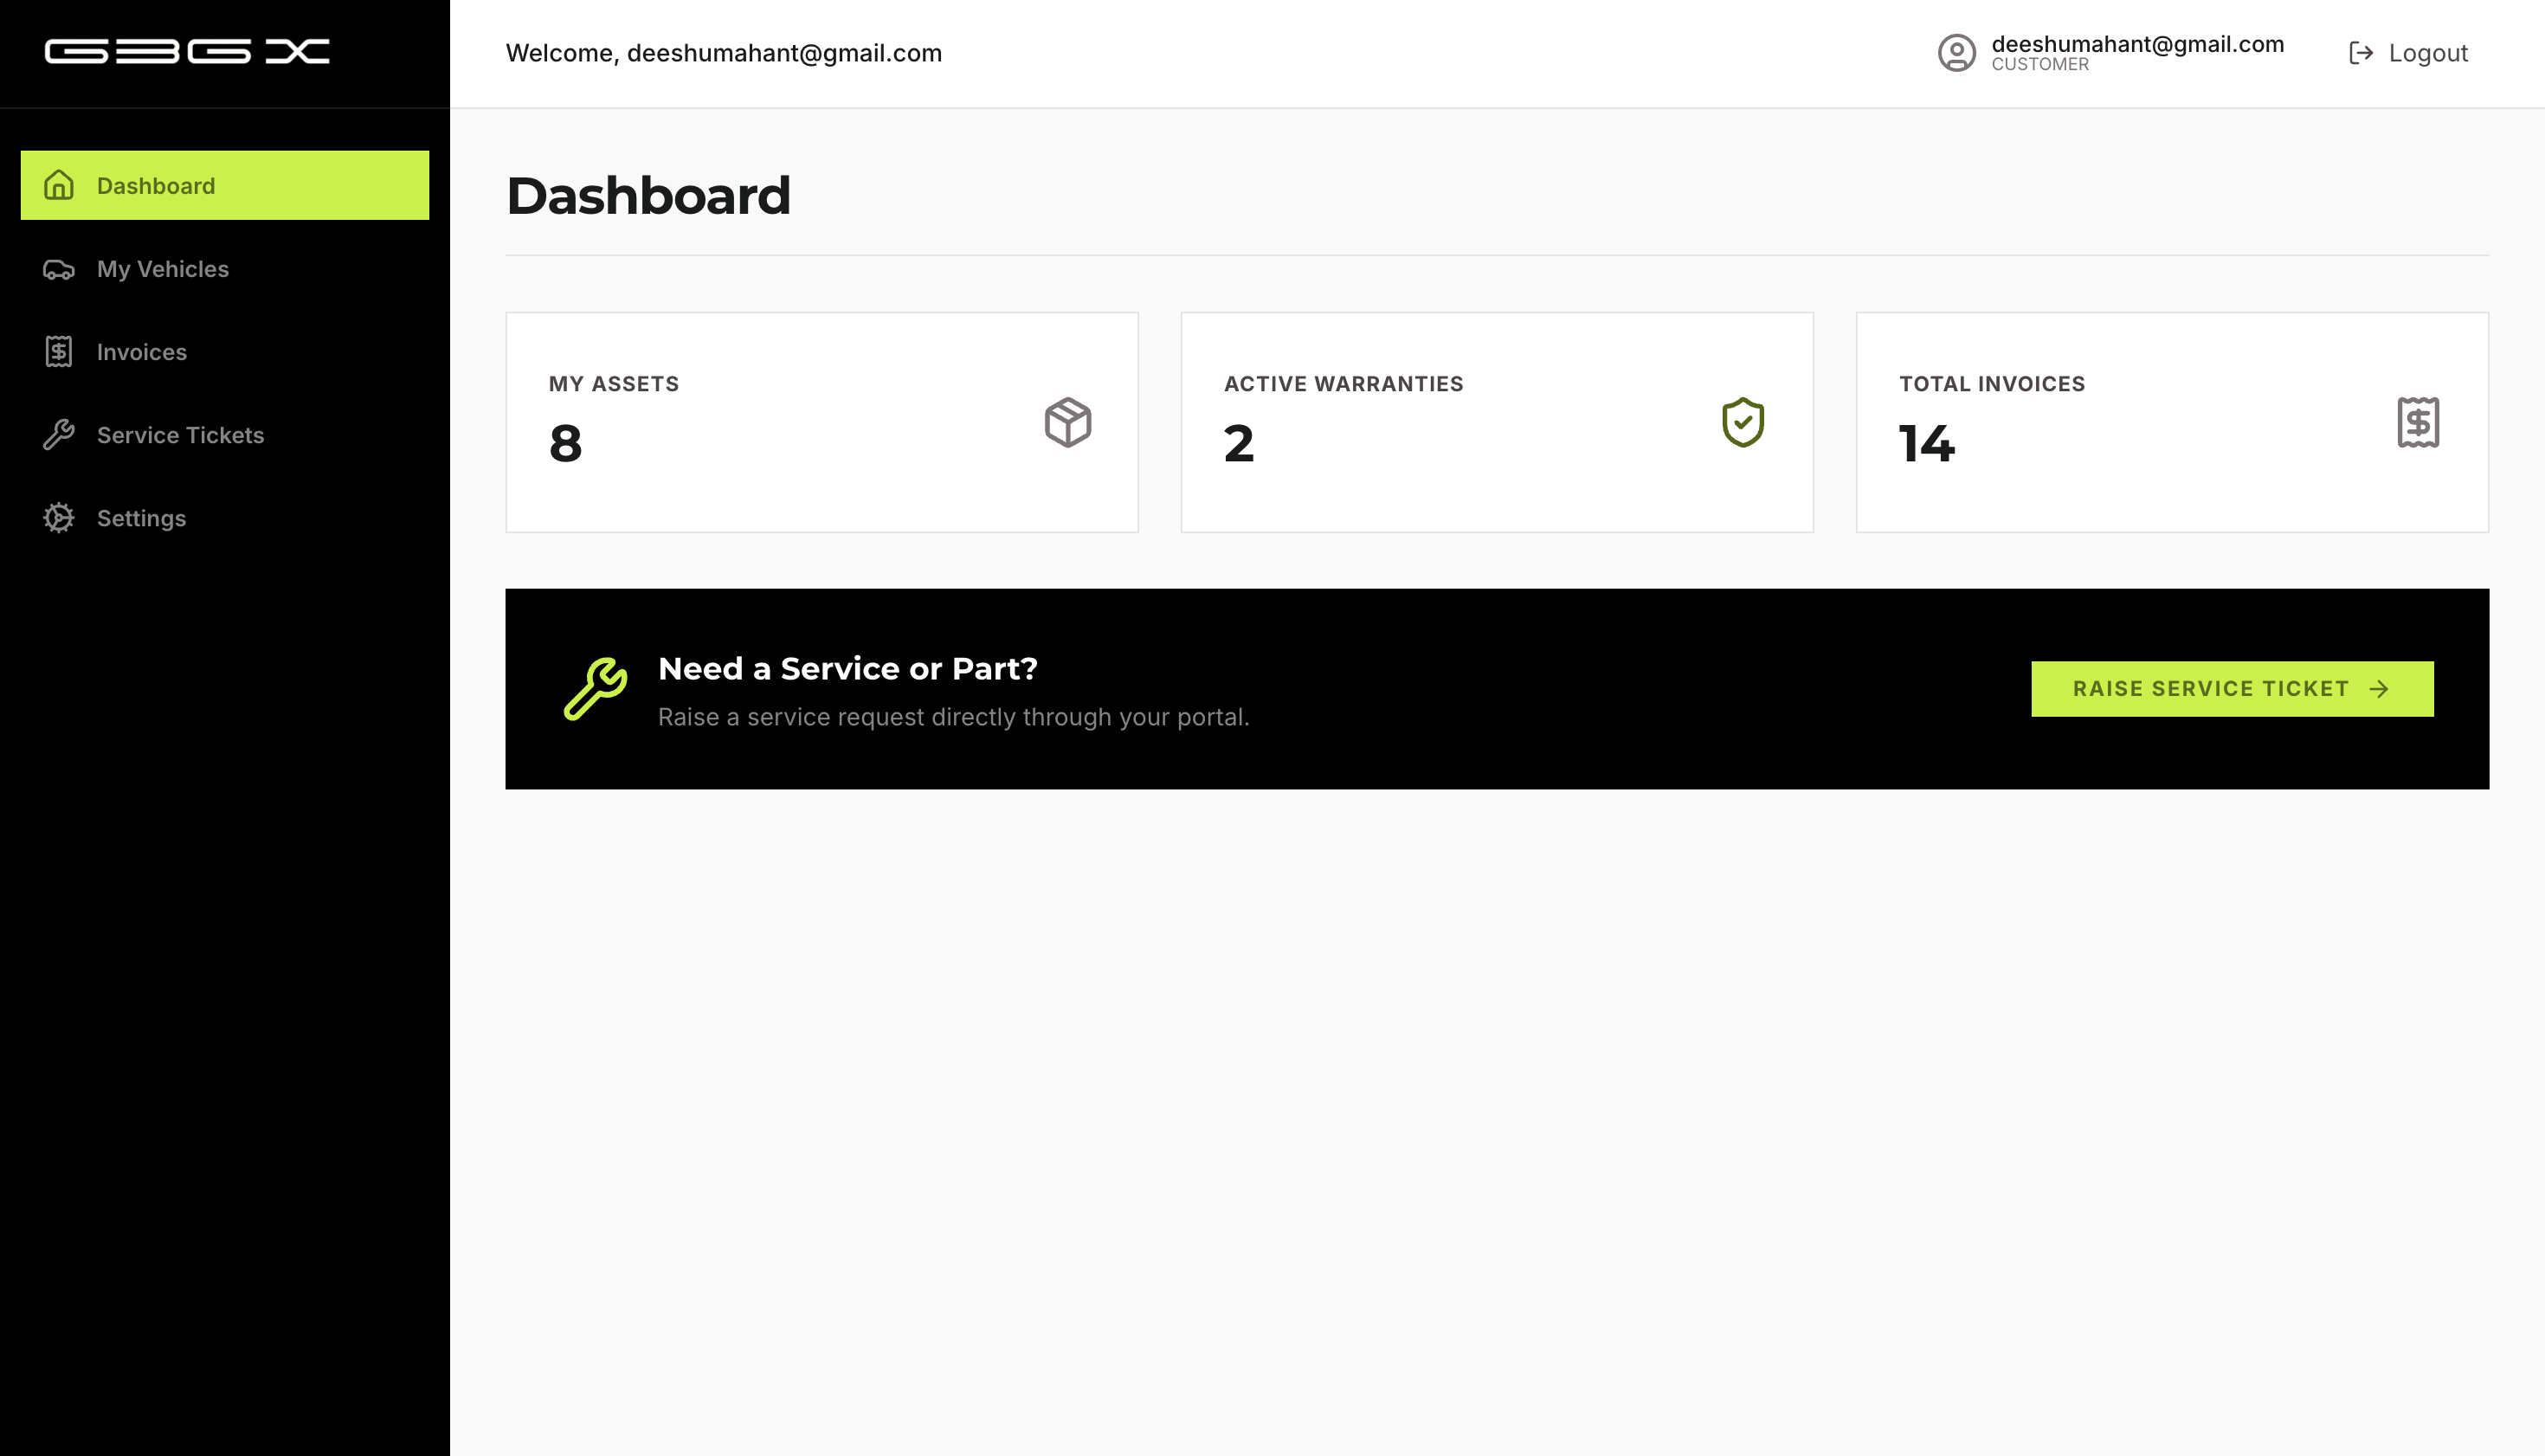
5.2 — Customer Portal Operations
Customer logs in — initial password is their phone number.
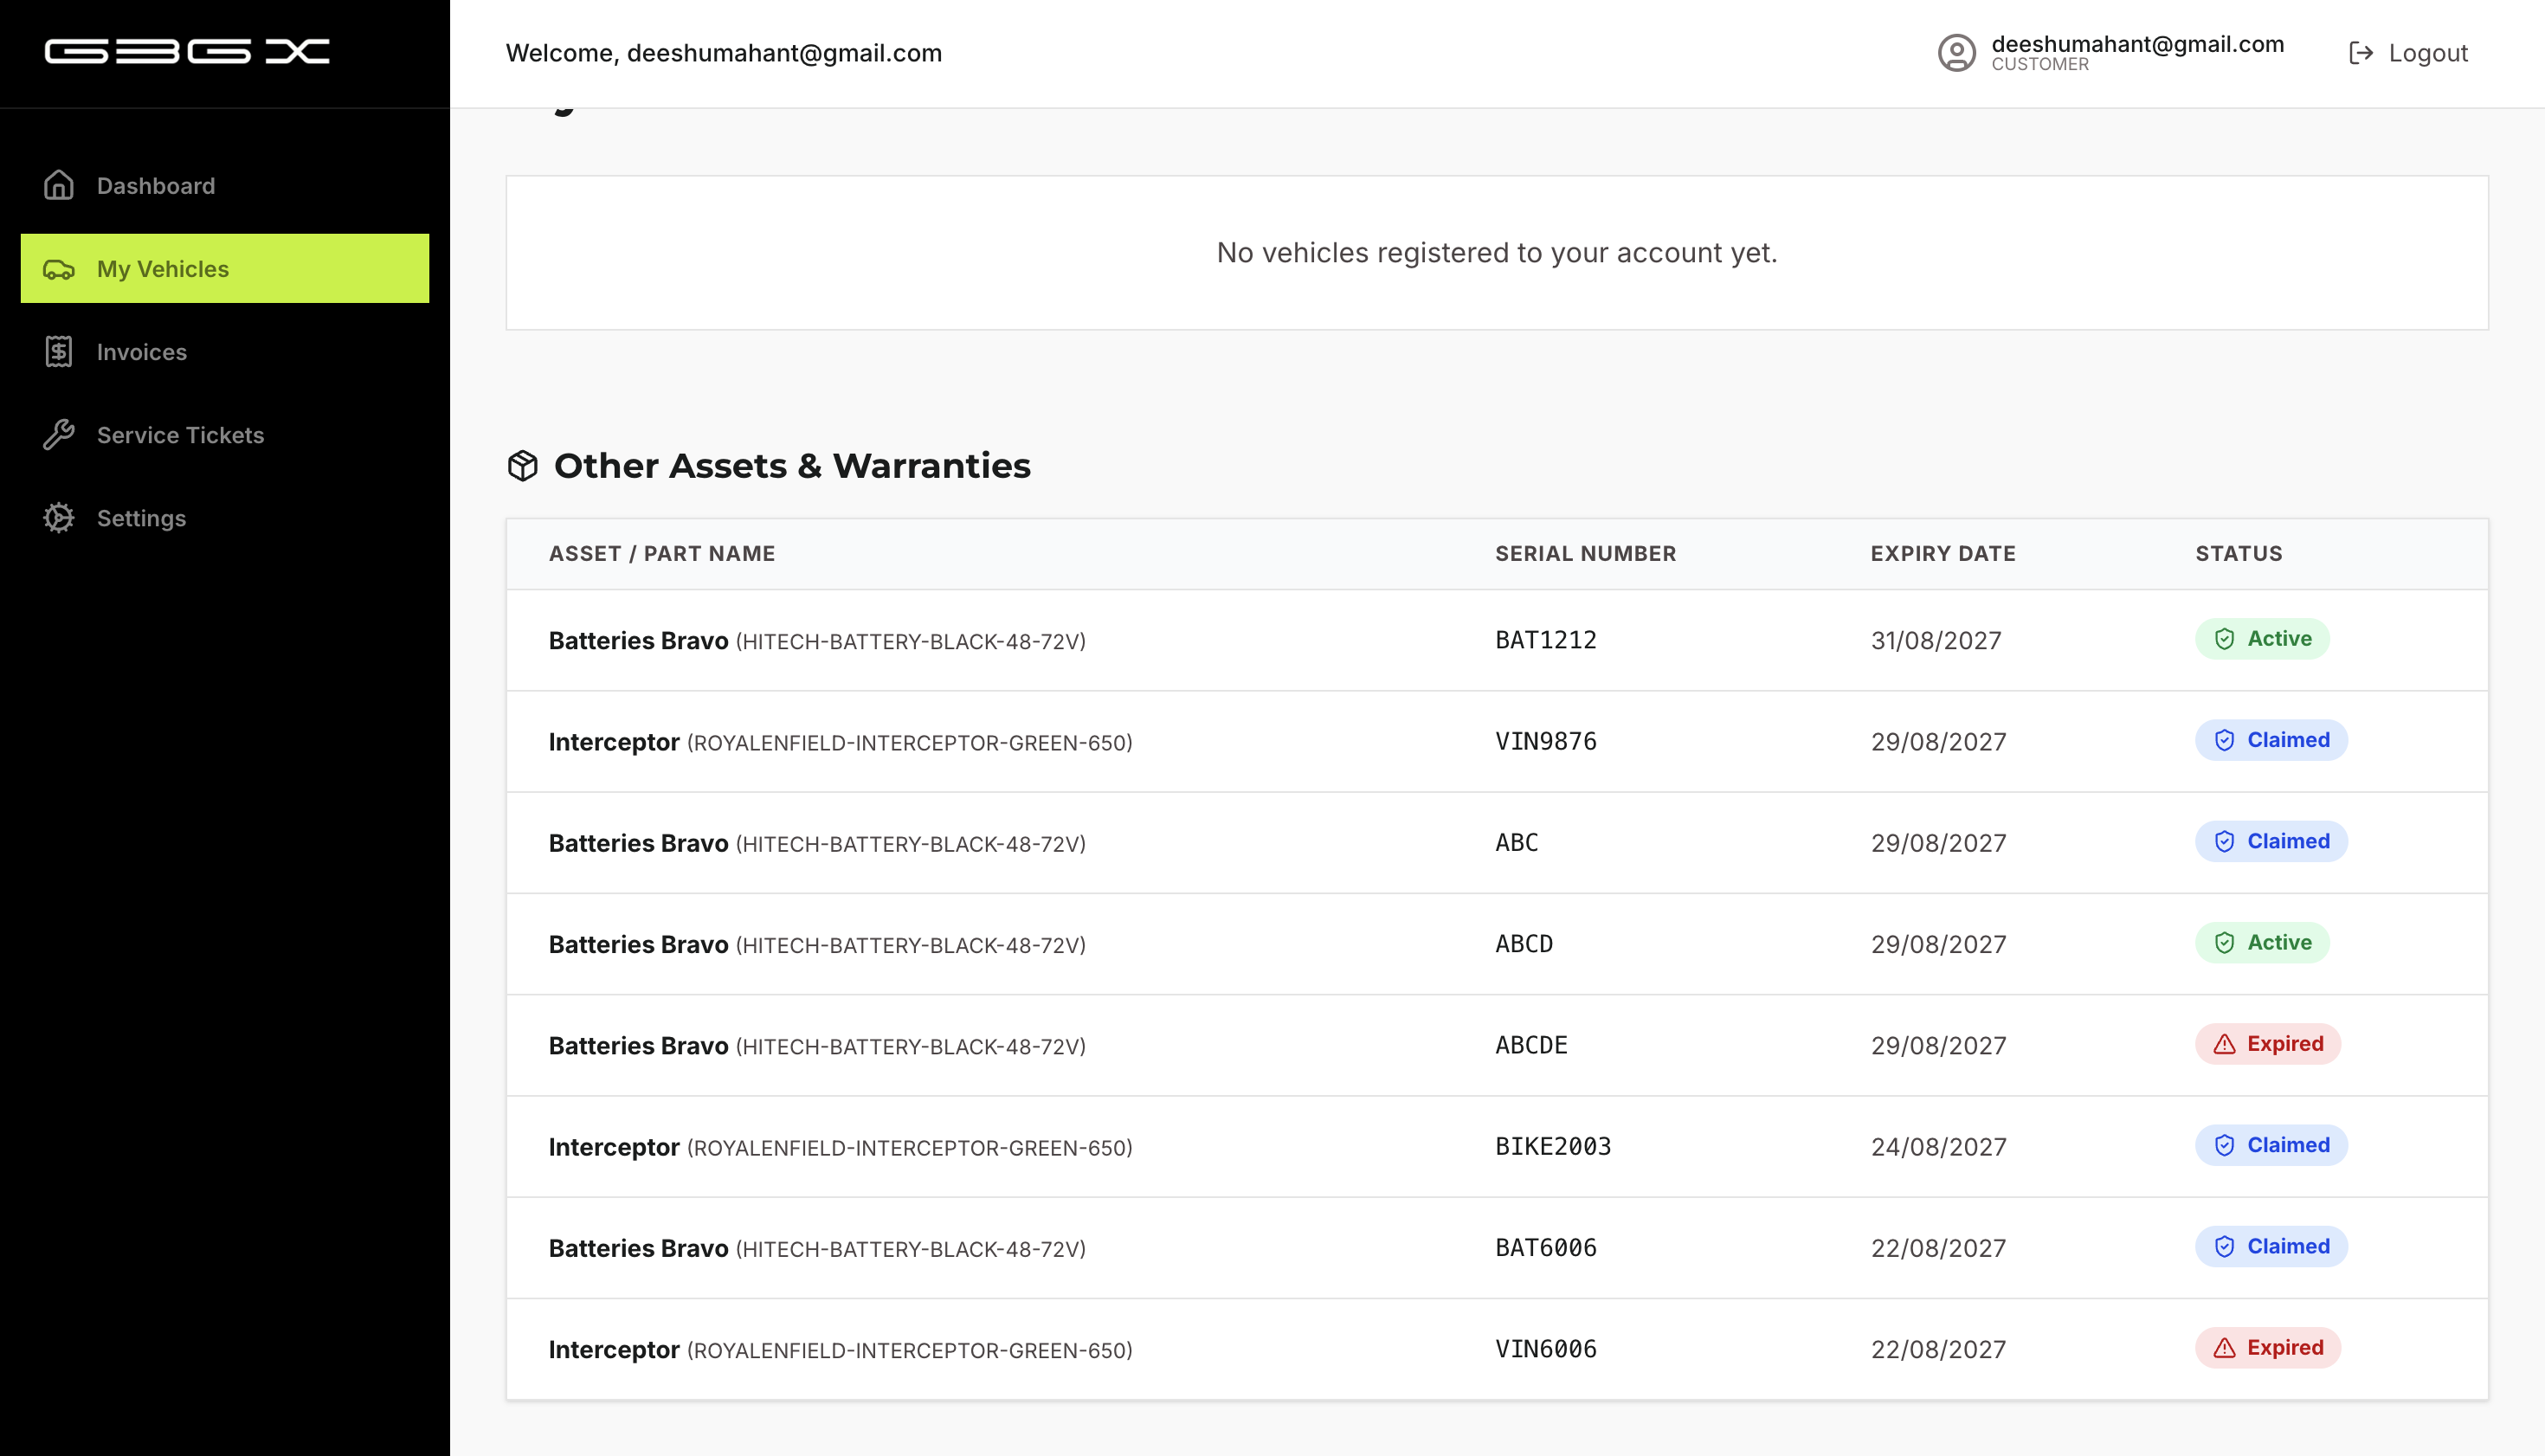
Dashboard: views active vehicles, standalone assets (batteries), and warranty alerts (Expiring Soon / Expired).
Vehicles: views vehicle passport, downloads invoices, checks compatible parts.
Service: raises a new service request directly.
Chapter 6 — Reverse Logistics (RTV & Scrap)
6.1 — RTV from Entity to Central Warehouse
Branch Manager navigates to Assets → Lifecycle. Enters Serial.
Clicks RTV. Enters Reason.
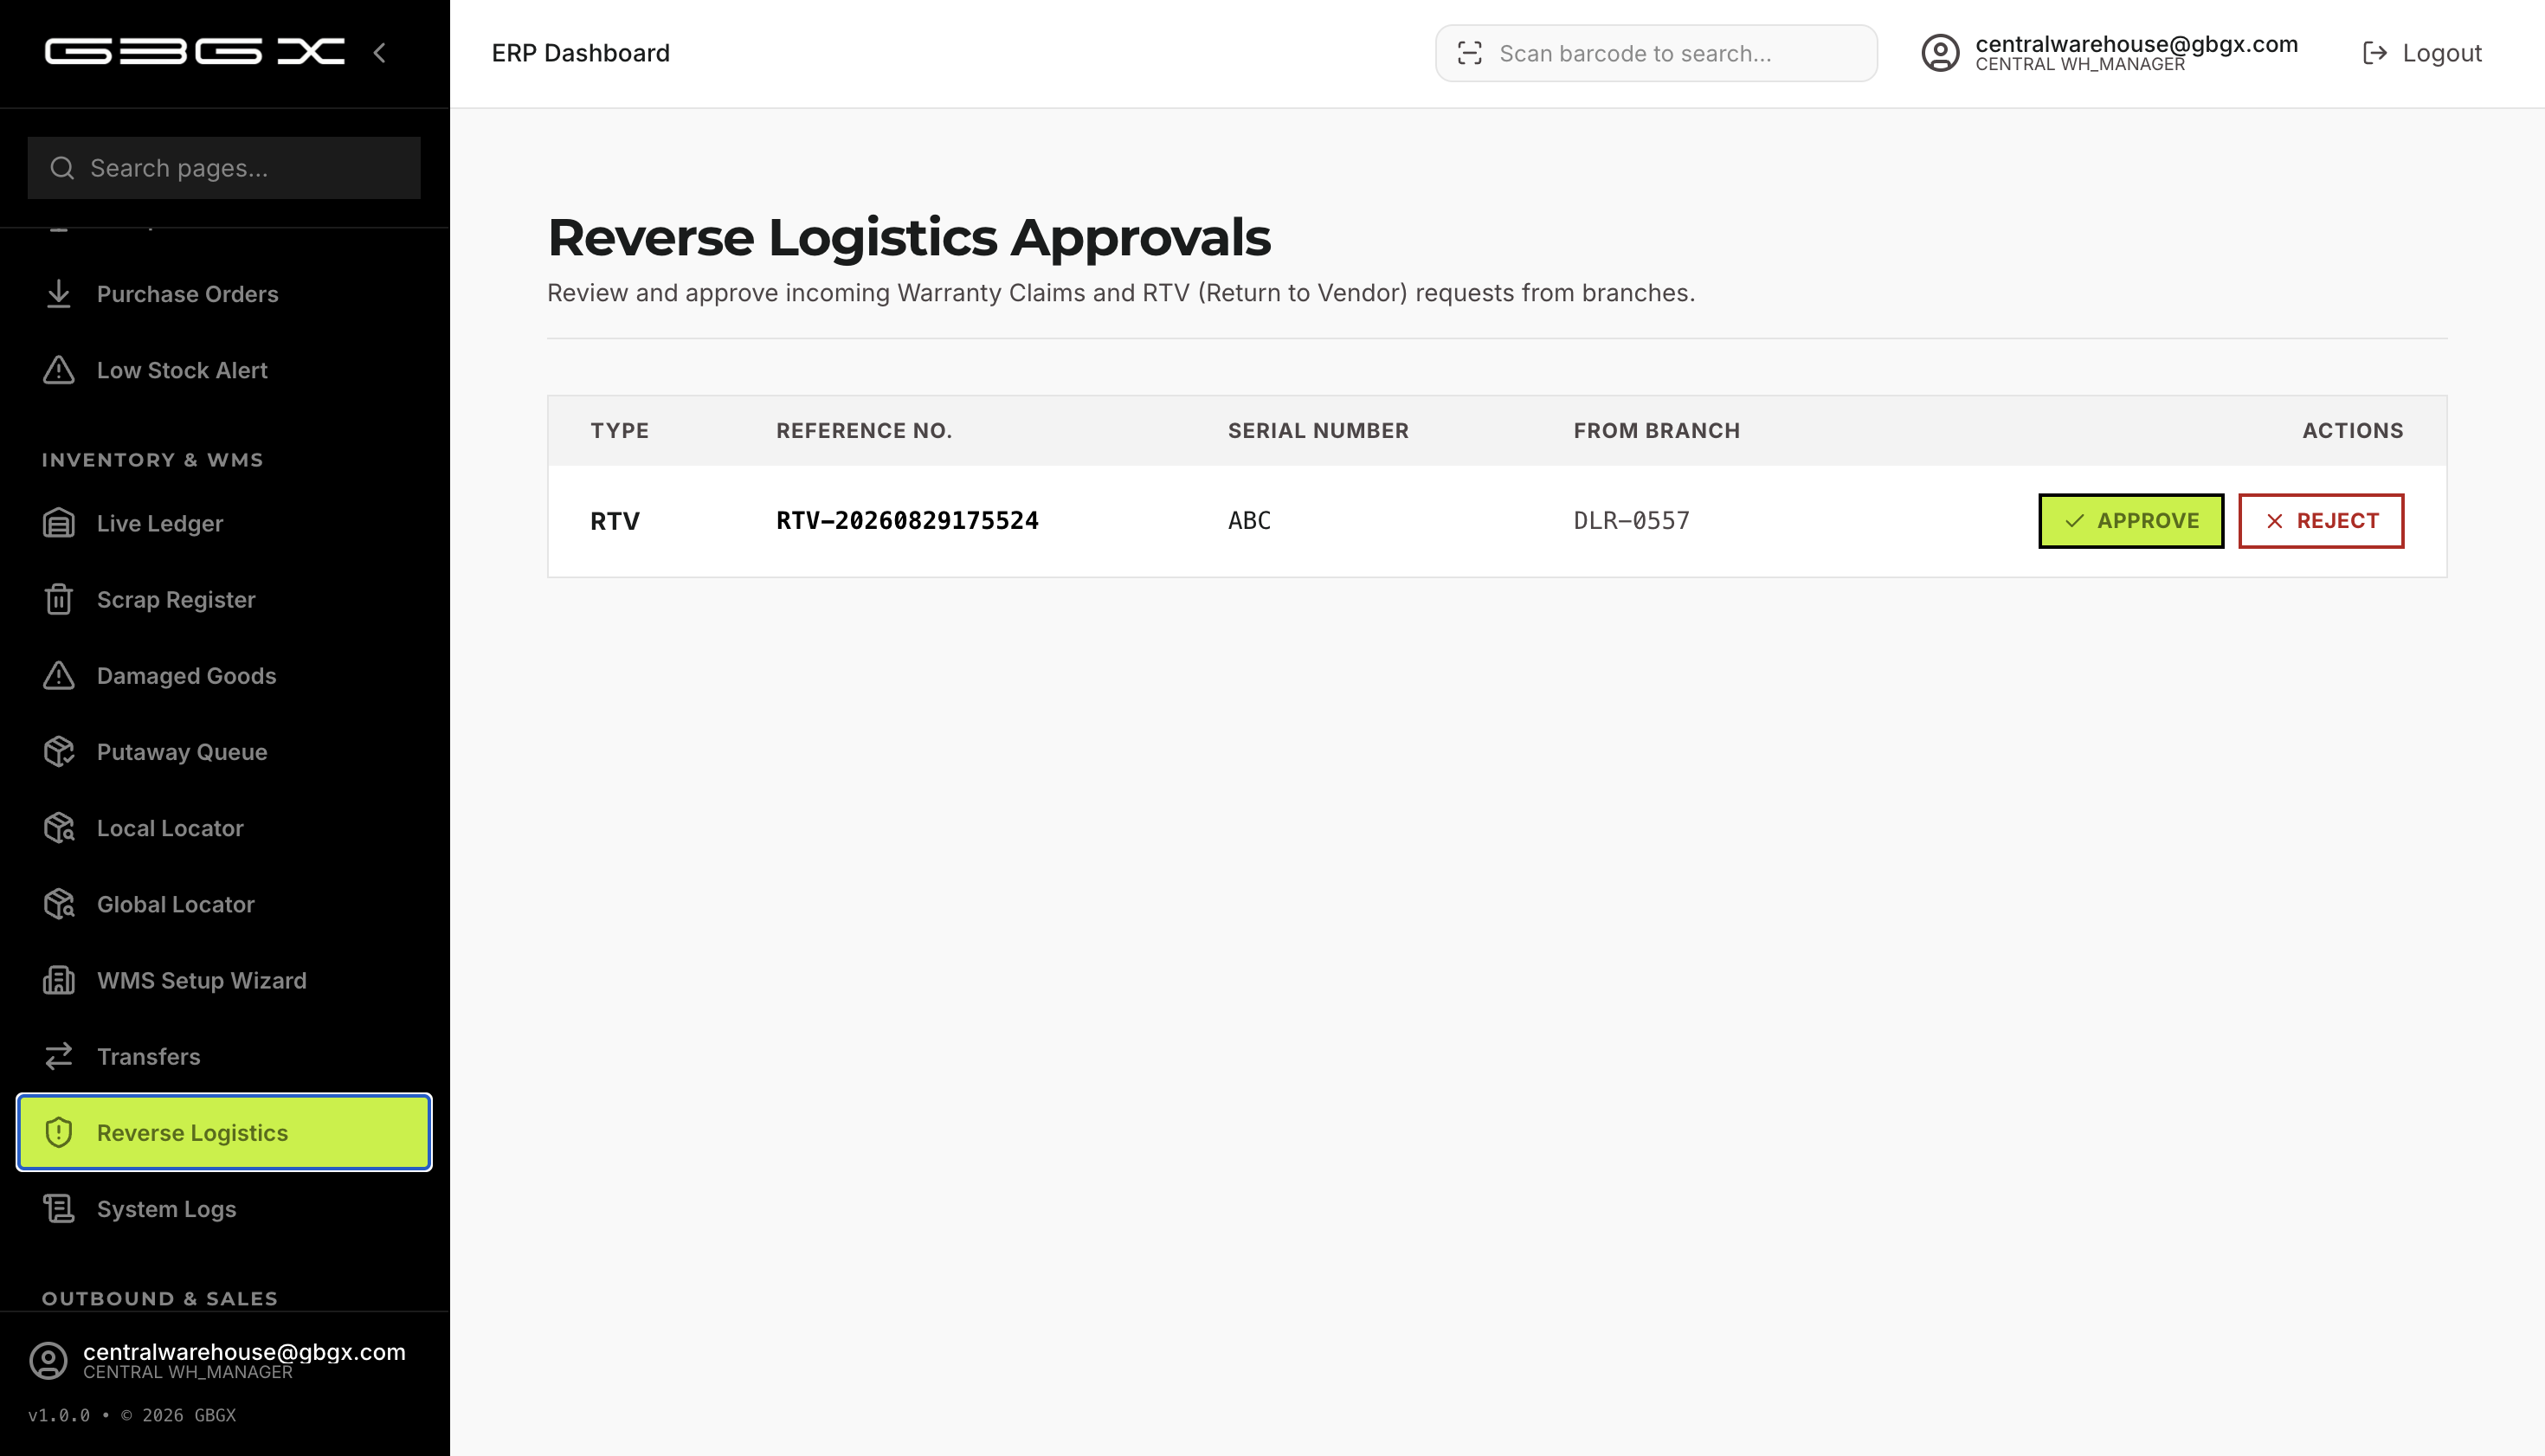
Navigates to Inventory → Warranty Approvals. Approves the RTV.
Picks, packs, and dispatches the item (same flow as 5.1).
Receives the transfer.
6.2 — RTV from Central Warehouse to Original Vendor
Central WH Admin navigates to Assets → Lifecycle. Enters Serial.
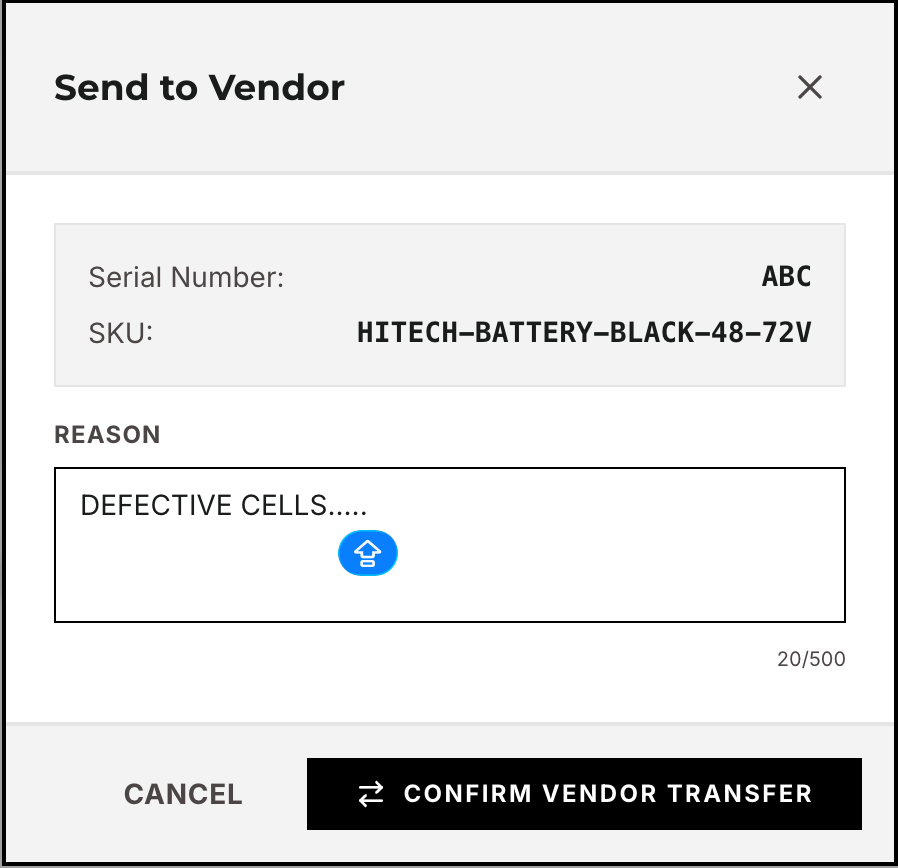
Clicks Send to Vendor. Enters Reason.
Vendor Portal → Incoming Returns → clicks Approve Return.
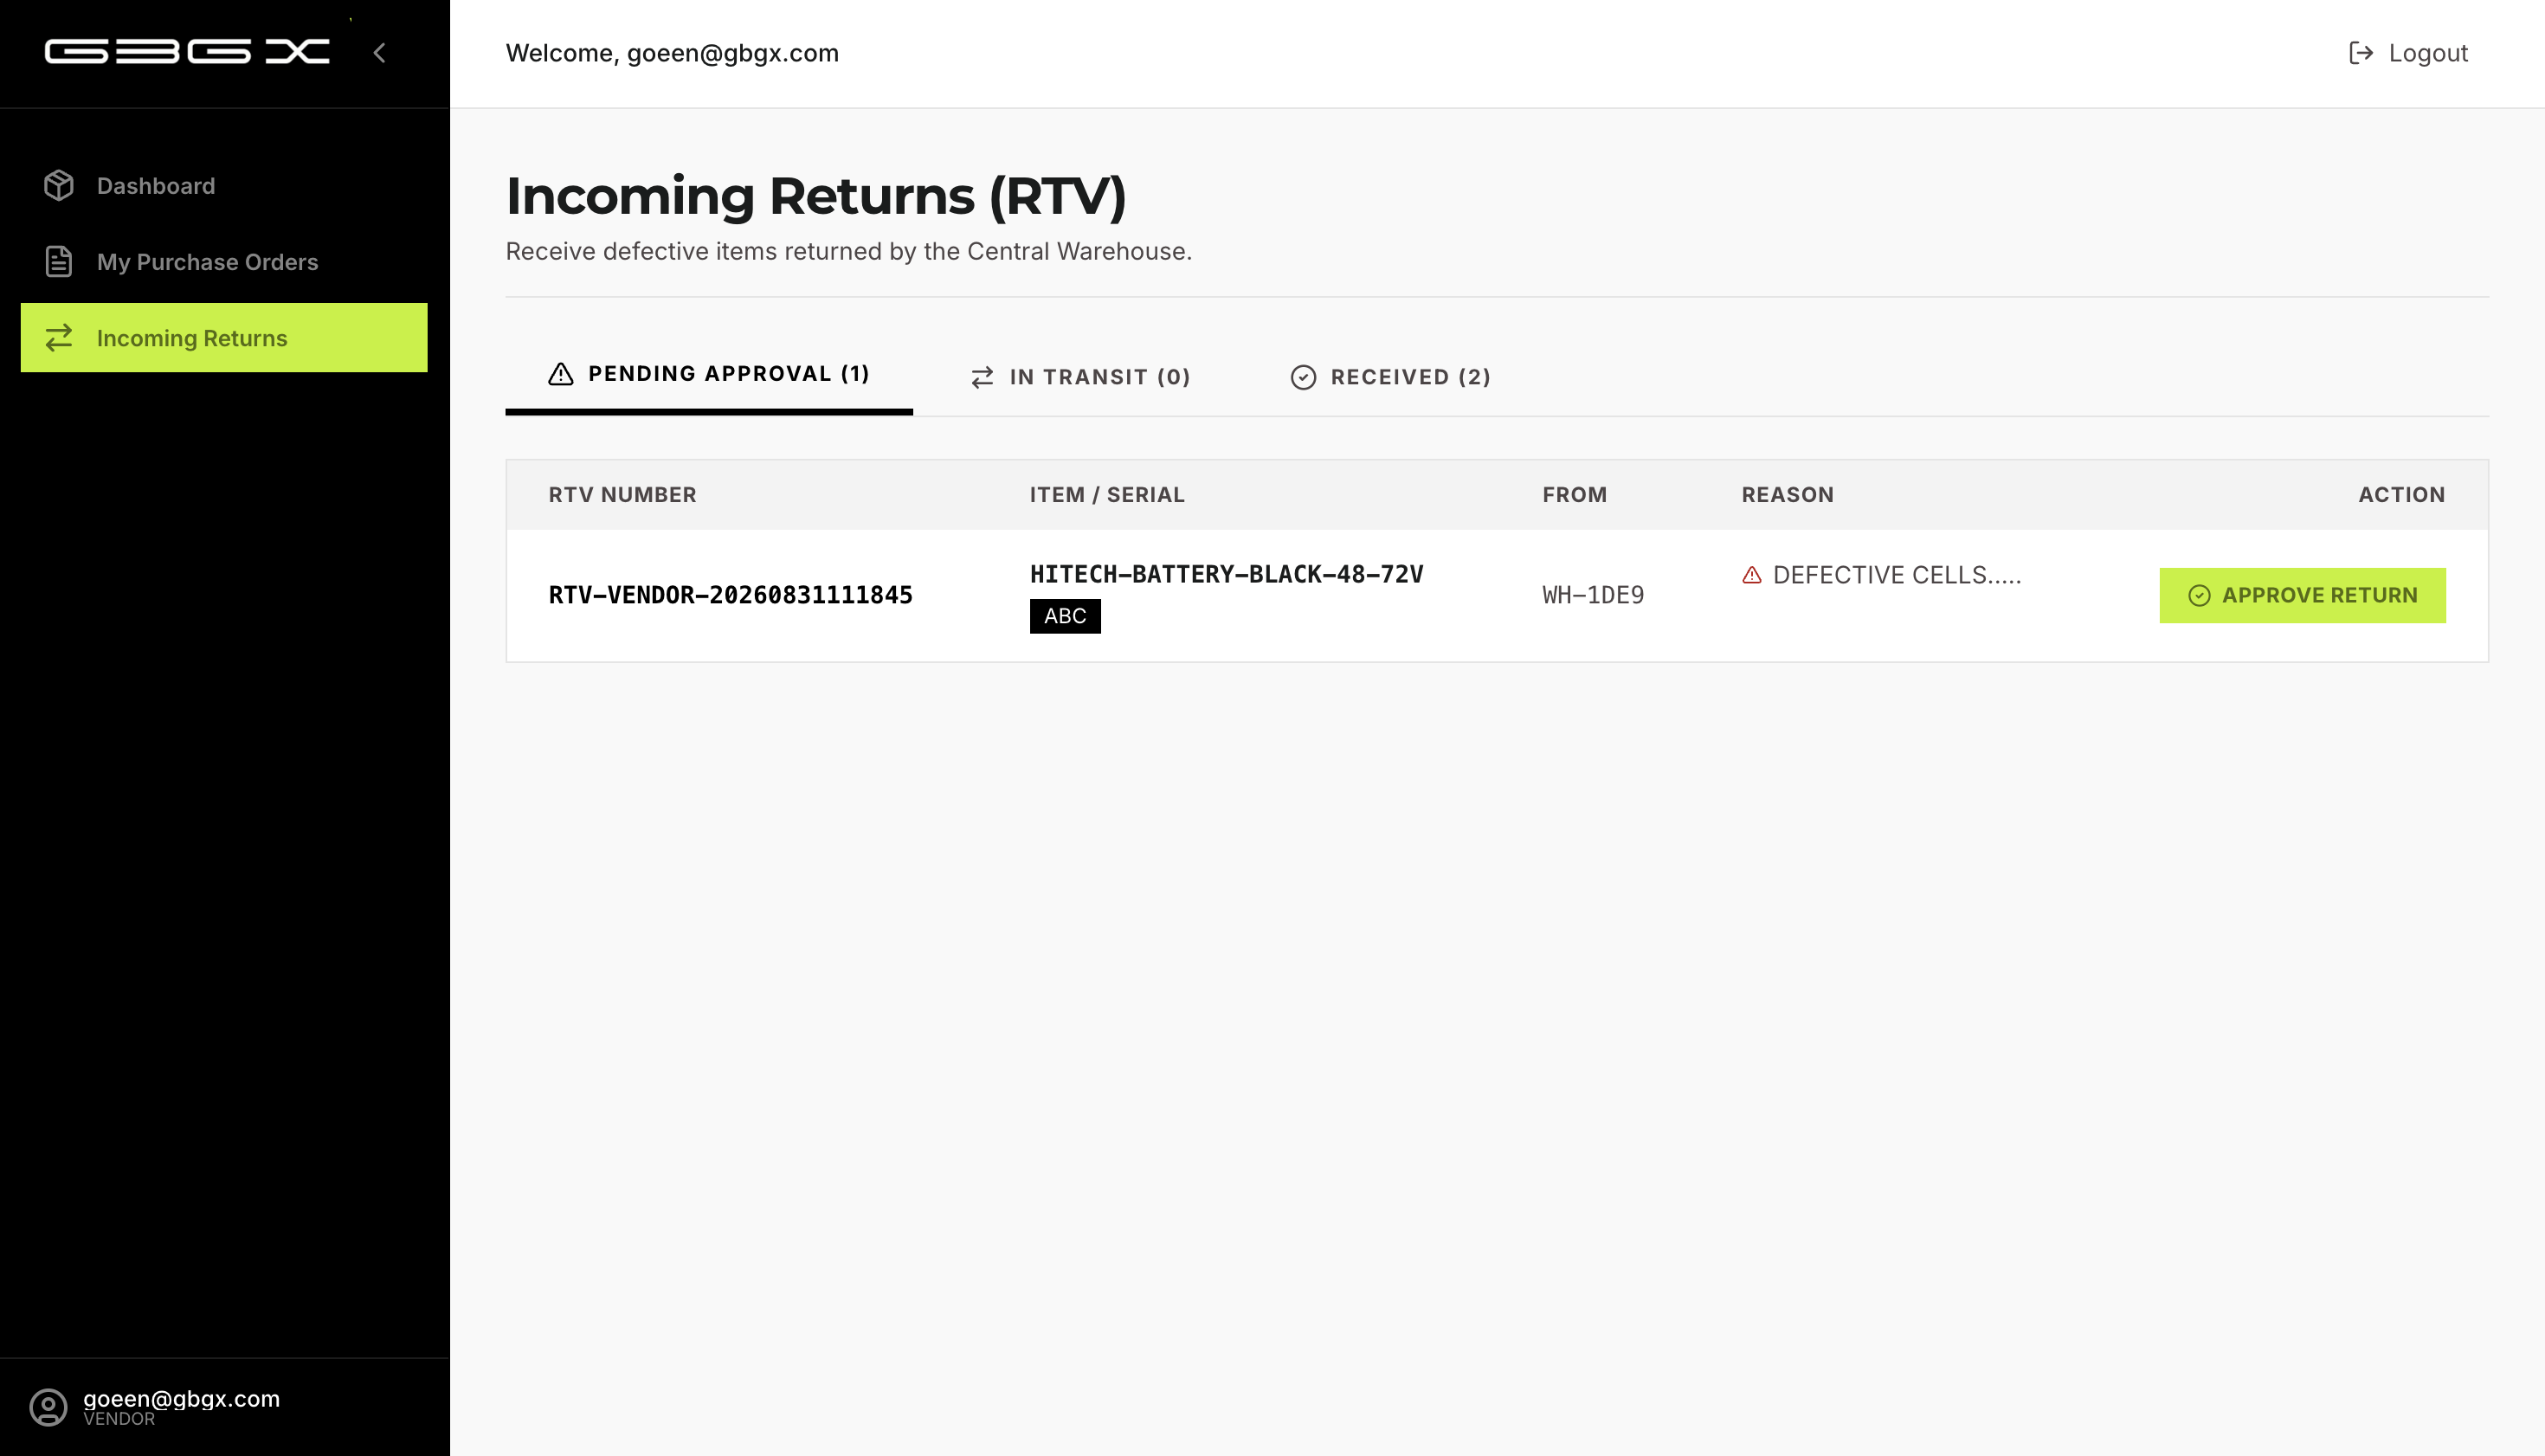
Picks, packs, and dispatches the item to the Vendor.
6.3 — Scrapping Damaged Goods (Any Entity)
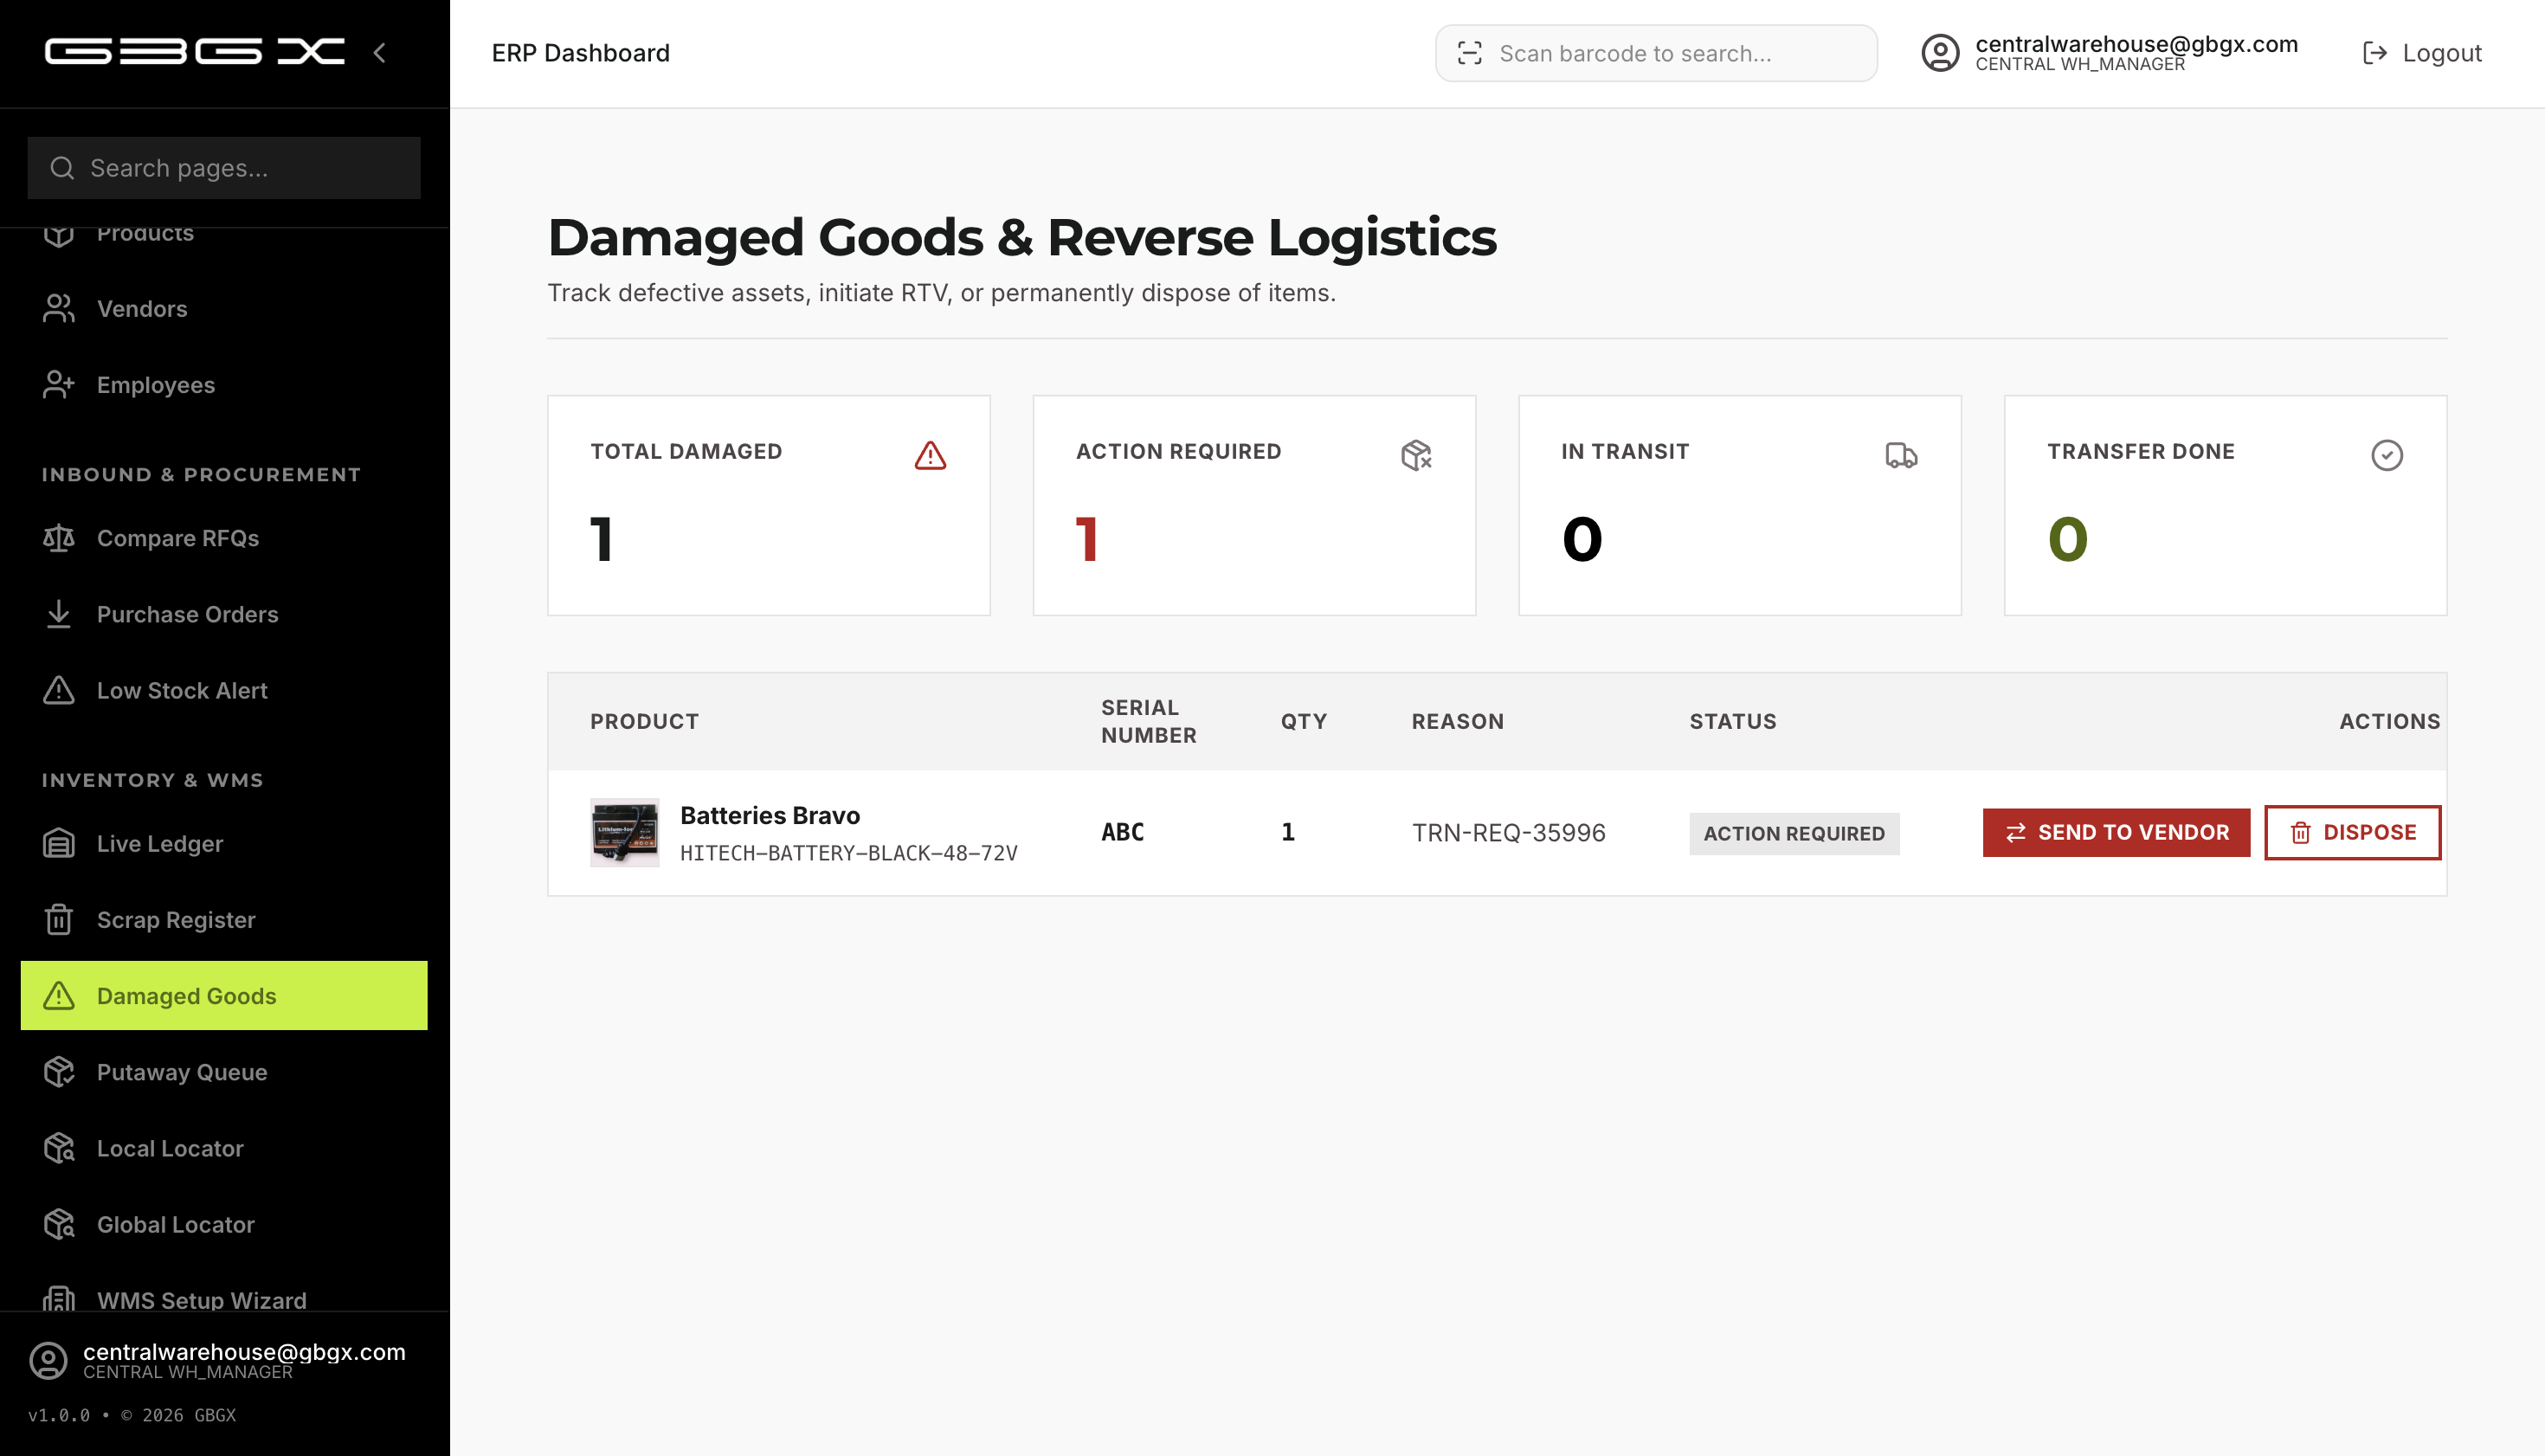
Navigate to Inventory → Damaged Goods.
View items in the -DAMAGED zone.
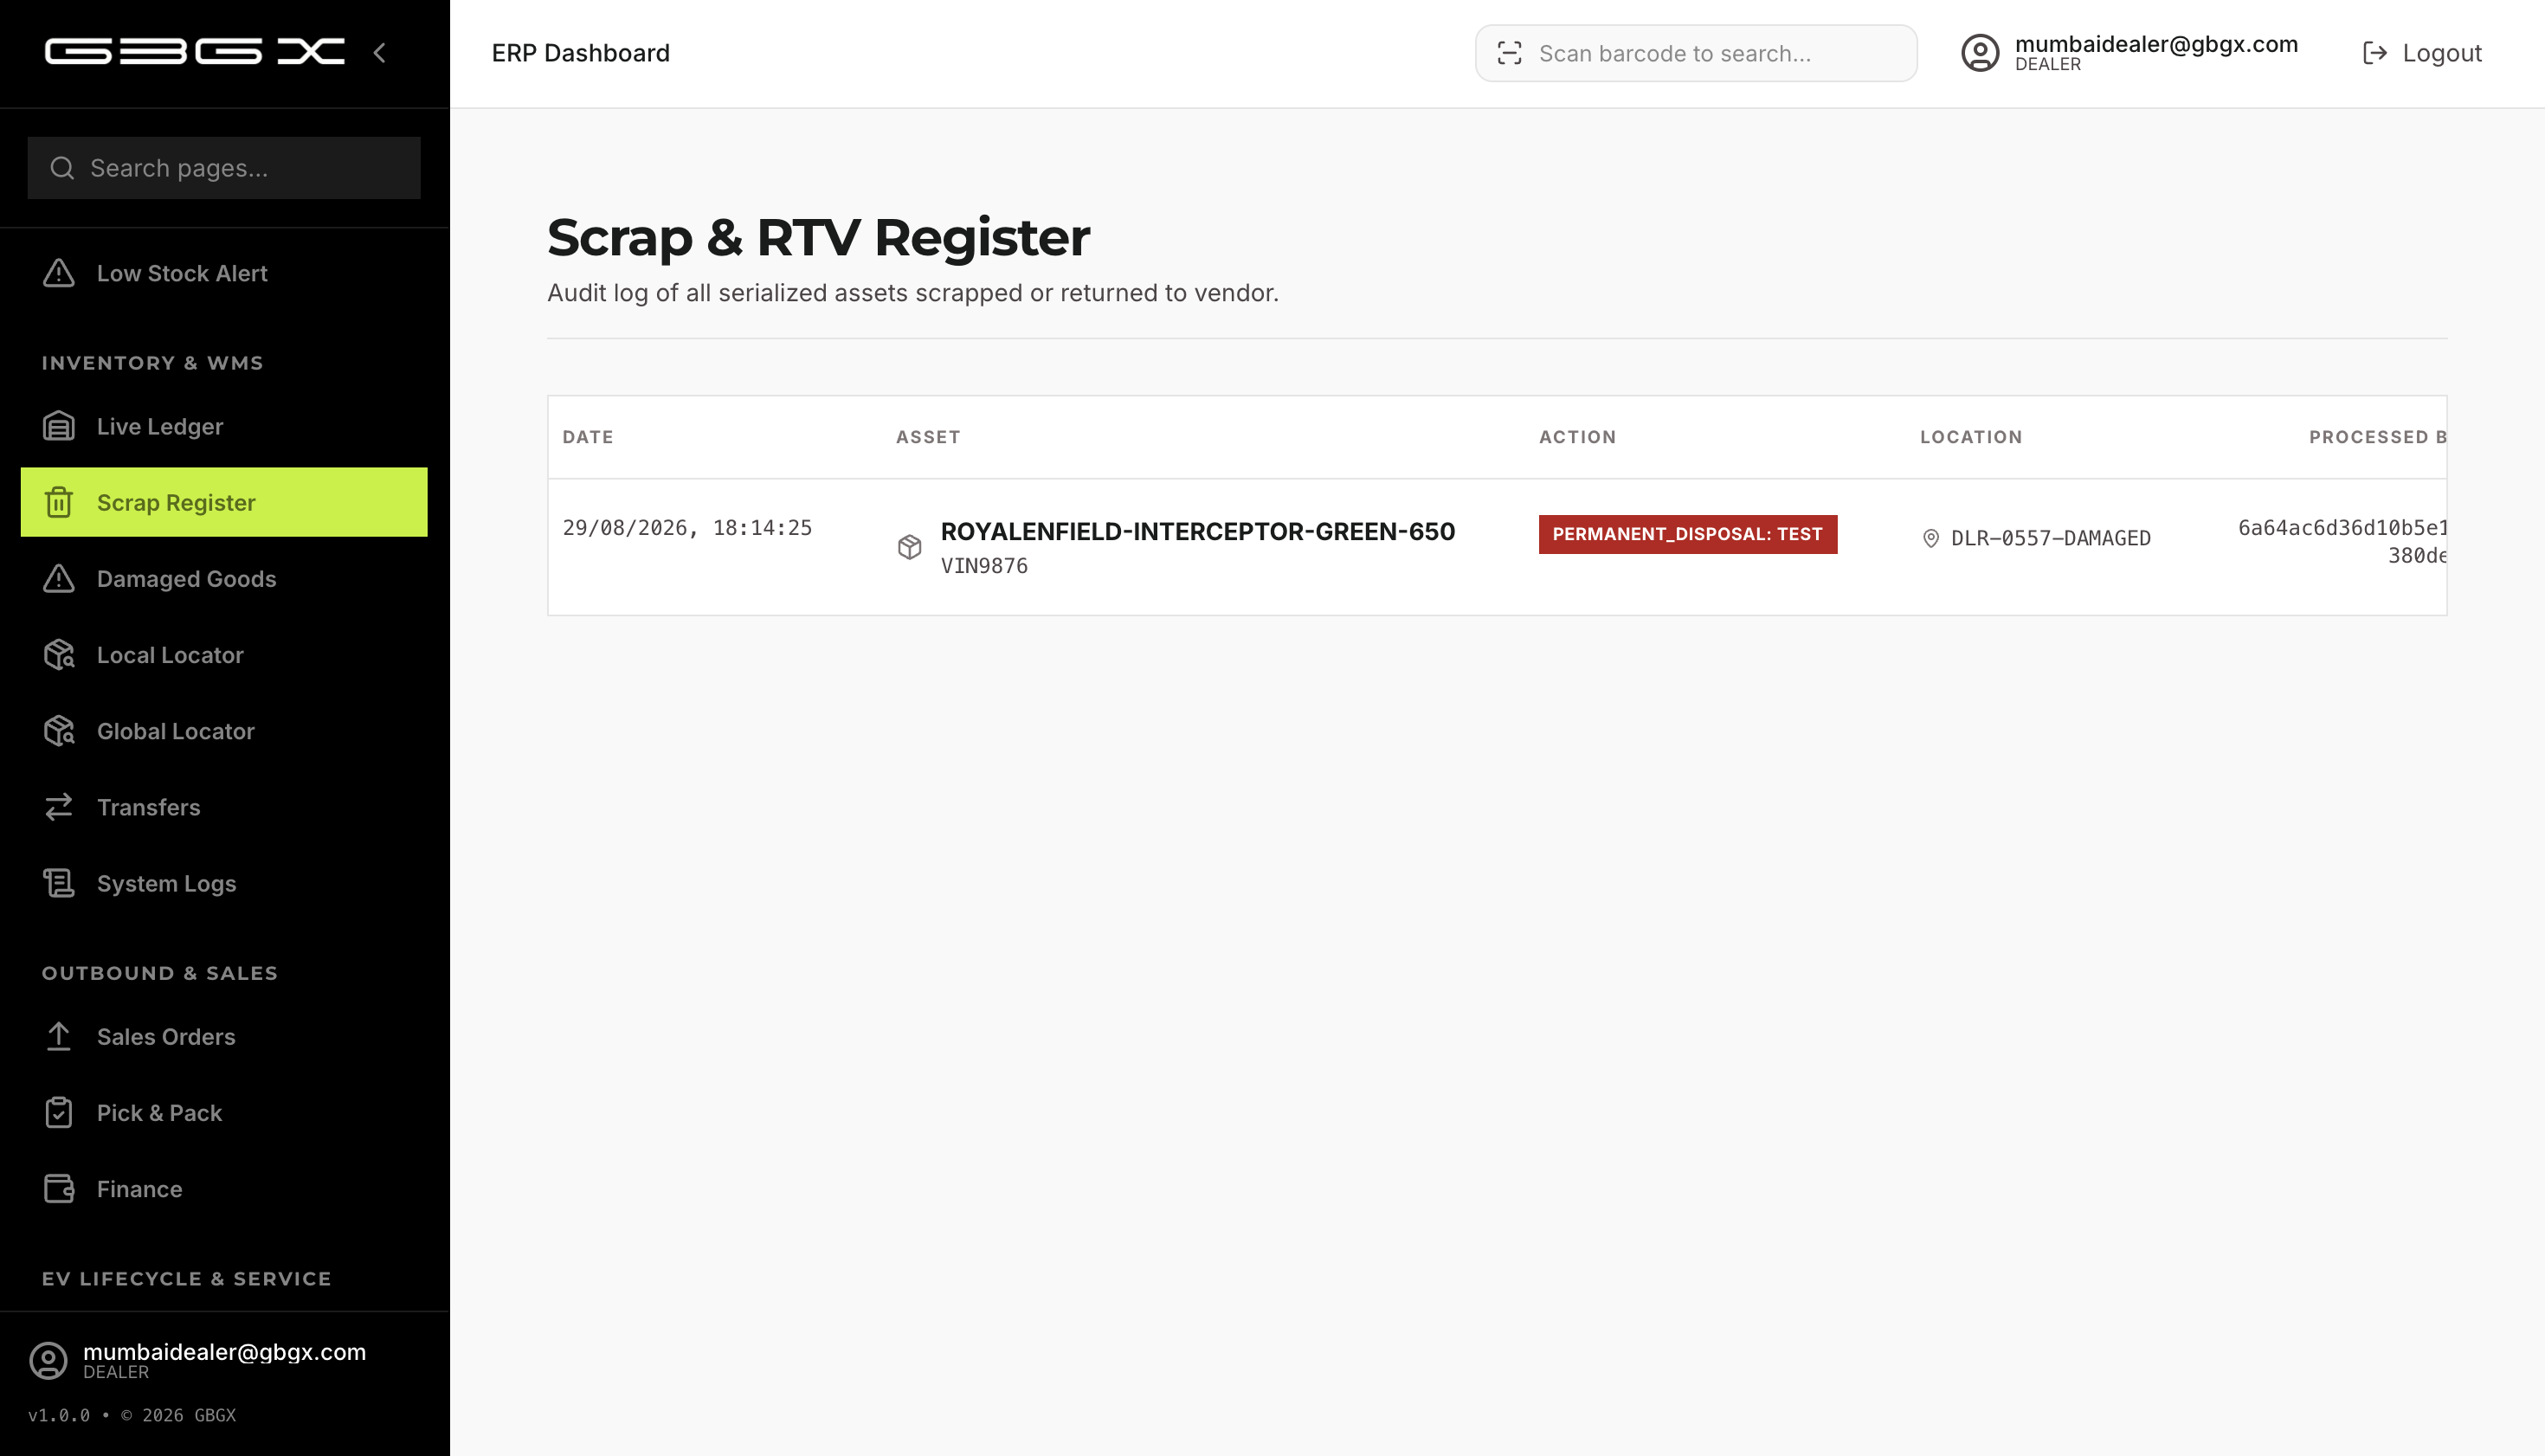
Click Dispose.
Enter Reason for Disposal.
Click Confirm Disposal.